




















BX521VCPWR (P1325030W W) Amana Refrigerator - Instructions
Keep searches simple. Use keywords, e.g. "leaking", "pump", "broken" or "fit".
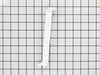
The post broke in two places, no longer holding up drawers and glass shelf
I simply put the post in and set up the drawers and shelf.
Parts Used:
-
Sandra from Palmdale, CA
-
Difficulty Level:Really Easy
-
Total Repair Time:Less than 15 mins
1 of 2 people
found this instruction helpful.
Was this instruction helpful to you?
Thank you for voting!
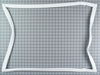
inside freezer would ice up around door seal. ice would build up and freezer would run constantly.
removed gasket with nut driver and screw gun. warmed new gasket up with hair dryer. worked seal around door. seal installed very easily. video was very helpfull. i didn't take door off. freezer works fine now with no frost or ice buildup.
Parts Used:
-
JIM from BROADVIEW HTS, OH
-
Difficulty Level:Easy
-
Total Repair Time:30 - 60 mins
-
Tools:Nutdriver, Screw drivers
1 of 2 people
found this instruction helpful.
Was this instruction helpful to you?
Thank you for voting!
Bad freezer door gasket
I wouldn't do it without taking the door off. Cut insulation board the size of the door and tape it to the frig. Lay the door on the table where you can work on it easy. You can use a small drill to take the screws out (under the seal). Put them back by hand and do not over tighten. They are easy to strip out where they won't hold the gasket tight to the door.
Parts Used:
-
Greg from Columbia, KY
-
Difficulty Level:Easy
-
Total Repair Time:30 - 60 mins
-
Tools:Nutdriver
1 of 2 people
found this instruction helpful.
Was this instruction helpful to you?
Thank you for voting!
The ice stripper cracked from freezing.
There was three screws to remove to unmout the ice maker, and unplug the wire harness,then two to remove to slip in new stripper. All took about 20 mins.
Parts Used:

-
David from Discovery Bay, CA
-
Difficulty Level:Really Easy
-
Total Repair Time:15 - 30 mins
-
Tools:Nutdriver
3 of 8 people
found this instruction helpful.
Was this instruction helpful to you?
Thank you for voting!
support post broken
removed crisper drawers, then food items from shelf above, then replaced support post and replaced drawers and food items from shelf
Parts Used:
-
STEVE from AUSTIN, TX
-
Difficulty Level:Really Easy
-
Total Repair Time:15 - 30 mins
1 of 2 people
found this instruction helpful.
Was this instruction helpful to you?
Thank you for voting!
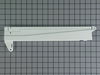
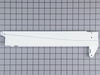
Meat drawer glides broken
Remove shelf assembly containing meat drawer. Remove drawer. Remove rollers and reinstall on new glides. Reassemble drawer unit and put back in fridge.
Parts Used:
-
Scott from Medford Lakes, NJ
-
Difficulty Level:Easy
-
Total Repair Time:15 - 30 mins
-
Tools:Screw drivers
1 of 2 people
found this instruction helpful.
Was this instruction helpful to you?
Thank you for voting!
Freezer door gasket replacement
It was easy. I followed the video that was on the item page, and the installation went really smooth. Remember to heat the gasket up before installing.
Parts Used:
-
Andrew from San Diego, CA
-
Difficulty Level:Really Easy
-
Total Repair Time:15 - 30 mins
-
Tools:Pliers, Screw drivers
1 of 2 people
found this instruction helpful.
Was this instruction helpful to you?
Thank you for voting!
light did not work on the refrigerator side
bulbs were not burnt out. received the new switch in a few days. watch the short video, was good to see how it comes out. used a putty knife to release the defective switch, removed wires put them on the new one and posed the new switch back in. Not bad Part cost $11.00 7 dollars shipping so for 17 bucks it works great. nice to see what is inside the refer!
Parts Used:

-
David from GROVESPRING, MO
-
Difficulty Level:Easy
-
Total Repair Time:Less than 15 mins
1 of 2 people
found this instruction helpful.
Was this instruction helpful to you?
Thank you for voting!
Light switch broke off
We looked up the problem online with the model number of the refrigerator. We ordered the part and followed the video installation that was sent with the order and was found online prior to purchasing
Parts Used:
-
Kathy from TEMECULA, CA
-
Difficulty Level:Very Easy
-
Total Repair Time:Less than 15 mins
-
Tools:Pliers
1 of 2 people
found this instruction helpful.
Was this instruction helpful to you?
Thank you for voting!
The plastic part just got old and crumbeled..so it wouldn't fit.
First I couldn't get it back..due to eye problems so i gave it to my husband and he just did it in a flash..you set it under the glass and put the drawers or crispers back in and its done.
Parts Used:
-
Darleene from Beaverton, MI
-
Difficulty Level:Really Easy
-
Total Repair Time:Less than 15 mins
1 of 2 people
found this instruction helpful.
Was this instruction helpful to you?
Thank you for voting!
Rocker on switch broke off
Eased the putty knife under the edge of the switch housing and pried it off. Pulled two wires off the old terminals and hooked them onto the new one and reinstalled into the refrigerator body.
Parts Used:
-
David Barnes from ROSWELL, NM
-
Difficulty Level:Very Easy
-
Total Repair Time:Less than 15 mins
1 of 2 people
found this instruction helpful.
Was this instruction helpful to you?
Thank you for voting!
Light in my refrigerator didn't work.
At first I went to a local part supplier and they didn't have it in stock but could order it for me for $55.00 plus $10.00 to ship it. I told them I would have to think about it. I went home and got on the computer and found your web site and was I shocked when I saw the same part listed for $6.98 and $7.00 to ship it. You guys saved me $50.00. The part arrived in two day and took 5 min. to install. I now have light in my refrigerator. Thank you.
Parts Used:
-
Joseph from Byron Center, MI
-
Difficulty Level:Really Easy
-
Total Repair Time:Less than 15 mins
-
Tools:Screw drivers
1 of 3 people
found this instruction helpful.
Was this instruction helpful to you?
Thank you for voting!
replace freezer gasket
best advice was to not remove the screws holding the gasket in, but just to loosen them. Old gasket easily removed. Most difficult part was getting the new gasket in at the corners. Using a plastic spatula helped as did tightening up some of the screws once a corner was fitted (so it would not pop out as you moved on to the next corner.
Parts Used:
-
Michael from El Paso, TX
-
Difficulty Level:Easy
-
Total Repair Time:15 - 30 mins
-
Tools:Nutdriver
1 of 3 people
found this instruction helpful.
Was this instruction helpful to you?
Thank you for voting!
Broken support post for crisper drawer
Lifted both drawer runners removed the broken post, put new post in place. Job completed in lest than two min.
Parts Used:
-
Joseph from Lakeland, FL
-
Difficulty Level:Really Easy
-
Total Repair Time:Less than 15 mins
1 of 3 people
found this instruction helpful.
Was this instruction helpful to you?
Thank you for voting!
Ice forming on the mullions of the freezer door.
Cover the freezer opening with cardboard and tape, remove all items from freezer door. It's easier to work with the door removed but the hex bolt on the bottom door hinge may be rusted in place. I wouldn't force it. Replacing the gasket with the door attached is not that diffult. Remove all the screws (1/4 " nut driver, you can use cordless drill driver for this, but I would reccomend reassembly by hand) Gasket will pull off...and then the inner panel. You may find ice on the inner door panel and the insulation may be soaked. Rather than wait for the insulation to thaw out and dry, may be easier to replace with bat type insulation on the inner panel esp if you have some on hand. On reassembly, take your time, work the gasket into place, get all screws started then tighten in sequence with a watchful eye on the gasket. Had no problems ...ice is gone, refrig. seems to run less. Very pleased.
Parts Used:
-
George from Ocean, NJ
-
Difficulty Level:A Bit Difficult
-
Total Repair Time:1- 2 hours
-
Tools:Nutdriver, Screw drivers, Socket set
1 of 3 people
found this instruction helpful.
Was this instruction helpful to you?
Thank you for voting!