




















MMV5165AAS - Instructions
Keep searches simple. Use keywords, e.g. "leaking", "pump", "broken" or "fit".
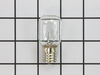
Burned out light in microwave
Spouse just screwed in the new bulb and reinstalled the light cover plate with the two screws. Took under a minute. Works great.
Parts Used:
-
DANNY from SAINT JOHNS, FL
-
Difficulty Level:Very Easy
-
Total Repair Time:Less than 15 mins
-
Tools:Screw drivers
4 of 8 people
found this instruction helpful.
Was this instruction helpful to you?
Thank you for voting!
Power Went Completely Out
The power on the microwave went completely out when I went to use it, but there was no power failure for the house or neighborhood. We removed the microwave from above the oven. Took out the screws on the sides and back of the microwave and slid the top back. The line fuse was located on top unobstructed, NOT behind the button panel like some microwave models. As the appliance is over 20 years old the line fuse was quite old. It was really hard to pry it out of its holder and actually broke. I used a vacuum to suck up the dust and glass and it was easier to get out the ends once the middle broke. Popped the new line fuse in, slid the top back on, put in the screws and put the microwave back in its compartment above the stove. Good as new!! We were about to spend money on a new microwave, but thankfully I came across this site. So happy I did!!
This repair was really easy. The part that took the most time was taking it down from it's compartment above the oven and putting it back up there once repaired.
This repair was really easy. The part that took the most time was taking it down from it's compartment above the oven and putting it back up there once repaired.
Parts Used:

-
Brittney from LUFKIN, TX
-
Difficulty Level:Very Easy
-
Total Repair Time:15 - 30 mins
-
Tools:Pliers, Screw drivers
2 of 2 people
found this instruction helpful.
Was this instruction helpful to you?
Thank you for voting!
Items were not getting heated up in the microwave,
I went to LG website enter model number and was given a list of parts that need to be replaced with a percentage of which part fails the most. I order micro switch PS3522738 which arrived and PS3529293 was backordered. I installed the one that arrived. The microwave worked briefly. I reordered and waited for both switches to arrive and installed both. The microwave still doesn't work.
Parts Used:
-
Kenneth from CRYSTAL LAKE, IL
-
Difficulty Level:Really Easy
-
Total Repair Time:15 - 30 mins
-
Tools:Screw drivers
2 of 2 people
found this instruction helpful.
Was this instruction helpful to you?
Thank you for voting!
Replacement of hood light bulbs
Unplug the microwave. Then remove the six screws that hold the lower panel which has the light bulb cover and a couple of vent filters. The light bulb sockets are on a fixture that is connected by a quick connect electrical connector. Disconnect that and the whole panel is free to access the bulbs. My bulbs were very fragile and trying to twist them out resulted in the glass twisitng loose with the base still in the sockets. I needed to use a needle nose pliers to remove the bases and then I replaced the bulbs and put every thing back together
Parts Used:
-
Jerry from Pine, CO
-
Difficulty Level:Easy
-
Total Repair Time:15 - 30 mins
-
Tools:Pliers, Screw drivers
2 of 2 people
found this instruction helpful.
Was this instruction helpful to you?
Thank you for voting!
Noisy and turning plate would not turn
Pulled unit out, pried the bottom plate off the unit. Mine was not screwed in, but designed to be pried off, and then replaced. That was a surprise, but not very difficult. Unscrewed the motor, unplugged the electric connection, replaced it with new part . Replaced the bottom plate and tested the machine.
Parts Used:
-
Donna from ARLINGTON, TX
-
Difficulty Level:Easy
-
Total Repair Time:15 - 30 mins
-
Tools:Screw drivers
2 of 2 people
found this instruction helpful.
Was this instruction helpful to you?
Thank you for voting!
microwave not heating
removed a dozen screws-discarded large cap-replaced diode-replaced a dozen screws(took longer to replace them than remove for some unknown reason). Microwave now works(wife happy).
Parts Used:
-
Mark from GREENSBURG, PA
-
Difficulty Level:Easy
-
Total Repair Time:30 - 60 mins
-
Tools:Pliers, Screw drivers
2 of 2 people
found this instruction helpful.
Was this instruction helpful to you?
Thank you for voting!
Micro Wave no heat all else fine. Also at times door would not shut properly.
Replace (after testing w/ohm meter) diode and locker holder. My door often would not close properly. Microwave let know by saying not shut properly. When disassembled found the top screw mount was hollowed out resulting in it moving on occasion when you close door. First remove casing (special safety torx head) needed for rear screws. Onc e removed all parts available to view or work on. Diode is on the capacitor so caution is needed when removing. Serious shock hazard if touched. Use insulated pliers to remove from capacitor and a phillips on the ground. Test with ohm meter Should have resistance on way and non the opposite. Replaced mine bad. Next the holder 2 phillips screws and its yours. Unplug each switch and remove. Take note to what wires go to what switch and what switch mounts where. Mine had 3 switches. Removed from old holder and put in new. Screwed holder back in place and left scrws loose till re wired. Once wired set the holder by lightly tighting the screws. Try the door till it seats properly ensuring that all 3 switches are working properly. If so thighten screws. If all seems to work as advertised, safely plug in and test unit if heats up un plug and put cover back on micro. Your all set. Happy heating.
Parts Used:
-
Roy from MILLINGTON, TN
-
Difficulty Level:Really Easy
-
Total Repair Time:1- 2 hours
-
Tools:Pliers, Screw drivers
2 of 2 people
found this instruction helpful.
Was this instruction helpful to you?
Thank you for voting!
Microwave oven ran but stopped heating
I had to unmount the over-the-range microwave oven to be able to gain access to the interior of the oven. Complicating removal (and re-installation) was the fact that there is a "pot-filler" faucet installed directly underneath the oven. In retrospect, I should've removed the faucet before doing the repair, but "c'est la vie."
After I got the microwave down, removing the case was also "interesting." I get bonus points for the fact that the previous owner must've had to replace the same diode before - and then re-assembled the microwave case incorrectly - thereby adding to the confusion (BTW, the service manual that I found online said nothing about how to remove the oven's case).
To remove the case, undo all the screws holding it on, and then rotate the case upwards from the back while also pulling the case backwards. There are crimped folds on the inside of the case that mate with the back edges of the front of the oven's chassis, and these folds have to be unclipped from the chassis in order to remove the case.
Replacing the diode itself was the easiest part of the job. The two connectors on the diode are of different types, making it impossible to install the diode with the wrong polarity.
BTW, the diode that had failed was not an OEM diode; I suspect it was a generic component that had been installed by a repairman sometime between 2004-2008 (when our home's original owners still owned the home). On the other hand, the new diode from PartSelect is an OEM part (it came packaged in a sealed Whirlpool bag).
The fact that the oven had stopped heating indicated that it was either the high-voltage diode or the magnetron that had failed. Since a replacement diode costs ~ 1/10th as much as a replacement magnetron, I figured it made sense to replace the cheaper part first. Fortunately, this fixed the problem.
One last thing: I tried testing both the old and new diodes for conductivity and polarity using my volt-ohm meter (VOM), but I was unable to get either diode to "turn on," even though my VOM is powered by a 9-v battery, and I used the 2-Mohm range setting. I guess the test voltage of my el-cheapo VOM isn't high enough to exceed the diode's threshold voltage, (even though I have successfully used this same VOM to test low-voltage diodes).
After I got the microwave down, removing the case was also "interesting." I get bonus points for the fact that the previous owner must've had to replace the same diode before - and then re-assembled the microwave case incorrectly - thereby adding to the confusion (BTW, the service manual that I found online said nothing about how to remove the oven's case).
To remove the case, undo all the screws holding it on, and then rotate the case upwards from the back while also pulling the case backwards. There are crimped folds on the inside of the case that mate with the back edges of the front of the oven's chassis, and these folds have to be unclipped from the chassis in order to remove the case.
Replacing the diode itself was the easiest part of the job. The two connectors on the diode are of different types, making it impossible to install the diode with the wrong polarity.
BTW, the diode that had failed was not an OEM diode; I suspect it was a generic component that had been installed by a repairman sometime between 2004-2008 (when our home's original owners still owned the home). On the other hand, the new diode from PartSelect is an OEM part (it came packaged in a sealed Whirlpool bag).
The fact that the oven had stopped heating indicated that it was either the high-voltage diode or the magnetron that had failed. Since a replacement diode costs ~ 1/10th as much as a replacement magnetron, I figured it made sense to replace the cheaper part first. Fortunately, this fixed the problem.
One last thing: I tried testing both the old and new diodes for conductivity and polarity using my volt-ohm meter (VOM), but I was unable to get either diode to "turn on," even though my VOM is powered by a 9-v battery, and I used the 2-Mohm range setting. I guess the test voltage of my el-cheapo VOM isn't high enough to exceed the diode's threshold voltage, (even though I have successfully used this same VOM to test low-voltage diodes).
Parts Used:
-
Forrest from Eugene, OR
-
Difficulty Level:Difficult
-
Total Repair Time:1- 2 hours
-
Tools:Screw drivers
2 of 2 people
found this instruction helpful.
Was this instruction helpful to you?
Thank you for voting!
The Microwave was completely dead and wouldn't run, light up or anything.
I followed an old appliance repair forums post from 2008 that discussed this exact common issue with this LG model. It took me quite a while to find the info. Then I used the schematic diagrams on your website to find where the part was located inside the microwave. I removed the outer cover. I tested all components including the thermostat for continuity with a multimeter. I discovered there wasn't any continuity in the thermostat so ordered the part and replaced it. Everything works like a charm! Thanks for the great, fast service.
Parts Used:
-
Christopher from SHERWOOD, OR
-
Difficulty Level:Easy
-
Total Repair Time:1- 2 hours
-
Tools:Pliers, Screw drivers
3 of 6 people
found this instruction helpful.
Was this instruction helpful to you?
Thank you for voting!
Would not start
Watched a you tube video prior to installing new switch. Followed the video which gave me confidence i was up to the task. After removing the touch pad I found my design was not exactly like the you tube model but I found the defective switch, replaced it and put the microwave back together. Works great. Again watch the videos
Parts Used:
-
LENNARD from BURNSVILLE, MN
-
Difficulty Level:Easy
-
Total Repair Time:30 - 60 mins
-
Tools:Pliers, Screw drivers
2 of 3 people
found this instruction helpful.
Was this instruction helpful to you?
Thank you for voting!
Light over range burned out
Philips screwdriver
Removed screw (1)
Removed light bulb
Put in new light bulb
Closed door to bulb compartment
Returned screw.
Pro tip! Check how many bulbs you need before ordering. Mine only needed two. I got two. I suspect I’ll buy a new microwave before new bulb burns out again. Ordering/delivery was fast. No need to have spare on hand.
Removed screw (1)
Removed light bulb
Put in new light bulb
Closed door to bulb compartment
Returned screw.
Pro tip! Check how many bulbs you need before ordering. Mine only needed two. I got two. I suspect I’ll buy a new microwave before new bulb burns out again. Ordering/delivery was fast. No need to have spare on hand.
Parts Used:
-
Vincent from CHICAGO, IL
-
Difficulty Level:Very Easy
-
Total Repair Time:Less than 15 mins
-
Tools:Screw drivers
3 of 6 people
found this instruction helpful.
Was this instruction helpful to you?
Thank you for voting!
Door switch malfunction
Take cover off microwave. Check door switches to determine which one was faulty.Remove and replace faulty switch.
Parts Used:
-
Sherry from PINELAND, SC
-
Difficulty Level:Very Easy
-
Total Repair Time:Less than 15 mins
-
Tools:Nutdriver, Screw drivers
2 of 3 people
found this instruction helpful.
Was this instruction helpful to you?
Thank you for voting!
No problem
-
Janet from PITTSFORD, NY
-
Difficulty Level:Really Easy
-
Total Repair Time:Less than 15 mins
-
Tools:Pliers
2 of 3 people
found this instruction helpful.
Was this instruction helpful to you?
Thank you for voting!
suddenly stopped working while in use
i unplugged the unit,unscrewed the outer shell so that all the wiring and internal components were visible.starting at the first of three micro switches i removed the slip on terminals installed the alligator clips too the wires so the switch would now be bypassed.i made sure the wires and clips were not touching anything plugged unit in and it worked.i then installed the new switch and closed up the outer shell
Parts Used:
-
Kevin from Colonia, NJ
-
Difficulty Level:Easy
-
Total Repair Time:Less than 15 mins
-
Tools:Pliers, Screw drivers
2 of 4 people
found this instruction helpful.
Was this instruction helpful to you?
Thank you for voting!
Air Filter Replacement
Originally called it "grease filter" until I found very small print "air filter" on damaged original. Part #PS3527528
Slipped into place with ease -- right bottom of microwave
Slipped into place with ease -- right bottom of microwave
Parts Used:

-
Claude from PARK CITY, UT
-
Difficulty Level:Very Easy
-
Total Repair Time:Less than 15 mins
1 person
found this instruction helpful.
Was this instruction helpful to you?
Thank you for voting!