




















MMV5165AAS - Instructions
Keep searches simple. Use keywords, e.g. "leaking", "pump", "broken" or "fit".
Motor quit working but light and timer still worked.
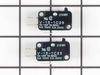
Since others reported similar problems and it was just the fuse we tried that first. That wasn't the problem so we ordered the Door Interlock Switch Kit. Shipping was very fast! Our microwave had 3 switches. My husband asked how to know which one to switch. I read that one person just did process of elimination. Luckily ours worked on the first change out! So happy to have stumbled across this site and not have to buy a whole new microwave.
Parts Used:
-
Thais from La Grange, TX
-
Difficulty Level:Easy
-
Total Repair Time:30 - 60 mins
-
Tools:Nutdriver, Screw drivers
Was this instruction helpful to you?
Thank you for voting!
Microwave would not heat food, but everything else worked.
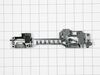
Problem was a faulty door latch switch. I easily accessed the switch by removing the control panel, total of 4 screws. After that, just disconnected the three switch door latch assembly and connected the new one. Took about half an hour and was very easy. Unit works perfectly now.
Parts Used:
-
Samuel from Daleville, VA
-
Difficulty Level:Really Easy
-
Total Repair Time:15 - 30 mins
-
Tools:Screw drivers
Was this instruction helpful to you?
Thank you for voting!
2 burned out bulbs under the microwave/important light source for kitchen stove.
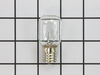
I didn't do the repair -- my husband did, said it was easy, had no problems what so ever! The new bulbs give a lot more light to the cooking area.
Parts Used:
-
Ferol from San Antonio, TX
-
Difficulty Level:Really Easy
-
Total Repair Time:15 - 30 mins
-
Tools:Screw drivers
Was this instruction helpful to you?
Thank you for voting!
motor would start by itself when door closed
remove 4 screws from top, front louvered panel snaps out. remove 1 screw from top of keypad, keypad pivot's forward and can be removed. There is a white mounting bracket inside left. Remove two screws, one top and one bottom, bracket lifts up and out. 3 sets wires are attached, mark them with masking tape, top, center, bottom and pull out plugs. They can only attach one way. Using a very small screw tip, lift plastic latch from switch, it rotates out and is removed from the pivot pin. reassemble in reverse order after switches are replaced
Parts Used:
-
Lewis from Loveland, CO
-
Difficulty Level:Really Easy
-
Total Repair Time:15 - 30 mins
-
Tools:Screw drivers
Was this instruction helpful to you?
Thank you for voting!
microwave would not heat.
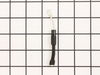
hardest part was taking the microwave down off of the wall to gain access to the diode. Thought if was the transformer but ended up being just a blown diode. remove and replace and bench test. that part took 15 minutes . moral of the story don't boil water under the side of the microwave that holds the electric components.
Parts Used:
-
outstanding from Galena, MD
-
Difficulty Level:A Bit Difficult
-
Total Repair Time:1- 2 hours
-
Tools:Pliers, Screw drivers
Was this instruction helpful to you?
Thank you for voting!