




















MAH20PDCXW Maytag Washer - Instructions
Keep searches simple. Use keywords, e.g. "leaking", "pump", "broken" or "fit".
Washer made loud noise when in the spin cycle
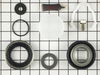
Followed the instructions that were supplied with the Lip Seal Kit, for removal of the inner drum. As expected, once into the project, I found that the bearings that are part of the outer drum, were bad. Reading other installation blogs, prior to starting, I knew the bearing sizes, 6206-2RS & 6207-2RS, and I purchased the bearings, from Motion Industries, before starting the project. Taking a hammer and long 1/2" socket extension I was able to remove both the inner and outer bearings form the outer drum. (Bearings were all but seized up) Once I had cleaned up the aluminum hub which is part of the outer drum and where the bearings mount, I was able to start the process of installing the new bearings and completing the project. Timing could not have been any better to take on this repair project because the aluminum hub was showing major signs of corrosion on the inner side of the hub. I was concerned that the new lip seal would not seal off the inner drum from the bearings/outer durm. This project was competed on 8/21/12 and so far and 6 loads later I have not found any leaks.
Parts Used:
-
Joe from Flower Mound, TX
-
Difficulty Level:A Bit Difficult
-
Total Repair Time:More than 2 hours
-
Tools:Nutdriver, Screw drivers, Wrench (Adjustable)
Was this instruction helpful to you?
Thank you for voting!
Seal failure causes bearing failure
I had pretty much the same experience as others. Difficult parts were 1) removing the inner tub, I used the blunt side of an axe with a 4x4 after several hammers would budge it. 2) removing the old bearing, like others I had to cut them out using a Dremmel with a steel cutting disk from Home Depot ($15) Wear eye protection as sparks are flying! Cut out the inner race and the bearing fell out, then cut V notches in the outer race, trying not to cut into the bearing seats on the tub although I did have a couple small cuts, then hammered it out from opposite side. Installed the new beaings and metal sleave between (what is the sleave for?). I tapped both bearing up against the seat shoulder but with the sleave in between there's not enough room and the new bearings turned real hard as the sleave is binding them. (Minor panic). A couple taps with hammer and chisel on the inner bearing from opposite side to push it out created enough room and the bearings turned real easy. Suggestion; plug the drain opening in the bottom of the outer tub with a towel or sponge to prevent pieces of the old bearing from falling in there. I saw one ball roll down in drain, so I tipped the machine on its side and several balls washed out plus pieces of the old bearing. I had a towel laying over the top but that wasn't enough, needs to be stuffed down in the opening. Re-assembly was easy and the machine runs perfect. The wife is very impressed. Total investment approx $85 (kit, bearings and cutting disk) plus about 8-10 hours vs $800 repair or new machine.
Parts Used:
-
Brian from Shoreview, MN
-
Difficulty Level:Difficult
-
Total Repair Time:More than 2 hours
-
Tools:Nutdriver, Pliers, Screw drivers, Socket set, Wrench set
Was this instruction helpful to you?
Thank you for voting!
Load noise on spin cycle.
Repair was simpl, took about 3 1/2 hours +. Used on line video for dismantal information & reassembling. Hammered out old bearings and seals. Installed them with big bolt and old bearings, I used the old bearings as pushing tools for new bearings. The large bolt and nut pulled the bearings in to place at the same time. Installed seal and reassembled machine. I moved from Jester to King at home.
Parts Used:
-
John from Needville, TX
-
Difficulty Level:Really Easy
-
Total Repair Time:More than 2 hours
-
Tools:Nutdriver, Pliers, Screw drivers, Socket set, Wrench set
Was this instruction helpful to you?
Thank you for voting!
Bearing sounded like an airplane .
The whole thing is on YouTube beating out bearings was the only difficult part
Parts Used:


-
William from W Townsend, MA
-
Difficulty Level:A Bit Difficult
-
Total Repair Time:More than 2 hours
-
Tools:Nutdriver, Pliers, Screw drivers, Socket set
Was this instruction helpful to you?
Thank you for voting!
bearing causing a schreeching sound when spinning
after getting the washer apart and notice that the inner andd outer bearing were bad, I had to beat out the bearing because they were rusted in. after getting the bearings out the washer went together quite easily. It runs like new again.
Parts Used:
-
Joe from Granbury, TX
-
Difficulty Level:Difficult
-
Total Repair Time:More than 2 hours
Was this instruction helpful to you?
Thank you for voting!
Horrific Clanging Noise from Bearings' Disintegration
Thanks to Partselect's accurate parts' lists, and installation video, along with others' posted installation trials, gained confidence to attack problem on my own (coupled with repair (or should I say, "replace")men's advise to trash machine). Bearings had basically disintegrated, causing inner tube to be out-of-alignment, and rub against outer tube. Would just like to add to what others' contributed, that I found Plumber's Tub Drain tool to work very well at knocking-out larger front bearing (was perfect fit to ID of bearing). Had to Dremel cut out rear bearing, but quite accessible from rear of machine. Otherwise, alot of cleaning from 13yrs. of useage. Thanks for everyone's assistance!
Parts Used:
-
Cary from Spokane, WA
-
Difficulty Level:Difficult
-
Total Repair Time:More than 2 hours
-
Tools:Screw drivers, Socket set, Wrench set
Was this instruction helpful to you?
Thank you for voting!
Stinky Neptune front door seal-Mildew
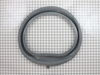
The replacement was not complicated. It took me more time because the details are not in the videos and I had to do it twice because I didn't get the seal on correctly the first time. I used the Neptune videos available on you tube for the basics. Use the "inspecting front door lock wax motor" video for a start, but be sure to take off the top front crosspiece also for easier access to the spring that tensions the seal retainer cable. You don't have to disconnect any wires, just lay the door lock assembly gently to the left of the washer. The old seal comes off very easily, using the front loader door seal video. My washer was an early one without the drain tube so I had to get the drain tube and clamps separately and drill out the tub nipple to the left below the seal. I used the biggest drill bit I had that fit inside the nipple. The tub is plastic and very easy to drill. Most of the plastic shavings will come out toward you if you drill slowly and don't push too hard on the drill. I also used my shop vac to try and get out any other shavings. I used dish washing liquid as a lubricant to help put the seal on and used too much. It doesn't take very much. The spring that tightens the inner seal clamp/cable was very hard to attach and it did require two locking pliers [vise-grips] and quite a lot of effort. You have to hook one end of the spring to the cable that wraps around the seal, hold the other end of the cable with locking pliers, the free end of the spring with locking pliers, and stretch the spring to hook it to the free end of the cable. There are some other methods described in various forums and one of them might work better for you. When I was an auto mechanic we had a special tool that helped attach springs like this on drum brakes. I was sure wishing that tool was still in my tool chest but it was not. This was the most difficult part for me, getting the cable and spring all in place and stretching the spring without dislodging the seal and having to start all over.I didn't get the seal aligned correctly the first time and had to do it over after putting ever thing back together and washing a load of clothes. I could have avoided that by carefully inspecting the seal before I put everything together. When you put it back together the end of that red or green nylon line that looks like weed eater line goes under the soap/bleach dispenser bezel on the top so you can manually open the door if the wax motor goes bad and it won't unlock.
Parts Used:
-
James from Lincoln city, OR
-
Difficulty Level:A Bit Difficult
-
Total Repair Time:More than 2 hours
-
Tools:Nutdriver, Pliers, Screw drivers
Was this instruction helpful to you?
Thank you for voting!
The washer wouldn't spin the water out of the clothes
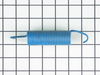
First and foremost, disconnect the power before anything else, then remove the door, access panel, and front of the washer,I then detached the front of the rubber boot so I could remove the plastic panel that it attaches to, that exposes the springs, I then used a vice grip to remove the springs replacing them one at a time, I also replaced the struts in the rear of the machine which requires removing the rear panel, and I used a bottle jack to support the rear of the washer tub while I changed the struts, I changed the struts first which only helped a little, the springs made the job complete and the washer now completely wrings the clothes to a damp state that dries quickly.
Parts Used:
-
Doug from Pella, IA
-
Difficulty Level:A Bit Difficult
-
Total Repair Time:1- 2 hours
-
Tools:Nutdriver, Socket set
Was this instruction helpful to you?
Thank you for voting!
Moldy Bellow
Moldy bellow was the reason I replaced the bellow. It tried cleaning the bellow numerous time over the last five year, but once the mold sets in, it's a losing battle. A highly mold resistant bellow would be nice. The available video was invaluable. I would not have purchased the parts if I had not seen the video. I spent a few more dollars for additional parts, because once I got started I did not want to find a bad part and then not be able to complete the repair in one try. Since the bellow was moldy, I expected the door boot drain hose would be moldy also, so, for a few more dollars, I replace it also. Worth the effort. I took me, just under two hours to complete the job, with the help of my wife. I'm some may be thinking, what did she do? She cleaned the parts I took off, so they were clean, well at least cleaner, when I put them back on. This washer was nearly ten year old and had never been apart. I could have finished the replacement bellow in less than an hour, but I took some time to clean inside the washer while it was apart. That's just the way I roll. Fitting the bellow to seal properly was not as simple as the repairman made it look on the video, but that was because he had done this before, probably many time over. He knew what it felt like to fit it and snap it into place. Once I got the feel of seating the bellow, it went smoothly. The boot cable and spring are a bit tricky to hook, as anticipated; I read some previous experiences. So, I thought about how I was going to secure the spring in order to stretch it to the other cable hook. I decided to use two pairs of vice grips to hold the spring and cable hook end. I have two small to medium sized vice grips, which worked perfectly. Otherwise, it is very difficult to pull and hold a pair of pliers closed, at the same time. I sit at a computer most days and am not used to a mechanics world. Use your brain when you don't have the brawn. Job done, no leaks.
Parts Used:

-
Robert from Palm Bay, FL
-
Difficulty Level:Easy
-
Total Repair Time:1- 2 hours
-
Tools:Pliers, Screw drivers, Socket set
Was this instruction helpful to you?
Thank you for voting!
leaking boot around drum
The video was great. The only problem was getting the spring back on. It was way too stiff, so I put it in a vise and stretched it a bit. It's a bit fussy but your site made it go pretty easy. thanks
Parts Used:
-
John from Portland, OR
-
Difficulty Level:Easy
-
Total Repair Time:1- 2 hours
-
Tools:Nutdriver, Pliers, Screw drivers
Was this instruction helpful to you?
Thank you for voting!
Bellows was soiled
I followed the video for the installation. I did find that installing the spring was no way as easy as it looked in the video. Otherwise, OK.
Parts Used:
-
Jack from Haymarket, VA
-
Difficulty Level:Easy
-
Total Repair Time:1- 2 hours
-
Tools:Nutdriver, Pliers, Screw drivers, Wrench (Adjustable)
Was this instruction helpful to you?
Thank you for voting!
Attaching the Spring to the metal band around Tube
I followed the video which I might say is somewhat misleading for the Maytag Neptune washing machine. This is the one with a recall due to mildew and mold build up on the Door Seal (Bellow). First to take it apart you really need a 8mm socket in order to get into tight spaces. Once you start using the socket everything will come apart quickly the last being removing the old Bellow. I found this is easy if you just roll the spring toward the front using a screw driver. Once it clears the front of the Bellow, the cable will fall off along with the spring. You can now remove the old Bellow. The next step is to insert the new Bellows on the rim of the tube. I started by attaching the drain hose at the bottom and then from the video, started at the top make sure you have it center correctly and worked down one side pushing the Bellows on the rim and then do the same thing to the other side part way. Alternating from one side to the other until you reach the bottom. The Bellow is now on the tube, NOW the hard part. First, the old spring was stretched. I bought a new spring at Home Depot. I next took the cable and placed it around the tube with the ends at the top. Make sure to thread the cable carefully so it is in place. Watch out for plugs and the drain at the bottom of the tube. I attempted to attach the spring by myself using a long nose plier and a Grip plier but just could not stretch is far enough by myself as shown in the video. I next took a 16 ga insulated wire you could also get at Home Depot and attached it to each end of the cable and twisted it together in the middle with pliers so it was tight and cut off the excess wire. I attached one end of the spring through the right eyelet on the cable and using the grip pliers and BOTH hands on the grip pliers pull the spring and threaded it through the left eyelet. Hold the spring in place I now pushed the stretched spring against the back lip of the tube. I removed the 16 ga wire buy cutting off the ends and carefully pulling it away. Next, I just followed the video. I pushed all the tabs on the Bellow in to the holes on the tub and then screwed the parts back in reverse order. Good Luck Al
Parts Used:
-
Alvin from Manalapan, NJ
-
Difficulty Level:A Bit Difficult
-
Total Repair Time:1- 2 hours
-
Tools:Nutdriver, Pliers, Screw drivers, Socket set
Was this instruction helpful to you?
Thank you for voting!
Spin action failed because the door did not lock
The instructions from Richard of Austin, MN were instrumental in repairing my clothes washer. I am an electronics technician, and my control board failed just like Richard indicated. One thing Richard did not state is that resistor R11 and Q6 did not fail until the wax motor (solenoid) shorted out. If I had used the old wax motor, it would have caused the new parts I installed on the board to fail. I did find the wax motor cheaper on other companies web sites but without the instructions Richard provided, I would have had to spend nearly $300 on a new control board instead of repairing the original board. The two limit switches on the machine can be checked using an ohm-meter, so they only need to be replaced if they do not close when engaged which can be done manually. I found the resistor and Triac at Radio Shack online. I repaired the machine for about $40 total. Michael from Austin, TX
Parts Used:
-
Michael from Austin, TX
-
Difficulty Level:A Bit Difficult
-
Total Repair Time:1- 2 hours
-
Tools:Screw drivers, Wrench (Adjustable)
Was this instruction helpful to you?
Thank you for voting!
leaking gasket
Follow the suggestions on the rope tied to the side of the washer, then mechanically lever the spring open. Only change I would incorporate is using a block of wood to keep the wash drum from moving over as you pull on the rope to open the spring up. GREAT AND EASY FIX!
Parts Used:
-
Richard from Brownstown, IN
-
Difficulty Level:A Bit Difficult
-
Total Repair Time:1- 2 hours
-
Tools:Pliers, Screw drivers
Was this instruction helpful to you?
Thank you for voting!
washer was leaking water all over the place
removed the door &the top took the tightener off the bellow took old one out put new one on and clean all parts and put it back together works like a new one love it.
Parts Used:
-
DONNA from WALKER, WV
-
Difficulty Level:Really Easy
-
Total Repair Time:1- 2 hours
-
Tools:Pliers, Screw drivers, Socket set
Was this instruction helpful to you?
Thank you for voting!