




















MAH20PDCXW Maytag Washer - Instructions
Keep searches simple. Use keywords, e.g. "leaking", "pump", "broken" or "fit".
Spin action failed because the door did not lock
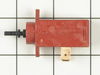
The instructions from Richard of Austin, MN were instrumental in repairing my clothes washer. I am an electronics technician, and my control board failed just like Richard indicated. One thing Richard did not state is that resistor R11 and Q6 did not fail until the wax motor (solenoid) shorted out. If I had used the old wax motor, it would have caused the new parts I installed on the board to fail. I did find the wax motor cheaper on other companies web sites but without the instructions Richard provided, I would have had to spend nearly $300 on a new control board instead of repairing the original board. The two limit switches on the machine can be checked using an ohm-meter, so they only need to be replaced if they do not close when engaged which can be done manually. I found the resistor and Triac at Radio Shack online. I repaired the machine for about $40 total. Michael from Austin, TX
Parts Used:
-
Michael from Austin, TX
-
Difficulty Level:A Bit Difficult
-
Total Repair Time:1- 2 hours
-
Tools:Screw drivers, Wrench (Adjustable)
Was this instruction helpful to you?
Thank you for voting!
Seal failed then bearings
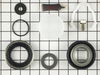
Basically the problem was the bearing replacement. Although you cant get them on PartsSelect, I got the seal kit on the site. The seal kit is easy, the bearings took two days and an air hammer to extract them and a big hammer to get them back in. All in all it was worth it,
Parts Used:
-
Rob from Manhattan, KS
-
Difficulty Level:A Bit Difficult
-
Total Repair Time:1- 2 hours
-
Tools:Nutdriver, Screw drivers, Socket set
Was this instruction helpful to you?
Thank you for voting!
leaking gasket
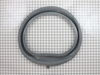
Follow the suggestions on the rope tied to the side of the washer, then mechanically lever the spring open. Only change I would incorporate is using a block of wood to keep the wash drum from moving over as you pull on the rope to open the spring up. GREAT AND EASY FIX!
Parts Used:
-
Richard from Brownstown, IN
-
Difficulty Level:A Bit Difficult
-
Total Repair Time:1- 2 hours
-
Tools:Pliers, Screw drivers
Was this instruction helpful to you?
Thank you for voting!
Mildew, water in bellow and under tub
Set my iPad on the dryer and played the video. Could not have done it without it. Putting spring back on was the hardest, fell off once. Took that long because video connection timed out and had to get another coffee. Part delivery was quick. Found the drain tube out of the bellows was clogged. If it wasn't for the mildew on the bellows could havw fixed the problem if I had known about a drain at the bottom of the bellows.
Parts Used:
-
Ivars from Fairfax, VA
-
Difficulty Level:A Bit Difficult
-
Total Repair Time:1- 2 hours
-
Tools:Nutdriver, Pliers, Screw drivers
Was this instruction helpful to you?
Thank you for voting!
will not high speed spin
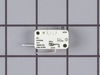
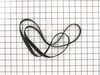
remove door phillips remove front push down and pry out remove soap tray phillips remove two nut screws to lift up topy open tie or support top up remove bad contactor phillips normaly open check with continunity tester replace and reverse procedure
Parts Used:
-
greg from ozone park, NY
-
Difficulty Level:Easy
-
Total Repair Time:1- 2 hours
-
Tools:Nutdriver, Screw drivers
Was this instruction helpful to you?
Thank you for voting!
Washer would not run, seemed like the wax motor was the most common cause.
Watched the video, worked just like shown so as quick as you can take out 8 screws you can make the repair. Turned out it was the MCB but maybe this part (wax motor) Will save a main control board failure.
Parts Used:
-
Randy from Crawford, CO
-
Difficulty Level:Really Easy
-
Total Repair Time:30 - 60 mins
-
Tools:Pliers, Screw drivers
Was this instruction helpful to you?
Thank you for voting!
broken drive belt
My first time attempted to repair washer and step by step video instruction attached with order confirmation did it for me. Thank you
Parts Used:
-
Truc from San Diego, CA
-
Difficulty Level:Really Easy
-
Total Repair Time:30 - 60 mins
-
Tools:Nutdriver, Screw drivers, Socket set
Was this instruction helpful to you?
Thank you for voting!
leaky door seal
removed front panel. removed brakets holding top. lifted top hinged backward. Removed tension spring and cable that secures the seal to the drum. Pulled seal out. Put new seal back in. Secured with cable and spring. Reassembled top and front.
Parts Used:
-
John from Landenberg, PA
-
Difficulty Level:Really Easy
-
Total Repair Time:30 - 60 mins
-
Tools:Pliers, Screw drivers
Was this instruction helpful to you?
Thank you for voting!
washer was leaking water all over the place
removed the door &the top took the tightener off the bellow took old one out put new one on and clean all parts and put it back together works like a new one love it.
Parts Used:
-
DONNA from WALKER, WV
-
Difficulty Level:Really Easy
-
Total Repair Time:1- 2 hours
-
Tools:Pliers, Screw drivers, Socket set
Was this instruction helpful to you?
Thank you for voting!
Water leaking from the rubber front door seal.
I follwoed the detailed instructions provided via the Part Select web page and instructional video. This information was very helpful. I printed the step by step paper instructions and had them available at the washer. They were very easy to understand. By doing this work myself I saved a $100.00 repair service call and installation cost and another $30.00 on parts. This resulted $130.00 ++ savings and 30 minutes of my time. Thanks for the great help and guidance!!
Parts Used:
-
William from Sewickley, PA
-
Difficulty Level:Easy
-
Total Repair Time:15 - 30 mins
-
Tools:Nutdriver, Pliers, Screw drivers, Socket set
Was this instruction helpful to you?
Thank you for voting!
Would not enter spin cycle. Found WAX Motor not cycling, 120VAC present when disconnected. Applied 120VAC dierectly cycled OK.
When I found the WAX motor would not cycle I applied 120VAC directly to the WAX motor and machine went into SPIN CYCLE as it should have. Stopped machine and ordered replacement Machine Control Board. Replaced the part and machine works perfectly.
Parts Used:
-
E T from Milton, WI
-
Difficulty Level:Easy
-
Total Repair Time:15 - 30 mins
-
Tools:Nutdriver, Screw drivers
Was this instruction helpful to you?
Thank you for voting!
Started smelling rubber burning during spin cycle
I thought for sure the washer was toast! Thankfully, due to your website it was an easy 26.00 fix. Husband took care of the repair in about a half an hour. He did not encounter any problems with the fix and it's running like a charm!
Parts Used:
-
Lauraine from Kimberling City, MO
-
Difficulty Level:Easy
-
Total Repair Time:15 - 30 mins
-
Tools:Pliers, Screw drivers, Wrench (Adjustable)
Was this instruction helpful to you?
Thank you for voting!
Damaged bellow.
With the video you had on your web site, the repair was very easy. couldn't be any happier. you saved me from buying a new washer!
Parts Used:
-
Jack from Great Falls, MT
-
Difficulty Level:Easy
-
Total Repair Time:15 - 30 mins
-
Tools:Pliers, Screw drivers
Was this instruction helpful to you?
Thank you for voting!
Whenever the timer hit the rinse cycle, my breaker would trip
First I took off the door and the front of the washing machine. Then, took off the bracket of the soap dispensing bin from the top of the machine. Then lift up the top of the machine, and unscrew the bracket that holds the wax motots, label and pull wires, replace motors and wires and put back together. This is also a good time to clean and dust the interior of the machine. Before replacing, my motor smelled and looked burnt out, instead of paying $300 -$400 to have someone look at it, I investigated and I fixed it for around $30. I hope I get to inspire people to figure things out and save some cash!!
Parts Used:
-
scott from lafayette, CO
-
Difficulty Level:Easy
-
Total Repair Time:15 - 30 mins
-
Tools:Nutdriver, Screw drivers
Was this instruction helpful to you?
Thank you for voting!
washing machine leaked out the bottom.
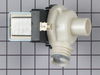
diagnosed problem (hole in drainage pump). unplugged, took service panel off rear, removed hoses, twisted pump counter clockwise. dropped new pump in, made connections, and it was good as new.
Parts Used:
-
ryan from Troy, OH
-
Difficulty Level:Easy
-
Total Repair Time:15 - 30 mins
-
Tools:Nutdriver, Screw drivers
Was this instruction helpful to you?
Thank you for voting!