




















JES1133WD01 General Electric Microwave - Instructions
Keep searches simple. Use keywords, e.g. "leaking", "pump", "broken" or "fit".
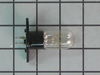
The Light Bulb went out
I used a phillips screw driver and a special type bit to undo the screws from the cabinet and found the light bulb and took the old one out and put the new one in and put it back together.
Parts Used:
-
Shirley from JACKSON, TN
-
Difficulty Level:Really Easy
-
Total Repair Time:30 - 60 mins
-
Tools:Screw drivers
1 person
found this instruction helpful.
Was this instruction helpful to you?
Thank you for voting!
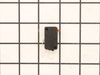
The unit would run when the door was open!
First I had to accept the fact that the unit was designed to keep non-professional people from doing any repairs. The switch was installed in such a manner that I had to break the mounting to remove the switch, then drill a hole in the mounting to secure the new switch in place.
Parts Used:
-
Mike from BLUFFTON, SC
-
Difficulty Level:A Bit Difficult
-
Total Repair Time:1- 2 hours
-
Tools:Nutdriver, Pliers, Screw drivers, Socket set, Wrench set
1 person
found this instruction helpful.
Was this instruction helpful to you?
Thank you for voting!
Light didn't work
I assumed light was burned out and got a replacement bulb.
Removed back and side screws with slight difficulity.
Was not able to remove cover. The top front would not loosen. I tried every trick in my 80 year repertoire. I gave up and put it back together.
I emailed PartSelect last week explaining the problem. So far no reply.
I am sure I have the right model # and others seem to have little trouble removing the cover.
I paid $85 + tax for the oven and it has worked well for about 8(?) years.
From what I read here, I figured I could handle the bulb replacement.
I'm just out the cost of the bulb and shipping and the oven still works. It would have been nice to have the light work again but we will just wait until it quits working and buy another inexpensive unit.
Removed back and side screws with slight difficulity.
Was not able to remove cover. The top front would not loosen. I tried every trick in my 80 year repertoire. I gave up and put it back together.
I emailed PartSelect last week explaining the problem. So far no reply.
I am sure I have the right model # and others seem to have little trouble removing the cover.
I paid $85 + tax for the oven and it has worked well for about 8(?) years.
From what I read here, I figured I could handle the bulb replacement.
I'm just out the cost of the bulb and shipping and the oven still works. It would have been nice to have the light work again but we will just wait until it quits working and buy another inexpensive unit.
Parts Used:
-
FLEET from OLYMPIA, WA
-
Difficulty Level:Very Difficult
-
Total Repair Time:More than 2 hours
-
Tools:Screw drivers, Wrench (Adjustable)
1 person
found this instruction helpful.
Was this instruction helpful to you?
Thank you for voting!
Turntable Stopped Working/Display Timer Would Countdown But Not Heat
With this model, you must remove the outer covering. Don't try to access the display unit from the front like I've seen in some other GE microwave videos. After removing the outer covering, the switches are easy to replace. They are very visible and easy to get to without taking any other parts off. You will see the door switches just behind the display board. Remove the switch and then remove the connecting wires to ensure you don't inadvertently brake a wire. You will need a tamper resistant star bit to remove 3 or 4 screws from the back panel. All other screws are philips head. I went ahead and replaced both switches (yes...there are two of them) and works like a charm. I saved an $800 microwave for less than $60 and know what to do if it happens again. Appears to be a common problem on this model. Thanks for others making a post...It saved me time and money reading others remarks. Good luck!
Parts Used:
-
Steve from Wesley Chapel, FL
-
Difficulty Level:Really Easy
-
Total Repair Time:30 - 60 mins
-
Tools:Screw drivers
1 person
found this instruction helpful.
Was this instruction helpful to you?
Thank you for voting!
no power in microwave in turn table wouldn't turn light would work act like door was open
remov cover to check voltage and found problem at the interlock switch ohm the switch and found it was open replace both switches it work fine now
Parts Used:
-
johnny from port orange, FL
-
Difficulty Level:Easy
-
Total Repair Time:1- 2 hours
-
Tools:Screw drivers
5 of 13 people
found this instruction helpful.
Was this instruction helpful to you?
Thank you for voting!
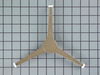
turntable would not turn
Microwave would not heat food evenly with the new rotating ring guide i ordered it was as easy to replace as one, two, three. Took out the old ring guide and replaced it with the new one it was simple because it could only go in one way. i had it done faster than the time it took to write this. i love it works great food heats up evenly and it was a lot cheaper than a new microwave.
Parts Used:
-
marc from tiffin, OH
-
Difficulty Level:Really Easy
-
Total Repair Time:Less than 15 mins
1 of 2 people
found this instruction helpful.
Was this instruction helpful to you?
Thank you for voting!
part under turn table broke
-
Albert from York, PA
-
Difficulty Level:Really Easy
-
Total Repair Time:Less than 15 mins
1 of 3 people
found this instruction helpful.
Was this instruction helpful to you?
Thank you for voting!
No heat.

-
Mack from Jacksonville, FL
-
Difficulty Level:Really Easy
-
Total Repair Time:Less than 15 mins
-
Tools:Pliers, Screw drivers
0 of 1 people
found this instruction helpful.
Was this instruction helpful to you?
Thank you for voting!
No heat
-
Edwin from New York, NY
-
Difficulty Level:Really Easy
-
Total Repair Time:15 - 30 mins
-
Tools:Screw drivers
0 of 1 people
found this instruction helpful.
Was this instruction helpful to you?
Thank you for voting!
When trying to run, intermittently, the light would come on but the tray wouldn't rotate or cook. When the door was open, the tray would intermittently rotate.
I pulled out the unit and found 2 interlock switches that are depressed when the door closes. After cycling the door open/closed I found that one of the switches occasionally would stay depressed. The repair was easy (after I took off the panels so I could get to the switch) I simply removed 2 screws that attached the interlock switch assemblies to the main unit. Then I popped out the defective switch and popped in the new one. This did indeed fix my problem.
Parts Used:
-
Sam from Chandler, AZ
-
Difficulty Level:Easy
-
Total Repair Time:15 - 30 mins
-
Tools:Nutdriver, Screw drivers
Was this instruction helpful to you?
Thank you for voting!
All power to the microwave went out.
PartSelect had helpful repair instructions on-line which made the repair easier and faster. Unfortunately, there were other problems with the oven that immediately blew the new fuse I had just installed. It was then determined that additional repair would most likely cost almost as much as a new microwave.
Parts Used:
-
Michael from East China Township, MI
-
Difficulty Level:Easy
-
Total Repair Time:Less than 15 mins
-
Tools:Screw drivers
Was this instruction helpful to you?
Thank you for voting!
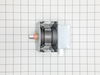
Microwave would not heat
I went on line, put in microwave repair and watched a video on repair. I then took the oven down from over the range and took it apart. I could see were the magnetron had burned out. There was a hole with obvious burn marks. I went on line looking for the needed part. I clicked on PartSelect and order the magnetron. I received the part within three days, regular shipping. As I had not put the oven back together it took only a few moments to save 150 to 200+ dollars. I put it back together and happy, happy me, it worked.
Parts Used:
-
David from Roanoke, VA
-
Difficulty Level:Easy
-
Total Repair Time:Less than 15 mins
-
Tools:Screw drivers
Was this instruction helpful to you?
Thank you for voting!
Powered Off completely
After reading reviews that there was no power what so ever and a fuse replacement will solve the problem, I tried it. Replacing the fuse is very easy (and I am not handy at all). All you have to do is remove the microwave cover from the top by removing two screws, slide the cover to the left and pulling the cover off. Then remove the grill in front of you, by removing one or two screws. The fuse is in front of you, use pliers and be firm but gentle. Replacing the fuse is easy but it did not solve my problem.
Parts Used:
-
Mohammad from Piscataway, NJ
-
Difficulty Level:Easy
-
Total Repair Time:Less than 15 mins
-
Tools:Screw drivers
Was this instruction helpful to you?
Thank you for voting!
broken glass tray

-
Aldeen B from Hayward, CA
-
Difficulty Level:Really Easy
-
Total Repair Time:Less than 15 mins
Was this instruction helpful to you?
Thank you for voting!
Quit working
-
William from Socorro, NM
-
Difficulty Level:Really Easy
-
Total Repair Time:Less than 15 mins
-
Tools:Pliers, Screw drivers
Was this instruction helpful to you?
Thank you for voting!