




















GMR05BLHWWC General Electric Dishwasher - Instructions
Keep searches simple. Use keywords, e.g. "leaking", "pump", "broken" or "fit".
The unit was moving all over the place
I watched the video from the web site and the one that came with my invoice. This made it very easy to fix.I got the tools that I needed and went to town on the repair.
Parts Used:
-
Ronald from NIAGARA FALLS, NY
-
Difficulty Level:Really Easy
-
Total Repair Time:15 - 30 mins
-
Tools:Screw drivers
4 of 5 people
found this instruction helpful.
Was this instruction helpful to you?
Thank you for voting!
No hot water to washer
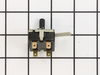
Unplug machine, verified the hot water line to the washer was clear. Used screwdriver to remove top panel from washer. Removed faulty (rusted) temperature switch from seating. Then removed each of the wires from the old switch with needlenose pliers and placed them on the proper area of the new switch. Placed the switch back on the panel and screwed the cover back on. Then plugged the unit back in an tested the hot, cold and warm settings. Easy fix.
Parts Used:
-
ernest from RIVER EDGE, NJ
-
Difficulty Level:Really Easy
-
Total Repair Time:15 - 30 mins
-
Tools:Pliers, Screw drivers
4 of 5 people
found this instruction helpful.
Was this instruction helpful to you?
Thank you for voting!
Washer wouldn't spin
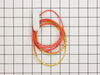
I followed the video from the website to install the lid switch. Worked like a charm. Great instructions. You do need to supply your own butt splice connectors .
Parts Used:
-
Don from BREMERTON, WA
-
Difficulty Level:Really Easy
-
Total Repair Time:30 - 60 mins
-
Tools:Nutdriver
4 of 5 people
found this instruction helpful.
Was this instruction helpful to you?
Thank you for voting!
broken agitator
I pulled on the bottom edges of the agitator, like the video said, until my fingers were numb. Finally, after I got aggravated, I beat the old agitator into a hundred pieces with a hammer and chisel. Then I slid the new agitator into place and gently tapped on the top of it. It snapped into place and has worked like a new one every since.
Parts Used:
-
Randy from CHIPLEY, FL
-
Difficulty Level:Difficult
-
Total Repair Time:30 - 60 mins
4 of 5 people
found this instruction helpful.
Was this instruction helpful to you?
Thank you for voting!
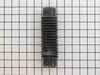
water leak in hose
First I located the trouble. I noticed that it was water leaking and figured it had to be a hose. I took the front panel off of the washer and after noticing that the drain hose had a slight hole in it, realized that I could fix it and save myself a repair call. I undid the two hose clamps and removed the hose. I went to a local repair shop that could not guarantee the right part. I went online and found Parts Select.com. I entered minimal information and the picture of the item that I was looking for, the Drain Inlet Hose, was staring at me! Within 3 business days and less than 20 dollars spent, I repaired my washing machine. The total time spent to repair after I received the hose took about 10 minutes. I will definitely use parts select .com and recommend to all my friends and family. Thank you.
Parts Used:
-
Steven from Holbrook, NY
-
Difficulty Level:A Bit Difficult
-
Total Repair Time:15 - 30 mins
-
Tools:Nutdriver, Pliers, Screw drivers
4 of 5 people
found this instruction helpful.
Was this instruction helpful to you?
Thank you for voting!
Washer wouldn’t drain so I checked the water pump. Found out it stopped working so I ordered a new one.
Very easy to put a new water pump. You have to disconnect two hoses from the pump, unplug the power connection from the pump, and unscrew the two screws from the base of the pump.
Parts Used:
-
Toivyan from UNION SPRINGS, AL
-
Difficulty Level:Very Easy
-
Total Repair Time:15 - 30 mins
-
Tools:Nutdriver, Pliers
3 of 3 people
found this instruction helpful.
Was this instruction helpful to you?
Thank you for voting!
Washer would stop and not start at times?
Took off the front panel of the washer which exposed electrical wires going to top lid sensor. Took out old sensor installed new. Cut wires from old sensor and spliced wires from new sensor to machines wires that went to old sensor. Replaced front of washer. Washer works fine now.
Parts Used:
-
Daniel from Boerne, TX
-
Difficulty Level:Easy
-
Total Repair Time:15 - 30 mins
3 of 3 people
found this instruction helpful.
Was this instruction helpful to you?
Thank you for voting!
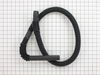
hose had a small pin hole. leaked.
With screwdriver, I removed screws holding old hose in place. Attached new hose and screwed into place.
Parts Used:
-
Truett from Kennesaw, GA
-
Difficulty Level:Really Easy
-
Total Repair Time:Less than 15 mins
-
Tools:Screw drivers
3 of 3 people
found this instruction helpful.
Was this instruction helpful to you?
Thank you for voting!
the hose extension had a tear
First I removed the screws that held the drain hose clip to the washer. Then I pulled the hose, along with the clip, completely out of the washer. I then took the old hose out of the washer clip and put the new hose in the new clip; I pushed the hose into the washing maching and tightened the hose clip to the maching with the existing screws. Seriously easy, took less than 15 minutes. And I have virtually no handyman skills at all!
Parts Used:

-
Jennifer from Concord, CA
-
Difficulty Level:Really Easy
-
Total Repair Time:Less than 15 mins
-
Tools:Screw drivers, Wrench (Adjustable)
4 of 6 people
found this instruction helpful.
Was this instruction helpful to you?
Thank you for voting!
Wife noticed water pooling around the washing machine
Unplug the washing machine. There are electrical components that can injure or kill you. Using a screw driver inserted just below the lid of the washer in the front, there are two (2) spring clips that you push on to release. Then the front of the washer tilts down and you remove it and set aside.
On the bottom right you will see the flexible, convoluted rubber hose connecting from the pump to the washer tub. Two (2) clamps hold the hose on. Remove the two clamps, install the new hose and re-install the clamps. Re-install the front panel and push into place, allowing clips to lock into the front panel.
On the bottom right you will see the flexible, convoluted rubber hose connecting from the pump to the washer tub. Two (2) clamps hold the hose on. Remove the two clamps, install the new hose and re-install the clamps. Re-install the front panel and push into place, allowing clips to lock into the front panel.
Parts Used:
-
Edward from Ridgewood, NJ
-
Difficulty Level:Really Easy
-
Total Repair Time:Less than 15 mins
-
Tools:Screw drivers, Socket set
3 of 3 people
found this instruction helpful.
Was this instruction helpful to you?
Thank you for voting!
drain hose replacement
Put the drain hose clip on (it will take squeezing but the hose will pass through). There will be a groove that whose width spacing is similar to the clip. Once that's on, insert hose and screw in the clip.
Parts Used:
-
Henry from Merced, CA
-
Difficulty Level:Easy
-
Total Repair Time:Less than 15 mins
-
Tools:Screw drivers
3 of 3 people
found this instruction helpful.
Was this instruction helpful to you?
Thank you for voting!
Washing Machine Leaky Hose
I replaced the hose between the tub and the pump. The only difficulty came with the accessibility of the problem area. I just pulled off the front panel of the machine and used a screwdriver and pliers to loosen the attachments and put the new hose in place.
Parts Used:
-
Kiel from Laughlin AFB, TX
-
Difficulty Level:Really Easy
-
Total Repair Time:Less than 15 mins
-
Tools:Pliers, Screw drivers
3 of 3 people
found this instruction helpful.
Was this instruction helpful to you?
Thank you for voting!
There was no fabric softener dispenser

-
Norma from Holiday, FL
-
Difficulty Level:Really Easy
-
Total Repair Time:Less than 15 mins
4 of 6 people
found this instruction helpful.
Was this instruction helpful to you?
Thank you for voting!
Rinse cap was broken
Watched online video, repaired myself in under 10 minutes.
Easy fix with video instructions
Easy fix with video instructions
Parts Used:
-
DENNIS from MAUMEE, OH
-
Difficulty Level:Really Easy
-
Total Repair Time:Less than 15 mins
-
Tools:Pliers, Screw drivers
3 of 3 people
found this instruction helpful.
Was this instruction helpful to you?
Thank you for voting!
The agitator "wings" are open at the bottom so any clothes with strings gets caught in these wings and eventually brake the wings off.
I watched the video provided by your site and followed it. I removed the clothes softener part from the agitator, Got a good grip on the agitator and pulled up. It came right off. Aligned the new agitator groves and slid it into place, put the fabric softener part back on! Super easy.
Parts Used:
-
Margaret from Chimayo, NM
-
Difficulty Level:Very Easy
-
Total Repair Time:Less than 15 mins
3 of 3 people
found this instruction helpful.
Was this instruction helpful to you?
Thank you for voting!