




















GB2026PEKB Amana Refrigerator - Instructions
Keep searches simple. Use keywords, e.g. "leaking", "pump", "broken" or "fit".
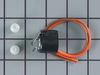
Defrost thermostat failed causing ice build up
Once I figured out where the part was located it was quite simple. I thawed out the freezer first. Using a nut driver, I removed all the screws to the back panel of freezer. Squeezed the clips on the ice maker attachment to release the panel. Once I opened the panel the thermostat was visible and accessible. The failed thermostat was obvious by its bulging appearance. By following the instructions found on Partselect.com, I cut the two connecting wires and removed the failed part. I then striped some insulator from the wires to connect the new part. I used electrical tape to ensure connection and insulation as the white wire connectors did not work well (too big) for my application. Closed everything back up, plugged in refer and all was good. A little time and a $20 part saved me $150. Thanks Part Select!
Parts Used:
-
Gwen from Vista, CA
-
Difficulty Level:Really Easy
-
Total Repair Time:15 - 30 mins
-
Tools:Nutdriver
11 of 15 people
found this instruction helpful.
Was this instruction helpful to you?
Thank you for voting!
Defrost not working
There were three parts in question, the defrost timer (inside the casing near the control dial at the top of the refridgerator), the defrost thermostat (behind the back wall of the freezer), and the heater coil (ditto). We tested the defrost timer by opening it up, advancing it to the defrost cycle, and waiting for the compressor to start up again, showing that the timer was working. Then we replaced the defrost thermostat and found that the heater coil worked.
The hardest part was figuring out how to open the casing and get to the timer. If I do it over again I will replace the $20 thermostat first and then deal with the timer if necessary. To get to the thermostat you can easily take the freezer door off by removing two screws in the door tracks. There was even an arrow pointing to one of the screws! Take out the food trays and then unscrew the back wall with a nut driver. The thermostat was clipped to one of the copper freezer tubes. I unplugged one end of the thermostat circuit at the lead to the heater coil and then cut the thermostat out of the circuit and used wire nuts to connect the new thermostat.
The hardest part was figuring out how to open the casing and get to the timer. If I do it over again I will replace the $20 thermostat first and then deal with the timer if necessary. To get to the thermostat you can easily take the freezer door off by removing two screws in the door tracks. There was even an arrow pointing to one of the screws! Take out the food trays and then unscrew the back wall with a nut driver. The thermostat was clipped to one of the copper freezer tubes. I unplugged one end of the thermostat circuit at the lead to the heater coil and then cut the thermostat out of the circuit and used wire nuts to connect the new thermostat.
Parts Used:
-
Glenn from Santa Rosa, CA
-
Difficulty Level:Easy
-
Total Repair Time:30 - 60 mins
-
Tools:Nutdriver, Screw drivers
11 of 15 people
found this instruction helpful.
Was this instruction helpful to you?
Thank you for voting!
freezer no staying cold
Replaced the electronics board. Fairly easy job. Video helped enormously. Programing is awkward.
Parts Used:

-
William from EXTON, PA
-
Difficulty Level:Easy
-
Total Repair Time:15 - 30 mins
-
Tools:Screw drivers
9 of 10 people
found this instruction helpful.
Was this instruction helpful to you?
Thank you for voting!
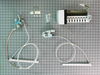
Replacement of Amana ice maker
If you can take the old one out and reverse the procedure, there isn't much more to it than that.
Parts Used:
-
RAYMOND from HILLSBOROUGH, NC
-
Difficulty Level:Easy
-
Total Repair Time:15 - 30 mins
-
Tools:Nutdriver, Pliers, Screw drivers, Wrench (Adjustable)
16 of 31 people
found this instruction helpful.
Was this instruction helpful to you?
Thank you for voting!
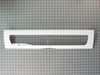
A friend dropped a jar of relish on the plastic window and cracked it.
Easy repair. Unwrapped the new cover; pulled the old one off by releasing tabs. Inserted new piece.
Took less than 15 minutes. Looks like new. The replacement part arrived quickly from Part Select.
Took less than 15 minutes. Looks like new. The replacement part arrived quickly from Part Select.
Parts Used:
-
Gene from Petaluma, CA
-
Difficulty Level:Really Easy
-
Total Repair Time:Less than 15 mins
9 of 10 people
found this instruction helpful.
Was this instruction helpful to you?
Thank you for voting!
Right hand door would not auto close.
Removed the top door hinge cover.
Remover the four 12mm hex screws.
Lifted empty door off bottem hinge support.
Removed old door closure.
Put some silicon lub on the new closure and installed.
Reversed the removal steps.
But this did not fix the problem. Will have to remove the door and inspect the inside of the door's lower hinge assembly.
Remover the four 12mm hex screws.
Lifted empty door off bottem hinge support.
Removed old door closure.
Put some silicon lub on the new closure and installed.
Reversed the removal steps.
But this did not fix the problem. Will have to remove the door and inspect the inside of the door's lower hinge assembly.
Parts Used:

-
Bill from Murphy, NC
-
Difficulty Level:Easy
-
Total Repair Time:Less than 15 mins
-
Tools:Nutdriver
16 of 31 people
found this instruction helpful.
Was this instruction helpful to you?
Thank you for voting!
There was no light on in refrig area
Just replaced the switch, but unfortunately that was not the problem; nor was it the bulb....so I am back to square one.
But Parts Select is a great place to order from. Thank you.
But Parts Select is a great place to order from. Thank you.
Parts Used:

-
Lori from Chuluota, FL
-
Difficulty Level:Easy
-
Total Repair Time:Less than 15 mins
-
Tools:Screw drivers
12 of 19 people
found this instruction helpful.
Was this instruction helpful to you?
Thank you for voting!
broken light switch

-
Richard from West Warwick, RI
-
Difficulty Level:Really Easy
-
Total Repair Time:Less than 15 mins
-
Tools:Screw drivers
12 of 20 people
found this instruction helpful.
Was this instruction helpful to you?
Thank you for voting!
Broken drawer lid
-
Rolf from Stanhope, NJ
-
Difficulty Level:Really Easy
-
Total Repair Time:Less than 15 mins
8 of 8 people
found this instruction helpful.
Was this instruction helpful to you?
Thank you for voting!
Light switch rocker broke, disabling freezer internal light, water dispenser, and ice dispenser
Very simple. Matched female plugs with respective male color coded prong; pushed together then inserted unit in slot of freezer sidewall and rotated into position...job done.
Parts Used:
-
Kenneth from Newton Grove, NC
-
Difficulty Level:Really Easy
-
Total Repair Time:Less than 15 mins
10 of 14 people
found this instruction helpful.
Was this instruction helpful to you?
Thank you for voting!
Door bushing
I bought a set of appliances used online and the fridge door did not align to the other door. I quickly noticed I had lost the lower bushing to the right door upon transportation so I did what any man would do...find a way to fix it! after checking out a few websites I ran accross Partselect and after seeing their "dummy proof" diagrams It was certain I couldn't mess this up considering the loads of bushings to choose from. The order was placed Monday morning and to my surprise I had a package the VERY NEXT DAY!! AMAZING delivery time and quality products. PartSelect is definately my appliace parts source from now on! Thank you!
Parts Used:
-
Carlos from Streamwood, IL
-
Difficulty Level:Really Easy
-
Total Repair Time:Less than 15 mins
9 of 12 people
found this instruction helpful.
Was this instruction helpful to you?
Thank you for voting!
Broken Tab
You will need a Nutdriver a 1/4" size and a philips screwdriver, I'm a young woman, It was easy find the pc. I need here since I lost my manual, in this particular piece the inside part is not included the tab that controls the tempeture, you will have to use the same from the broken one, snap off all and carefully remove it from the insideout of the broken piece to intall it in the replacement, make sure you remember how its going back, that was the hard part of all the repair! after that it was easy as 1, 2, 3!!! have fun!!
Parts Used:

-
CARMEN from CORAL GABLES, FL
-
Difficulty Level:Easy
-
Total Repair Time:15 - 30 mins
-
Tools:Nutdriver, Screw drivers
8 of 9 people
found this instruction helpful.
Was this instruction helpful to you?
Thank you for voting!
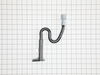
The frost free drain behind the freezer compartment clogged and water collected in the bottom of the freezer and eventually came out the door on the right front of the refrigerator.
The other instructions and the video provided by Parts Direct are pretty good with instructions, but they omit two steps. First, if you have an ice maker, you will need to unplug the connector on the back side of the panel you remove at the back of the refrigerator to access the drain tube. Just unplug it and you can move the removed panel to the side without disconnecting any of the water lines. Second, the instructions say to just reconnect the "bottom end" of the new p-trap drain to the drain pan at the bottom of the refrigerator. They don't tell you there are two places to connect the new p-trap to the drain pan. The original tube/trough connected to the one at the back of the drain pan on the left (viewed from the rear of the refrigerator). At first, it looks like the new p-trap won't reach to it for the connection, but if you look closer, there is another connector to the right of the original one that the p-trap connects to properly. Replacing the drain trough with the new p-trap was actually pretty easy and would only take about a half hour. Add another half hour to give the refrigerator coils a good cleaning as they will need it now that you can reach them. The real time consumer, 3 to 4 hours, is needed to use a hair dryer to melt and clear the ice from the condenser at the back of the freezer so the water can drain. Just take your time and all the ice will eventually melt and drain out so the new p-trap will work properly.
Parts Used:
-
David from ROSEBURG, OR
-
Difficulty Level:Easy
-
Total Repair Time:30 - 60 mins
-
Tools:Nutdriver, Screw drivers
8 of 9 people
found this instruction helpful.
Was this instruction helpful to you?
Thank you for voting!
evaporator coil in freezer section fozen solid, refer not cool
To remove freezer door, push white tabs, inside rail toward back, remove door and rails as one unit. Unscrew plastic rail support on one side, remove ice maker, then back panel. Cut off thermostat, strip old leads, match colors, twist copper wires together, then crimp on new part using connectors provided. Reassemble, hardest part was figuring out how to remove freezer door. Check for continuity between heater lead and white terminal of icemaker plug just to make sure the heater is good while everything is apart.
Parts Used:
-
Michael from Tucson, AZ
-
Difficulty Level:Really Easy
-
Total Repair Time:30 - 60 mins
-
Tools:Nutdriver, Screw drivers
10 of 16 people
found this instruction helpful.
Was this instruction helpful to you?
Thank you for voting!
35 year old water tube became brittle and cracked; leaking water
Unscrewed clamp holding water tube to refrigerator ice maker. Pulled water tube from ice maker and water valve inlet. Cut the new tubing to the exact same length and inserted one end to the water valve inlet and the other end to the ice maker then screwed clamp holding water tube back to the refrigerator ice maker.
Parts Used:
-
Melvin from OPELIKA, AL
-
Difficulty Level:Very Easy
-
Total Repair Time:Less than 15 mins
-
Tools:Screw drivers
8 of 10 people
found this instruction helpful.
Was this instruction helpful to you?
Thank you for voting!