




















GB2026PEKB Amana Refrigerator - Instructions
Keep searches simple. Use keywords, e.g. "leaking", "pump", "broken" or "fit".
Ice stripper broken on ice maker
I unplugged the fridge. Loosened the 2 top screws on the ice maker and removed the lower screw. I disconnected the wiring harness and removed the Ice maker. I removed the plastic timer cover in front. I then loosened the screws on the face of the ice maker and removed the broken ice stripper and replaced it with a new one. Re-tightened the screws on the face, installed the timer cover, plugged in the wiring harness, re-attached the ice maker. Plugged the fridge back in and walla, it was making ice in 30 minutes!
Parts Used:

-
Kenneth from New Braunfels, TX
-
Difficulty Level:Really Easy
-
Total Repair Time:Less than 15 mins
-
Tools:Screw drivers
17 of 24 people
found this instruction helpful.
Was this instruction helpful to you?
Thank you for voting!
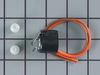
Freezer didn't defrost
I removed the back panel. I used my hair dryer to remove the build up ice. Then I removed the old thermostat, spliced the wires to install the new thermostat, and crimped the wires. I saved $150 doing it myself. If you know how to splice and crimp wires, you can do this; even a caveman can do it.
Parts Used:
-
Charlene from Baltimore, MD
-
Difficulty Level:Really Easy
-
Total Repair Time:15 - 30 mins
15 of 19 people
found this instruction helpful.
Was this instruction helpful to you?
Thank you for voting!
Old one was broken and kept falling off. Very annoying

-
Kathleen from Gainesville, FL
-
Difficulty Level:Really Easy
-
Total Repair Time:Less than 15 mins
13 of 14 people
found this instruction helpful.
Was this instruction helpful to you?
Thank you for voting!
light inside fridge was flickering and clicking
tested bulb good ,replaced door switch first(least expensive)then ordered light socket and circuitboard.If clicking sound is heard replace circuitboard first to save on return shipping because the switch and socket where ok
Parts Used:

-
bill from escondido, CA
-
Difficulty Level:Easy
-
Total Repair Time:15 - 30 mins
-
Tools:Nutdriver
20 of 35 people
found this instruction helpful.
Was this instruction helpful to you?
Thank you for voting!
Broken cup water fill on ice maker
I called the local Amana repair man, wanted $150 for a new ice maker because they could not get the part I needed. Found Partsselect.com and the part cost $17 with shipping. They saved me over $100. The repair was very easy too, just removed a couple of screws.
Thanks,
Matt
Thanks,
Matt
Parts Used:

-
Matthew from Aurora, CO
-
Difficulty Level:Easy
-
Total Repair Time:15 - 30 mins
-
Tools:Nutdriver, Screw drivers
13 of 15 people
found this instruction helpful.
Was this instruction helpful to you?
Thank you for voting!
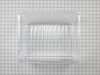
Plastic slide on crisper drawer broke
Ordered new drawer -- fast and easy to find the correct part on this site. I also felt that the price was very reasonable.
Except for one thing, it would have been simple to slide the new drawer in.
The original drawer has a white plastic "face" that is removable.
"Removable" is a relative term. It took my wife and I over 20 mins to very carefully remove the face without breaking. One person could not do it --- you need to hold the drawer firmly while another pries the face off carefully. Once off, it was able to be pushed on to the new drawer -- be firm.
Except for one thing, it would have been simple to slide the new drawer in.
The original drawer has a white plastic "face" that is removable.
"Removable" is a relative term. It took my wife and I over 20 mins to very carefully remove the face without breaking. One person could not do it --- you need to hold the drawer firmly while another pries the face off carefully. Once off, it was able to be pushed on to the new drawer -- be firm.
Parts Used:
-
James from Staten Island, NY
-
Difficulty Level:A Bit Difficult
-
Total Repair Time:30 - 60 mins
12 of 14 people
found this instruction helpful.
Was this instruction helpful to you?
Thank you for voting!
Scratches in Surface
This product comes in a bottle with a brush like Liquid Paper. It goes on incredibly easy. A second coat might be needed. I wanted to prevent rust from setting in so I covered the scratches and dings. The paint is a little brighter since my washer is 10 years old but it still looks great.
Parts Used:
-
Michelle from Richardson, TX
-
Difficulty Level:Really Easy
-
Total Repair Time:Less than 15 mins
83 of 227 people
found this instruction helpful.
Was this instruction helpful to you?
Thank you for voting!
Guide rail on the crisper drawer had snapped off.
I ordered a new crisper drawer from PartSelect over the internet one morning at approximately 10:00am, and the product was delivered, non-express delivery, the next day at about 4:pm. The front coverplate of the old crisper came off easily, and snapped into place on the new drawer easily. The entire repair/replacement took less than 5 minutes.
Service from PartSelect, from locating, to ordering, to rceiving the part could not have been simpler or more efficient. A 5 star experience.Thank you.
Service from PartSelect, from locating, to ordering, to rceiving the part could not have been simpler or more efficient. A 5 star experience.Thank you.
Parts Used:
-
Gerald from Campton, NH
-
Difficulty Level:Really Easy
-
Total Repair Time:Less than 15 mins
12 of 15 people
found this instruction helpful.
Was this instruction helpful to you?
Thank you for voting!
Light switch in freezer side got broken
Took a putty knife and
Removed the old switch removed the spade terminals from the old switch and replaced them on the new switch and just pushed the new switch back in place
Removed the old switch removed the spade terminals from the old switch and replaced them on the new switch and just pushed the new switch back in place
Parts Used:

-
Doug from PLEASANT VIEW, TN
-
Difficulty Level:Really Easy
-
Total Repair Time:Less than 15 mins
10 of 10 people
found this instruction helpful.
Was this instruction helpful to you?
Thank you for voting!
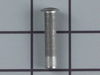
Left front plastic wheel was broken
Pop loose the plastic grate at the bottom.
Locate and remove the wheel leveling screw from the front bottom corner.
Remove cotter pin from the pin that mounts the wheel assembly to the refrigerator. Tap out the mounting pin.
Lift out the wheel assembly.
Remove the Roller pin from the wheel assembly. I used a Dremel tool with a cutting disk. A hack saw will also probably work.
Install the new roller pin and wheel into the wheel assembly. Use a hammer or vice to peen over the end of the roller pin.
Reinstall and adjust wheel assembly.
Locate and remove the wheel leveling screw from the front bottom corner.
Remove cotter pin from the pin that mounts the wheel assembly to the refrigerator. Tap out the mounting pin.
Lift out the wheel assembly.
Remove the Roller pin from the wheel assembly. I used a Dremel tool with a cutting disk. A hack saw will also probably work.
Install the new roller pin and wheel into the wheel assembly. Use a hammer or vice to peen over the end of the roller pin.
Reinstall and adjust wheel assembly.
Parts Used:

-
mike from holly springs, NC
-
Difficulty Level:Really Easy
-
Total Repair Time:30 - 60 mins
-
Tools:Nutdriver, Pliers, Screw drivers
12 of 16 people
found this instruction helpful.
Was this instruction helpful to you?
Thank you for voting!
Refrigerator not defrosting properly. Evaporator froze on three different occasions.
I watched the video provided on-line in your website, which was excellent. The information provided gave me everything I needed to change the board. I already had experience handling control boards and was aware of the static precautions; however, your paperwork was very good detailing how to program the new board. The only small problem I had was reinstalling the temp sensor in its bracket. The lead was very short. Other than that, all went well! The project took between 20 and 30 minutes.
Parts Used:

-
John from GREENSBURG, PA
-
Difficulty Level:Really Easy
-
Total Repair Time:30 - 60 mins
-
Tools:Screw drivers
10 of 11 people
found this instruction helpful.
Was this instruction helpful to you?
Thank you for voting!
fridge door would not close completely by itself
Removed the hinge cover, removed three hinge screws, removed door. Then I used a screwdriver to pry out the hinge bushings, pushed the new ones in and replaced the door. Both Maytag and Lowe's (who held the extended warranty) said that the door was not a repairable item and would have to replace the whole door. Since that would cost more than the value of the fridge, they voided the warranty and returned my cost. Too bad we didn't know about Part Select, we would have held their feet to the fire.
Parts Used:

-
thomas from melbourne, FL
-
Difficulty Level:Really Easy
-
Total Repair Time:Less than 15 mins
-
Tools:Nutdriver, Screw drivers
10 of 11 people
found this instruction helpful.
Was this instruction helpful to you?
Thank you for voting!
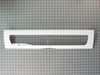
Cracked plastic on pantry drawer lid
Broken lid popped out, new lid popped in. No tools required. 30 seconds to replace. Great price, part shipped within an hour of placing my order and arrived the next day, although I only paid for standard shipping. Excellent service - will definitely order again if the opportunity arises!
Parts Used:
-
Angela from Bay Village, OH
-
Difficulty Level:Really Easy
-
Total Repair Time:Less than 15 mins
10 of 12 people
found this instruction helpful.
Was this instruction helpful to you?
Thank you for voting!
Plastic peg hinging lid to drawer broke
It actually took 1 day and 15 minutes to fix this problem.
I removed the drawers and shelves in the area around the pantry. I carefully took apart the sliders and plastic parts that comprise the endcap/temperature adjuster. Then I tried to replace the unbroken part into the assembly. At that point I realized that something was wrong and I had ordered the wrong part. So I cleaned and put the broken part back in the refrigerator to wait for the replacement.
PartSelect customer service person was terrific and had the correct part on the way to my home immediately. I don't know how, but it arrived the NEXT day!
THEN, it took me 15 minutes to unscrew the sliders, endcap and replace both.
Thank you PartSelect.
I removed the drawers and shelves in the area around the pantry. I carefully took apart the sliders and plastic parts that comprise the endcap/temperature adjuster. Then I tried to replace the unbroken part into the assembly. At that point I realized that something was wrong and I had ordered the wrong part. So I cleaned and put the broken part back in the refrigerator to wait for the replacement.
PartSelect customer service person was terrific and had the correct part on the way to my home immediately. I don't know how, but it arrived the NEXT day!
THEN, it took me 15 minutes to unscrew the sliders, endcap and replace both.
Thank you PartSelect.
Parts Used:

-
Lee from North Potomac, MD
-
Difficulty Level:Really Easy
-
Total Repair Time:Less than 15 mins
-
Tools:Screw drivers
9 of 9 people
found this instruction helpful.
Was this instruction helpful to you?
Thank you for voting!
frig would not get cold
I watched video for repair and it went just like it showed. piece of cake
Parts Used:
-
dennis j from TOMAHAWK, WI
-
Difficulty Level:Very Easy
-
Total Repair Time:15 - 30 mins
-
Tools:Screw drivers
10 of 12 people
found this instruction helpful.
Was this instruction helpful to you?
Thank you for voting!