




















GB2026PEKB Amana Refrigerator - Instructions
Keep searches simple. Use keywords, e.g. "leaking", "pump", "broken" or "fit".
Freeezer door icing up
Loosen 4 screws remove door wipe off frost pull old gasket out of slot push in new gasket instal door that was it. No help need.
Parts Used:
-
PAUL from SOUTH WALES, NY
-
Difficulty Level:Very Easy
-
Total Repair Time:15 - 30 mins
-
Tools:Screw drivers
6 of 7 people
found this instruction helpful.
Was this instruction helpful to you?
Thank you for voting!
broken front wheel
remove front grill. with pry bar and wooden block, elevate side with broken wheel and insert wooden block behind assemble from the exterior bottom. With roller wheel assemble lose from the wooden block remove front elevator screw from the front frame. next remove cotter pin with the pliers and pull assemble pin. next elevate assemble out. drill out axle on the crimp side insert from the hardware store one 5/16 x 21/2 bolt with nut and new wheel. reinsert assemble in the reverse order. Remove wooden block and adjust height of wheel. replace grill. job complete. good job
Parts Used:

-
Robert from Orting, WA
-
Difficulty Level:Difficult
-
Total Repair Time:Less than 15 mins
-
Tools:Nutdriver, Pliers
7 of 10 people
found this instruction helpful.
Was this instruction helpful to you?
Thank you for voting!
chef drawer cover
take the old one out replace with new once - no instructions required, no tools needed
Parts Used:
-
Maria from Cream Ridge, NJ
-
Difficulty Level:Really Easy
-
Total Repair Time:Less than 15 mins
6 of 7 people
found this instruction helpful.
Was this instruction helpful to you?
Thank you for voting!
All three lights are not working...lights are off but refrigerator still cooling. Also, the control box not lit up to show the temparture for freezer and refrigerator
Used a screw driver to pull old switch. Pulled one wire at a time, only two wires. After wires instlled to new switch push new one back in place where the old one was.
Parts Used:

-
Antonio from San Antonio, TX
-
Difficulty Level:Really Easy
-
Total Repair Time:Less than 15 mins
-
Tools:Screw drivers
7 of 10 people
found this instruction helpful.
Was this instruction helpful to you?
Thank you for voting!
Broken glass on pantry door
Pulled the broken pantry door off, and snapped the new door in place. Vry simple.
Parts Used:
-
Michael from Roseville, MI
-
Difficulty Level:Really Easy
-
Total Repair Time:Less than 15 mins
6 of 7 people
found this instruction helpful.
Was this instruction helpful to you?
Thank you for voting!
refrigerator running all the time
Followed the video and installed the new Jazz board. The board cam in 1 piece which had to be separated into two pieces, but the scored area on the board made it less intimidating. At the same time I replaced the two incandescent lamps in the refrigerator area with LED lamps. Getting the housing for the control board apart was the most difficult part, installing the replacement board was a breeze.
Parts Used:

-
Steve from SOUTH ST PAUL, MN
-
Difficulty Level:Easy
-
Total Repair Time:30 - 60 mins
-
Tools:Screw drivers
6 of 7 people
found this instruction helpful.
Was this instruction helpful to you?
Thank you for voting!
water leaked when the paddel was pushed
Followed the video on parts page. I was worried I would brake the cover but learned from the video the right way to remove the front plate. I found the video very informing. Thank you for saving me a service call and the part cost was minimal compared to a new refrigerator .
Parts Used:
-
Monica from EDMOND, OK
-
Difficulty Level:Really Easy
-
Total Repair Time:30 - 60 mins
-
Tools:Nutdriver, Pliers, Screw drivers
6 of 8 people
found this instruction helpful.
Was this instruction helpful to you?
Thank you for voting!
Hinge pin for drawer lid broke
1. Remove all drawers {3}, shelves {glass 1}, shelf support {1}. 2. Remove two {2} screws from End Cap. 3. Carefully remove End Cap and drawer temperature control part on the back wall keeping them aligned as installed. The part on the back wall swings out so that the tab on the left end of the piece may be withdrawn from the securing slot (hole). The two parts should be carefully removed while keeping the two parts at a right angle the way they are installed. The reason for this caution follows. 4. On the back side of both parts are plastic pieces that, I believe, can be easily broken if you are not aware. The pieces are connected together at the right angle. They are the control arms for the temperature control -- on right side End Cap only -- the left side doesn't have them or the rear part on the back wall. 5. The pieces must be disconnected and removed. You must examine and ponder how they are held in place and hooked together in order to disconnect and remove them without damaging them. The same advice is applicable to reinstalling the pieces in the new part -- End Cap. 6. After reassembled and keeping the two parts at a right angle, insert the tab on the left end of the back wall part into the slot (hole) and swing the two parts back into position. 7. Replace the screws. 8. Done, reinstall the shelf, shelf support, and the drawers. NOTE: I ordered the two screws but they were not needed.
Parts Used:


-
Lynn H from MILL CREEK, WA
-
Difficulty Level:Really Easy
-
Total Repair Time:30 - 60 mins
-
Tools:Screw drivers, Socket set
5 of 5 people
found this instruction helpful.
Was this instruction helpful to you?
Thank you for voting!
Top section warm, but freezer okay.
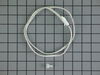
Popped off the control panel at the top behind the door. Found the thermistor and replaced it, cutting the wires and splicing the new one in. Immediately the warm section of the refrigerator was getting below freezing temperature readings, so the cooling vent was not opening. I put the old one back on and the temperature readings went back to being accurate. So this was not the problem. I believe now that the fan somehow is not blowing enough cold air up. So now I'll probably buy a fan motor and maybe a blade and try that. Otherwise the computer module I priced at $500 so I hope it isn't that. I replace the fan motor a few years ago already.
Parts Used:
-
Christopher from HOMESTEAD, FL
-
Difficulty Level:Easy
-
Total Repair Time:15 - 30 mins
-
Tools:Screw drivers
5 of 5 people
found this instruction helpful.
Was this instruction helpful to you?
Thank you for voting!
The Switch Broke...Absolutely Fell Apart.
I simply removed the old switch using 2 small screwdrivers and the old switch case popped out. I then upluged the wires from the old switch and reversed the process. Didn't take longer than 5 minutes begining to end! Thank you for the great service! Duncan quaid
Parts Used:
-
Duncan from Metairie, LA
-
Difficulty Level:Really Easy
-
Total Repair Time:Less than 15 mins
-
Tools:Screw drivers
5 of 5 people
found this instruction helpful.
Was this instruction helpful to you?
Thank you for voting!
Snow in freezer. Gasket separating and magnetic strip exposed
The old gasket peeled out easily. No tools needed. The replacement gasket fit right in the groove. I did not need to immerse the gasket in warm water or use a hair dryer. Nifty trick: once the new gasket is in place, close the freezer door. Run your finger in the center groove of the gasket, which will push the magnet against the fridge. Leave the door closed for an hour. The gasket has then assumed a perfect fit and will continue to fit perfectly.
Parts Used:
-
Jennifer from EVERETT, WA
-
Difficulty Level:Very Easy
-
Total Repair Time:Less than 15 mins
5 of 5 people
found this instruction helpful.
Was this instruction helpful to you?
Thank you for voting!
Dog ate toe grille
Snapped into place with the attached clips. Could not be easier. Really great service from PartSelect--got here faster than I expected. This was a great service--would recommend to everyone!
Parts Used:

-
Julie from Bronxville, NY
-
Difficulty Level:Really Easy
-
Total Repair Time:Less than 15 mins
7 of 11 people
found this instruction helpful.
Was this instruction helpful to you?
Thank you for voting!
Back of freezer froze up and not getting cold in refrigertor.
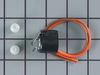
I got on the web blog and saw a conversation on here that sounded just like the problems i have been having with my unit. After reading every thing about it i ordered the part needed and installed it. I let the fridge thaw out over night and started it up the next morning. Its been two month since i installed the part and it is working great!!!
Parts Used:
-
Dustin from Piedmont, OK
-
Difficulty Level:Really Easy
-
Total Repair Time:15 - 30 mins
-
Tools:Screw drivers
8 of 14 people
found this instruction helpful.
Was this instruction helpful to you?
Thank you for voting!
Broken right side peg for deli drawer cover
First, make sure you have the correct part. I had trouble with mine, at first, until I realized that I had received the wrong part... it was same shape but larger. To begin, remove both fruit/vegetable drawers. Remove deli drawer. Remove deli drawer glass panel with both supports. Remove 3, 1/4" hex screws that attach end-cap. Disengage temp control slide and arm from end-cap by carefully moving parts in the direction where they will disengage. Remove temp control slide from end-cap. Now that end-cap is out, remove 2 screws that hold metal drawer slide to end-cap. Attach drawer slide to new end-cap. Attach temp contol slide and connect the plastic arm. Attach end-cap to refrigerator. Replace glass shelf, supports and drawers. Done.
Parts Used:
-
jose from friendswood, TX
-
Difficulty Level:Easy
-
Total Repair Time:15 - 30 mins
-
Tools:Nutdriver
7 of 11 people
found this instruction helpful.
Was this instruction helpful to you?
Thank you for voting!
RH door closure broke
Removed the door and replaced the broken door closure bushing. I had courteous help and responce from Parts Select people. Excelent turn around time on parts delivery.
Parts Used:

-
Estel from Luling, TX
-
Difficulty Level:Easy
-
Total Repair Time:1- 2 hours
-
Tools:Nutdriver, Screw drivers
10 of 21 people
found this instruction helpful.
Was this instruction helpful to you?
Thank you for voting!