




















CSB9120SJ1SS General Electric Microwave - Instructions
Keep searches simple. Use keywords, e.g. "leaking", "pump", "broken" or "fit".
Not heat
-unplug
-remove top and front covers
-unplug wire connectors from heating assembly
-remove heating assembly from metal stand and push out of the way
-remove metal stand from dry
-pull out heating assembly
-install new one in reserve order
-remove top and front covers
-unplug wire connectors from heating assembly
-remove heating assembly from metal stand and push out of the way
-remove metal stand from dry
-pull out heating assembly
-install new one in reserve order
Parts Used:

-
Kip from POWELL, OH
-
Difficulty Level:Very Easy
-
Total Repair Time:15 - 30 mins
-
Tools:Screw drivers, Socket set
1 person
found this instruction helpful.
Was this instruction helpful to you?
Thank you for voting!
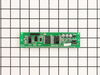
Blank LCD screen
.Shut breaker to microwave
. Remove two screws on each side of microwave cabinet frame holding it to the wood frame
. Get assistance in pulling microwave out of cabinet
.unplug power cable before pulling microwave completely out of cabinet
. Microwave has two separate panels top and sides removed all screws around frame along the door and sides
. Remove top steel panel
. Remove sides
. Locate screws around the electrical board screen just behind the front cover
. Use small flat head screwdriver to move plastic fasteners on each side of the electrical to release the board.
. Identify the LCD screen board and remove two screws on each side unplug the wire harness from the board.
. Lift LCD board off the two set pins
. Replace board
. Replace screws
. Plug harness back into board
. Reassemble electrical board back into display panel. Pay attention to re-engage the two plastic clips before replacing screws.
. Once panel is completely replaced.
. Resemble all panels in reverse order
. Test microwave before installing unit back into cabinet.
. Remove two screws on each side of microwave cabinet frame holding it to the wood frame
. Get assistance in pulling microwave out of cabinet
.unplug power cable before pulling microwave completely out of cabinet
. Microwave has two separate panels top and sides removed all screws around frame along the door and sides
. Remove top steel panel
. Remove sides
. Locate screws around the electrical board screen just behind the front cover
. Use small flat head screwdriver to move plastic fasteners on each side of the electrical to release the board.
. Identify the LCD screen board and remove two screws on each side unplug the wire harness from the board.
. Lift LCD board off the two set pins
. Replace board
. Replace screws
. Plug harness back into board
. Reassemble electrical board back into display panel. Pay attention to re-engage the two plastic clips before replacing screws.
. Once panel is completely replaced.
. Resemble all panels in reverse order
. Test microwave before installing unit back into cabinet.
Parts Used:
-
Ezequiel from Lithia, FL
-
Difficulty Level:Easy
-
Total Repair Time:30 - 60 mins
-
Tools:Screw drivers
1 person
found this instruction helpful.
Was this instruction helpful to you?
Thank you for voting!
Turntable Stopped Working/Display Timer Would Countdown But Not Heat
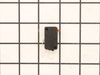
With this model, you must remove the outer covering. Don't try to access the display unit from the front like I've seen in some other GE microwave videos. After removing the outer covering, the switches are easy to replace. They are very visible and easy to get to without taking any other parts off. You will see the door switches just behind the display board. Remove the switch and then remove the connecting wires to ensure you don't inadvertently brake a wire. You will need a tamper resistant star bit to remove 3 or 4 screws from the back panel. All other screws are philips head. I went ahead and replaced both switches (yes...there are two of them) and works like a charm. I saved an $800 microwave for less than $60 and know what to do if it happens again. Appears to be a common problem on this model. Thanks for others making a post...It saved me time and money reading others remarks. Good luck!
Parts Used:
-
Steve from Wesley Chapel, FL
-
Difficulty Level:Really Easy
-
Total Repair Time:30 - 60 mins
-
Tools:Screw drivers
1 person
found this instruction helpful.
Was this instruction helpful to you?
Thank you for voting!
no power in microwave in turn table wouldn't turn light would work act like door was open
remov cover to check voltage and found problem at the interlock switch ohm the switch and found it was open replace both switches it work fine now
Parts Used:
-
johnny from port orange, FL
-
Difficulty Level:Easy
-
Total Repair Time:1- 2 hours
-
Tools:Screw drivers
5 of 13 people
found this instruction helpful.
Was this instruction helpful to you?
Thank you for voting!
The unit would run when the door was open!
First I had to accept the fact that the unit was designed to keep non-professional people from doing any repairs. The switch was installed in such a manner that I had to break the mounting to remove the switch, then drill a hole in the mounting to secure the new switch in place.
Parts Used:
-
Mike from BLUFFTON, SC
-
Difficulty Level:A Bit Difficult
-
Total Repair Time:1- 2 hours
-
Tools:Nutdriver, Pliers, Screw drivers, Socket set, Wrench set
1 person
found this instruction helpful.
Was this instruction helpful to you?
Thank you for voting!
Try to heat food and fuse would blow.

-
bart from new sarpy, LA
-
Difficulty Level:A Bit Difficult
-
Total Repair Time:1- 2 hours
-
Tools:Screw drivers
8 of 22 people
found this instruction helpful.
Was this instruction helpful to you?
Thank you for voting!
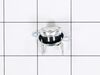
Thermostat quit.
Checked all sensors with a multi-meter, found the thermostat to be the problem, no continuity.
Parts Used:
-
Tony from ITHACA, MI
-
Difficulty Level:Easy
-
Total Repair Time:Less than 15 mins
-
Tools:Screw drivers
1 of 2 people
found this instruction helpful.
Was this instruction helpful to you?
Thank you for voting!
Replace bulb under microwave
Part Select sent the wrong part I did not realize it until prong broke off one of the bulbs. They sent 130v instead of 120v. Return bulbs awaiting resolution.
Parts Used:

-
Andrew from COLUMBIA, MD
-
Difficulty Level:A Bit Difficult
-
Total Repair Time:Less than 15 mins
-
Tools:Screw drivers
2 of 5 people
found this instruction helpful.
Was this instruction helpful to you?
Thank you for voting!
Microwave’s Halogen Light Bulb burned out.
Our Microwave’s Halogen Light Bulb burned out.
We looked in our manual and were able to take the cover off to get to the bulb, but we were unable to unscrew the builb and the bulb in the manual did not match the size of the one you offer (size and part number were different)
We called 1-888-738-4871.
Gentleman who answered was very knowledgeable: answered all of our questions (PULL THE OLD BULB OUT) and assisted us by ordering replacement bulbs.
We (more importantly my wife) were very pleased with the result.
We looked in our manual and were able to take the cover off to get to the bulb, but we were unable to unscrew the builb and the bulb in the manual did not match the size of the one you offer (size and part number were different)
We called 1-888-738-4871.
Gentleman who answered was very knowledgeable: answered all of our questions (PULL THE OLD BULB OUT) and assisted us by ordering replacement bulbs.
We (more importantly my wife) were very pleased with the result.
Parts Used:
-
PETER from NEW YORK, NY
-
Difficulty Level:Really Easy
-
Total Repair Time:30 - 60 mins
-
Tools:Screw drivers
1 of 3 people
found this instruction helpful.
Was this instruction helpful to you?
Thank you for voting!
Bulb burned out
-
Richard from SPRINGFIELD, MA
-
Difficulty Level:Really Easy
-
Total Repair Time:15 - 30 mins
-
Tools:Screw drivers
2 of 7 people
found this instruction helpful.
Was this instruction helpful to you?
Thank you for voting!
No heat.
-
Mack from Jacksonville, FL
-
Difficulty Level:Really Easy
-
Total Repair Time:Less than 15 mins
-
Tools:Pliers, Screw drivers
0 of 1 people
found this instruction helpful.
Was this instruction helpful to you?
Thank you for voting!
No heat
-
Edwin from New York, NY
-
Difficulty Level:Really Easy
-
Total Repair Time:15 - 30 mins
-
Tools:Screw drivers
0 of 1 people
found this instruction helpful.
Was this instruction helpful to you?
Thank you for voting!
no night light
took out cover by removing cover. pulled out light bulbs replaced with new bulbs. replaced cover and tighten screw. very easy
Parts Used:
-
CURTIS from WINDSOR, WI
-
Difficulty Level:Really Easy
-
Total Repair Time:Less than 15 mins
-
Tools:Screw drivers
4 of 14 people
found this instruction helpful.
Was this instruction helpful to you?
Thank you for voting!
Powered Off completely
After reading reviews that there was no power what so ever and a fuse replacement will solve the problem, I tried it. Replacing the fuse is very easy (and I am not handy at all). All you have to do is remove the microwave cover from the top by removing two screws, slide the cover to the left and pulling the cover off. Then remove the grill in front of you, by removing one or two screws. The fuse is in front of you, use pliers and be firm but gentle. Replacing the fuse is easy but it did not solve my problem.
Parts Used:
-
Mohammad from Piscataway, NJ
-
Difficulty Level:Easy
-
Total Repair Time:Less than 15 mins
-
Tools:Screw drivers
Was this instruction helpful to you?
Thank you for voting!
All power to the microwave went out.
PartSelect had helpful repair instructions on-line which made the repair easier and faster. Unfortunately, there were other problems with the oven that immediately blew the new fuse I had just installed. It was then determined that additional repair would most likely cost almost as much as a new microwave.
Parts Used:
-
Michael from East China Township, MI
-
Difficulty Level:Easy
-
Total Repair Time:Less than 15 mins
-
Tools:Screw drivers
Was this instruction helpful to you?
Thank you for voting!