




















ARR620 Amana Range - Instructions
Keep searches simple. Use keywords, e.g. "leaking", "pump", "broken" or "fit".
Burned out broiler element
The repair went real easy. Turned off power, unscrewed two screws at back of oven and disconnected the two wires. Reconnected two wires to new broiler element and remounted the new one with the two screws. Turned the breaker back on and had a steak cooking in no time.
Parts Used:

-
James from Matamoras, PA
-
Difficulty Level:Easy
-
Total Repair Time:15 - 30 mins
-
Tools:Pliers, Screw drivers
3 of 4 people
found this instruction helpful.
Was this instruction helpful to you?
Thank you for voting!
Oven baking element glowing bright red in one spot.
Turned power off! Removed two mounting screws, disconected two slip on wire terminals from heating element. Removed Element from oven. Took about 10 minutes.
Part came in two days. Re installed heating elemet by pushing on the two slip on wire terminals and re installing the two mountint screws. Took about 10 more minutes.
We have been retired for 17 years. Wish all my "Honeydew jobs were this easy!
Part came in two days. Re installed heating elemet by pushing on the two slip on wire terminals and re installing the two mountint screws. Took about 10 more minutes.
We have been retired for 17 years. Wish all my "Honeydew jobs were this easy!
Parts Used:
-
Loyal from Los Alamos, NM
-
Difficulty Level:Really Easy
-
Total Repair Time:15 - 30 mins
-
Tools:Pliers, Screw drivers
3 of 4 people
found this instruction helpful.
Was this instruction helpful to you?
Thank you for voting!
oven door shattered
took out screws on door side. Took out screws that held handle. Inserted glass and put handle back in and then put screws on side back in. There could have been better instructions with glass
Parts Used:
-
Carol from Winter Haven, FL
-
Difficulty Level:Really Easy
-
Total Repair Time:15 - 30 mins
-
Tools:Screw drivers
3 of 4 people
found this instruction helpful.
Was this instruction helpful to you?
Thank you for voting!
Burners weren't heating
Unplugged old burner elements. Popped in new burners. Turned on the burners to test.
Parts Used:
-
james from killingworth, CT
-
Difficulty Level:Really Easy
-
Total Repair Time:Less than 15 mins
3 of 4 people
found this instruction helpful.
Was this instruction helpful to you?
Thank you for voting!
i sat a tupperware bowl on a hot burner and it stuck to the burner so i had to replace it
-
judy from palatine, IL
-
Difficulty Level:Really Easy
-
Total Repair Time:15 - 30 mins
3 of 4 people
found this instruction helpful.
Was this instruction helpful to you?
Thank you for voting!
Blowing Breaker
Removed screws holding rear cover, removed cover. Male connector on Broil Element had rusted off and caused wire to fall onto the frame of the range, shorting it out.
Removed element by disconnecting other wire and removing the single Phillips head screw accessible from inside the oven. Released the element from the two hooks towards the front of the oven near the door and removed.
The wire to the element that burned off had a high temperature female push on connector that I did not have on hand. I had a high temp ring connector so I drilled one of the male connectors on the new element so I could use a small stainless screw and nut which I had to hold the ring terminal on.
After crimping the new connector on I fastened it to the element, connected the other wire and put the rear cover back.
Good to go now!
Removed element by disconnecting other wire and removing the single Phillips head screw accessible from inside the oven. Released the element from the two hooks towards the front of the oven near the door and removed.
The wire to the element that burned off had a high temperature female push on connector that I did not have on hand. I had a high temp ring connector so I drilled one of the male connectors on the new element so I could use a small stainless screw and nut which I had to hold the ring terminal on.
After crimping the new connector on I fastened it to the element, connected the other wire and put the rear cover back.
Good to go now!
Parts Used:
-
Jason from Wrentham, MA
-
Difficulty Level:Easy
-
Total Repair Time:15 - 30 mins
-
Tools:Nutdriver, Screw drivers
3 of 4 people
found this instruction helpful.
Was this instruction helpful to you?
Thank you for voting!
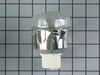
needed new oven light assembly/part #PS1864256
Removed old assembly, attached wires to new and inserted into space for same. Of course you must turn off the range circuit breaker. The part that took the most time was removing the old assembly. Once that was done, the rest took only a few minutes.
Parts Used:
-
Sara from Harwich Port, MA
-
Difficulty Level:A Bit Difficult
-
Total Repair Time:15 - 30 mins
-
Tools:Pliers, Screw drivers
25 of 70 people
found this instruction helpful.
Was this instruction helpful to you?
Thank you for voting!
burner would not stay heated had to wiggle the burner to make heat
Replaced with the new burner works like new. Thanks a bunch!
Parts Used:
-
Marjorie from Swanton, MD
-
Difficulty Level:Really Easy
-
Total Repair Time:Less than 15 mins
3 of 4 people
found this instruction helpful.
Was this instruction helpful to you?
Thank you for voting!
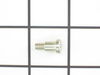
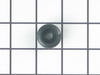
Had to replace a rubber whee that was part of one of the drawer slides.
I was surprised when I was able to find that the (10 year old) parts for one of the drawer slides of my stove were still available. However, I was disappointed that the small bolt that I ordered did not come with a nut. I was lucky to find one in a collection of nuts in my workshop, and so was able to fix the slide. However, I suggest that if you supply someone with a bolt, that you include the nut that is necessary to make it work.
Parts Used:
-
robert from fairport, NY
-
Difficulty Level:Easy
-
Total Repair Time:Less than 15 mins
-
Tools:Pliers, Screw drivers
3 of 4 people
found this instruction helpful.
Was this instruction helpful to you?
Thank you for voting!
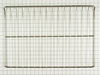
just moved.range oven had only 1 wire oven rack
I just ordered a new wire oven rack from you. When it came all I had to do was to remove it from the carton it came in and place it in the oven. It fit perfectly. Thanks
Parts Used:
-
Mary Jane from Union City, TN
-
Difficulty Level:Really Easy
-
Total Repair Time:Less than 15 mins
3 of 4 people
found this instruction helpful.
Was this instruction helpful to you?
Thank you for voting!
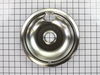
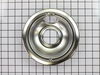
piece of cake. The pictures with the grid background on your website gave me ability to verify what I was purchasing.
This is the second use of Parts Select. First time was for another obscure part for an old microwave, which also worked out VERY well. Both appliances still in action.
Parts Used:
-
George from Irving, TX
-
Difficulty Level:Really Easy
-
Total Repair Time:Less than 15 mins
3 of 4 people
found this instruction helpful.
Was this instruction helpful to you?
Thank you for voting!
burned out element
Shut off power to the oven.
Unscrewed the old broiler element, unplugged it.
plugged in new one, screwed it in.
Turned on the power. Voila!
Unscrewed the old broiler element, unplugged it.
plugged in new one, screwed it in.
Turned on the power. Voila!
Parts Used:
-
Neil from Oak Park, MI
-
Difficulty Level:Really Easy
-
Total Repair Time:Less than 15 mins
-
Tools:Screw drivers
3 of 4 people
found this instruction helpful.
Was this instruction helpful to you?
Thank you for voting!
My son turned on the oven, not realizing the salad spinner was inside.
I called the local appliance parts store and they said it would cost $60-80 and take a week to order. I paid $16 and received my rack in 2 days!
Parts Used:
-
Donna from Orinda, CA
-
Difficulty Level:Really Easy
-
Total Repair Time:Less than 15 mins
3 of 4 people
found this instruction helpful.
Was this instruction helpful to you?
Thank you for voting!
Drip pans were not original to range, I could not get them clean.
I reoved old drip pans and installed new ones. Very easy, they look great!
Parts Used:
-
Lynn from BRADENTON, FL
-
Difficulty Level:Really Easy
-
Total Repair Time:Less than 15 mins
2 of 2 people
found this instruction helpful.
Was this instruction helpful to you?
Thank you for voting!
Burner would not heat up.
Removed 2 screws, cut the wires, pulled the part out that the element plugs into. Replaced the old part with the new one and put the screws back in to hold it, reconnected the wires and plugged in the element. Turned stove on and Valaaaa! It was fixed in 10 minutes! Thanks for the great repair parts!
Parts Used:

-
Nancy from Baldwinsville, NY
-
Difficulty Level:Really Easy
-
Total Repair Time:Less than 15 mins
-
Tools:Screw drivers
2 of 2 people
found this instruction helpful.
Was this instruction helpful to you?
Thank you for voting!