




















66213293K112 Kenmore Dishwasher - Instructions
Keep searches simple. Use keywords, e.g. "leaking", "pump", "broken" or "fit".
Upper rack wheels broke
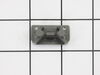
Originally I ordered the rack stop clips but realized I needed the whole upper rack repair kit. It entailed pulling off parts and popping new parts on. Very easy and simple.
Parts Used:
-
kerry from PRNC FREDERCK, MD
-
Difficulty Level:Really Easy
-
Total Repair Time:15 - 30 mins
2 of 2 people
found this instruction helpful.
Was this instruction helpful to you?
Thank you for voting!
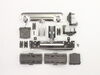
The wheels broke and came off of the top rack had to replace the top rack adjusting unit
Laid all the parts out after removing the old adjusting units off of the top rack. I figured out how the new parts went together and attached them to the rack and replaced the rack in the dishwasher. The instructions that came with the new adjuster kit were not much help they were hard to understand and the pictures weren’t very good easier to figure it out on my own. Hope this helps
Parts Used:
-
bruce from SMYRNA, DE
-
Difficulty Level:Really Easy
-
Total Repair Time:15 - 30 mins
-
Tools:Screw drivers
3 of 5 people
found this instruction helpful.
Was this instruction helpful to you?
Thank you for voting!
The track rollers detached from the rack so it could not be used
The parts seemed more sturdy than the originals that broke, so I hope this will be a better design. The instructions were adequate for installation and the adapter for the screws was supplied with the parts. The most difficult part was removing the old broken rack adjusters since there was no instruction for that.
Parts Used:
-
Constance from SPRINGDALE, AR
-
Difficulty Level:Easy
-
Total Repair Time:15 - 30 mins
-
Tools:Screw drivers
3 of 5 people
found this instruction helpful.
Was this instruction helpful to you?
Thank you for voting!
The diagrams are too faded
Just took the top rack out - set it on a wide flat surface - and removed the old parts and put in the new....since the pictures to follow were a little faded, it took a minute to figure out which direction things went...after that, it was fairly quick and easy.
Parts Used:
-
Rise from Roseburg, OR
-
Difficulty Level:Easy
-
Total Repair Time:30 - 60 mins
-
Tools:Screw drivers
3 of 5 people
found this instruction helpful.
Was this instruction helpful to you?
Thank you for voting!
The part holding the wheels broke from age
One side at a time. Removal a bit difficult, but first side took longer. Second side was a cinch. It would be nice if they had better pictures, but it was a fairly straightforward repair. Nice to have it done and working again
Parts Used:
-
Jan from MAUMELLE, AR
-
Difficulty Level:Easy
-
Total Repair Time:30 - 60 mins
-
Tools:Pliers
2 of 2 people
found this instruction helpful.
Was this instruction helpful to you?
Thank you for voting!
BROKEN ROLLERS ON UPPER RACK
CALLED PARTS SELECT AND THEY SENT A LINK TO A WONDERFUL VIDEO. VERY VERY HELPFUL. THIS COMPANY WAS VERY NICE TO DEAL WITH. ALSO WAS ABLE TO ORDER PART LATE SAT. EVENING WHICH WAS GREAT.
Parts Used:
-
Charles from MARSHFIELD, MO
-
Difficulty Level:Easy
-
Total Repair Time:30 - 60 mins
-
Tools:Pliers, Screw drivers
3 of 5 people
found this instruction helpful.
Was this instruction helpful to you?
Thank you for voting!
Orig. top rack guide failed. Was apparently a poor design that was redesigned
The most difficult part was taking the old, snap-together, parts off. The new parts were easy and quick to install.
Parts Used:
-
Robert from GALLATIN, TN
-
Difficulty Level:Really Easy
-
Total Repair Time:30 - 60 mins
-
Tools:Screw drivers
2 of 2 people
found this instruction helpful.
Was this instruction helpful to you?
Thank you for voting!
Top rack rear stop broken
Remove any pieces of the rear stop by prying it off the end with small flat blade screwdriver. Make sure rack is fully on the roller tracks and then carefully push the new plastic end piece onto the rack. Be sure to orient it correctly by checking the end piece of the other rack.
I ordered two and replace them both at the same time.
I ordered two and replace them both at the same time.
Parts Used:
-
Linda from BEND, OR
-
Difficulty Level:Really Easy
-
Total Repair Time:30 - 60 mins
2 of 2 people
found this instruction helpful.
Was this instruction helpful to you?
Thank you for voting!
The original plastic roller mounting posts on the upper tray had failed, rollers fell out and drawer could not close.
The kit number PS10064063 has much improved stainless steel framework. It's apparent the manufacturer recognized the deficiency of the original design. The instructions are adequate but the minimal essential to do the job. The images on the instruction sheet are low quality. Removal of the old parts isn't well instructed. Removal of the clips holding the failed roller mechanism was obvious, but the only way I could see to remove the adjuster was to pry it apart with a flat head screw driver. The Philips-to-hex head adaptor for installing the only two screws for each side that are needed in the new parts is a nice touch, so it isn't necessary to buy a hex screw driver. All in all a very satisfactory conclusion, since the extended warrantee service had declared the model to be unrepairable. The repair kit at reasonable price avoided the problems of having to remove and replace the dishwasher which otherwise is very satisfactory
Parts Used:
-
Jacob from DAYTONA BEACH, FL
-
Difficulty Level:Really Easy
-
Total Repair Time:30 - 60 mins
-
Tools:Screw drivers
3 of 5 people
found this instruction helpful.
Was this instruction helpful to you?
Thank you for voting!
Wheel insert sheared off and top rack falling down on left side.
Followed the video and it went almost perfect. Had to step back at first and reposition the initial step and then it went quickly. Used a star screwdriver rather than the adapter piece sent with.
Parts Used:
-
Dorothy from MANDAN, ND
-
Difficulty Level:Easy
-
Total Repair Time:30 - 60 mins
-
Tools:Screw drivers
2 of 2 people
found this instruction helpful.
Was this instruction helpful to you?
Thank you for voting!
wheels on upper rack broken
The repair was easy: just remove old assembly and replace with new one which was slightly different. The included directions were very poorly printed and practically useless so if you are not somewhat mechanically inclined it would be almost impossible to install just using the instructions provided
Parts Used:
-
John from Pingree Grove, IL
-
Difficulty Level:Easy
-
Total Repair Time:30 - 60 mins
-
Tools:Nutdriver, Screw drivers
2 of 2 people
found this instruction helpful.
Was this instruction helpful to you?
Thank you for voting!
Wheels broke off upper rack right side
Nomenclature of parts were not named with a drawing, Photos of instructions were very dark and unable to ascertain which was which , they were worthless. It took me 20 minutes to figure out where the new parts belonged. Keep in mind the new parts were different than the old parts. A simple sketch would have helped a lot.
Parts Used:
-
thomas from CLERMONT, FL
-
Difficulty Level:A Bit Difficult
-
Total Repair Time:30 - 60 mins
-
Tools:Screw drivers
2 of 2 people
found this instruction helpful.
Was this instruction helpful to you?
Thank you for voting!
The plastic tabs had broken on 2 of the 4 wheels so they would fall off & the top rack would fall down.
To remove the old parts off the top rack I used a jack knife & a needle nosed plier. The pictures were small in the instructions especially where it showed the small backing plate that held the part that slides up & down. I installed it wrong but I could easily remove it once I pushed in the the tab with a knife blade & then installed it correctly. The updated metal wheels are a big improvement & it works fine now. Huge savings because I did it myself, anyone can do it if you're not in a hurry.
Parts Used:
-
George from SAINT JAMES, MN
-
Difficulty Level:Really Easy
-
Total Repair Time:30 - 60 mins
-
Tools:Pliers, Screw drivers
3 of 6 people
found this instruction helpful.
Was this instruction helpful to you?
Thank you for voting!
glide stop on upper dish rack broken
-
Richard from FORT COLLINS, CO
-
Difficulty Level:Really Easy
-
Total Repair Time:30 - 60 mins
2 of 3 people
found this instruction helpful.
Was this instruction helpful to you?
Thank you for voting!
Wheels on top rack broke off on 2 dishwashers within one week of each other.
The picture of some of the parts for the repair did not match some of the parts received. So new pictures of the most recent parts need to be included in the repair kit. The repair kit only has a few parts, which makes it relatively quick to center and connect. The written instructions were not perfect, especially in identifying which direction the rack adjuster clips need to be oriented, but it was pretty easy to figure out since the clips are well aligned when only put in one way. My son and I connected the right and left rack adjuster wheel assemblies to the upper dish baskets for both dishwashers in about 15 minutes each. That time included taking off the old rack adjuster wheels assemblies and installing and make sure the two new assemblies worked well and fit in the upper water supper valves correctly.
Parts Used:
-
Mike from Albuquerque, NM
-
Difficulty Level:Easy
-
Total Repair Time:15 - 30 mins
-
Tools:Screw drivers
3 of 6 people
found this instruction helpful.
Was this instruction helpful to you?
Thank you for voting!