




















59676254701 Kenmore Refrigerator - Instructions
Keep searches simple. Use keywords, e.g. "leaking", "pump", "broken" or "fit".
3-year-old refrigerator wouldn't cool, digital temp. control stopped working
The digital display numbers (0= off and 7=coldest setting) controlled by the ECB would continually be replaced by straight lines, and the refrigerator would stop cooling. I tried unplugging it for a while. After plugging it in again, it worked (the digital display came on, I set it to "4" and it reached the proper temp), but the problem occurred again the following day, and then it stopped cooling entirely. I ordered the ECB, and it arrived in 3 business days. I watched the installation instruction video, took my time, double-checked the vid a few times to make sure I was doing it correctly, and replaced the ECB by myself in less than an hour. The refrigerator has been running without problems for 3 weeks now. My fridge had a different light bulb configuration than the one in the video, but everything else was the same, and it was a simple repair.
Parts Used:

-
Rebecca from SAINT JOHN, IN
-
Difficulty Level:Easy
-
Total Repair Time:30 - 60 mins
-
Tools:Screw drivers
6 of 6 people
found this instruction helpful.
Was this instruction helpful to you?
Thank you for voting!
No problem
-
Sharon from BRANFORD, CT
-
Difficulty Level:Very Easy
-
Total Repair Time:Less than 15 mins
6 of 7 people
found this instruction helpful.
Was this instruction helpful to you?
Thank you for voting!
Icemaker Quit Making Ice
Removed the two screws that hold flaping door. Removed the single screw that covers the connecting wires. Disconnected the wiring plug. I wiggled out the ice maker. Took off the motor cover. Swapped out one motor for the other. Reinstalled the icemaker in the resverse order of removal. Note the wiring plug in the freeze is very from. It makine s the reconnection differcult.
Parts Used:
-
JOSEPH from LINDENHURST, NY
-
Difficulty Level:A Bit Difficult
-
Total Repair Time:15 - 30 mins
-
Tools:Screw drivers
6 of 7 people
found this instruction helpful.
Was this instruction helpful to you?
Thank you for voting!
lots of clicking/ both fridg/freezer warm then recooling
went on this website to fine info ALWAYS GO TO TYE OF APP. FIRST THEN TYPE IN MODEL NUMBER...THAT WAY YOUR GOING TO GET THE INFO ONLY TO YOUR APP. then search under symptom .." DO LOTS OF READING HERE ",CLICK ON COSTUMER REPAIRS thats were i found additional info on my problem..now on to the fix.. it stands to reason that on my appy. anyways that if the to parts plug into each other then you should think smart and get both avoid the coming "i told you so, you should have ordered the other part to" didnt cost that much extra... word of advice here .. i have big hands so when " they say" to plug both together then plug into the compressor...DONT!!!! plug the start device in first then plug in capacitor... almost forgot!!!! make sure ALL ELECTRICAL PLUGS AND WIRES ARE CLEAN-NOT BURNT ECT... used a can of electric contact cleaner-NOT ON THE NEW PARTS JUST THE COMPRESSOR AND THE WIRE THAT PLUGS INTO THE CAPAC. .. its just that simple... you will have to let the app. run for at least 24-36 hrs. to get cool enough and stabilize. after that we had to readjust the temp settings a little bit no bigee enjoy!!!!!
Parts Used:

-
scott from GROVES, TX
-
Difficulty Level:Really Easy
-
Total Repair Time:Less than 15 mins
-
Tools:Nutdriver, Pliers
6 of 7 people
found this instruction helpful.
Was this instruction helpful to you?
Thank you for voting!
All three lights are not working...lights are off but refrigerator still cooling. Also, the control box not lit up to show the temparture for freezer and refrigerator
Used a screw driver to pull old switch. Pulled one wire at a time, only two wires. After wires instlled to new switch push new one back in place where the old one was.
Parts Used:

-
Antonio from San Antonio, TX
-
Difficulty Level:Really Easy
-
Total Repair Time:Less than 15 mins
-
Tools:Screw drivers
7 of 10 people
found this instruction helpful.
Was this instruction helpful to you?
Thank you for voting!
Water dispensed, but no ice.
We have a side-by-side and the tutorial was different than what we have. Had trouble getting cover off, but finally repaired and WE HAVE ICE! Also took longer than expected.
Saved a lot!
Saved a lot!
Parts Used:
-
NANCY from VALLEY VIEW, OH
-
Difficulty Level:A Bit Difficult
-
Total Repair Time:30 - 60 mins
-
Tools:Nutdriver, Screw drivers
6 of 7 people
found this instruction helpful.
Was this instruction helpful to you?
Thank you for voting!
refrigerator running all the time
Followed the video and installed the new Jazz board. The board cam in 1 piece which had to be separated into two pieces, but the scored area on the board made it less intimidating. At the same time I replaced the two incandescent lamps in the refrigerator area with LED lamps. Getting the housing for the control board apart was the most difficult part, installing the replacement board was a breeze.
Parts Used:
-
Steve from SOUTH ST PAUL, MN
-
Difficulty Level:Easy
-
Total Repair Time:30 - 60 mins
-
Tools:Screw drivers
6 of 7 people
found this instruction helpful.
Was this instruction helpful to you?
Thank you for voting!
The toe grille broke when we 1st put it on
-
Rana from Pittsburg, KS
-
Difficulty Level:Really Easy
-
Total Repair Time:Less than 15 mins
5 of 5 people
found this instruction helpful.
Was this instruction helpful to you?
Thank you for voting!
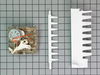
Ice maker just stpooed making ice
The troubleshooting time takes about 20 to 30 minutes. After checking out the solenoid (valve water), the water line, and the electronic board (emitter/receiver) are working fine. The only thing left is the ice module. I called Partselect and talked to a sale rep to make sure I get the right part, and the lady was so helpful by sendind the picture of the part so I can review before ordering it. I received the part in 3 days ( normal shipping) and did the folowings:
1) Unplugged the power cord from refrigerator.
2) Removed the ice module by removed a 1/4" screw from under the right side of the icemaker that retains the icemaker and a “U” plastic clamp and then pull out the whole unit it from the track.
3) Unplugged the cable connected to the ice maker.
4) Using the phillips screw driver to remove the 3 screws. Carefully pulled out the ice module and installed the new ice module.
5) Put the ice maker back to the freezer, plug the cable back to the ice maker and put the clamp and tighten the nut.
6) Plugged the power cable back to the wall.
The first ice I got in an hour and a full bucket of ice in less than 24 hours. I spent less than $80 for the whole thing. Thank you so much Partselect for the great service and the stories posted, it really helped me to get it done.
1) Unplugged the power cord from refrigerator.
2) Removed the ice module by removed a 1/4" screw from under the right side of the icemaker that retains the icemaker and a “U” plastic clamp and then pull out the whole unit it from the track.
3) Unplugged the cable connected to the ice maker.
4) Using the phillips screw driver to remove the 3 screws. Carefully pulled out the ice module and installed the new ice module.
5) Put the ice maker back to the freezer, plug the cable back to the ice maker and put the clamp and tighten the nut.
6) Plugged the power cable back to the wall.
The first ice I got in an hour and a full bucket of ice in less than 24 hours. I spent less than $80 for the whole thing. Thank you so much Partselect for the great service and the stories posted, it really helped me to get it done.
Parts Used:
-
Cuong from Camarillo, CA
-
Difficulty Level:Easy
-
Total Repair Time:Less than 15 mins
-
Tools:Nutdriver, Screw drivers
5 of 5 people
found this instruction helpful.
Was this instruction helpful to you?
Thank you for voting!
The Switch Broke...Absolutely Fell Apart.
I simply removed the old switch using 2 small screwdrivers and the old switch case popped out. I then upluged the wires from the old switch and reversed the process. Didn't take longer than 5 minutes begining to end! Thank you for the great service! Duncan quaid
Parts Used:
-
Duncan from Metairie, LA
-
Difficulty Level:Really Easy
-
Total Repair Time:Less than 15 mins
-
Tools:Screw drivers
5 of 5 people
found this instruction helpful.
Was this instruction helpful to you?
Thank you for voting!
needed a replacement crisper pan drawer for fridge
The part came the next day, very quick. The wrong size ended up in box we recieved. The part # we ordered was correct, just a mix up in the packaging process. I called and the customer service dept. had a new correct crisper pan delivered to my door two days later. Even with the mix up it was very fast and a good price compared to other sites. I would order again in the future.
Parts Used:

-
Angela from Oconomowoc, WI
-
Difficulty Level:Really Easy
-
Total Repair Time:Less than 15 mins
5 of 6 people
found this instruction helpful.
Was this instruction helpful to you?
Thank you for voting!
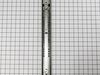
Broken black plastic spring mechanism inside freezer rail
Remove rail and removed broken black plastic spring mechanism with new one and then replace rail.
Parts Used:
-
Ronald from WESTERVILLE, OH
-
Difficulty Level:Really Easy
-
Total Repair Time:30 - 60 mins
-
Tools:Nutdriver, Screw drivers
7 of 12 people
found this instruction helpful.
Was this instruction helpful to you?
Thank you for voting!
RH door closure broke
Removed the door and replaced the broken door closure bushing. I had courteous help and responce from Parts Select people. Excelent turn around time on parts delivery.
Parts Used:

-
Estel from Luling, TX
-
Difficulty Level:Easy
-
Total Repair Time:1- 2 hours
-
Tools:Nutdriver, Screw drivers
10 of 21 people
found this instruction helpful.
Was this instruction helpful to you?
Thank you for voting!
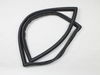
bad gasket
took about 15 min just took off gasket with flat screwdriver cleaned and put it on no glue it has magnets very easy
Parts Used:
-
Donna from Palestine, TX
-
Difficulty Level:Really Easy
-
Total Repair Time:Less than 15 mins
-
Tools:Screw drivers
4 of 4 people
found this instruction helpful.
Was this instruction helpful to you?
Thank you for voting!
Control noisy when opening and closing removed damper housing
Pop off vent cover remove 2 screws removed cover housing and foam. Removed damper by unclipping tabs on left and right side of control lift up and out. Unplugged power wires reinstalled in reverse order.
Parts Used:

-
Nelson from CATSKILL, NY
-
Difficulty Level:Easy
-
Total Repair Time:Less than 15 mins
-
Tools:Screw drivers
4 of 4 people
found this instruction helpful.
Was this instruction helpful to you?
Thank you for voting!