




















59676254701 Kenmore Refrigerator - Instructions
Keep searches simple. Use keywords, e.g. "leaking", "pump", "broken" or "fit".
frig would not get cold
I watched video for repair and it went just like it showed. piece of cake
Parts Used:

-
dennis j from TOMAHAWK, WI
-
Difficulty Level:Very Easy
-
Total Repair Time:15 - 30 mins
-
Tools:Screw drivers
10 of 12 people
found this instruction helpful.
Was this instruction helpful to you?
Thank you for voting!
freezer no staying cold
Replaced the electronics board. Fairly easy job. Video helped enormously. Programing is awkward.
Parts Used:
-
William from EXTON, PA
-
Difficulty Level:Easy
-
Total Repair Time:15 - 30 mins
-
Tools:Screw drivers
9 of 10 people
found this instruction helpful.
Was this instruction helpful to you?
Thank you for voting!
Right hand door would not auto close.
Removed the top door hinge cover.
Remover the four 12mm hex screws.
Lifted empty door off bottem hinge support.
Removed old door closure.
Put some silicon lub on the new closure and installed.
Reversed the removal steps.
But this did not fix the problem. Will have to remove the door and inspect the inside of the door's lower hinge assembly.
Remover the four 12mm hex screws.
Lifted empty door off bottem hinge support.
Removed old door closure.
Put some silicon lub on the new closure and installed.
Reversed the removal steps.
But this did not fix the problem. Will have to remove the door and inspect the inside of the door's lower hinge assembly.
Parts Used:

-
Bill from Murphy, NC
-
Difficulty Level:Easy
-
Total Repair Time:Less than 15 mins
-
Tools:Nutdriver
16 of 31 people
found this instruction helpful.
Was this instruction helpful to you?
Thank you for voting!
There was no light on in refrig area
Just replaced the switch, but unfortunately that was not the problem; nor was it the bulb....so I am back to square one.
But Parts Select is a great place to order from. Thank you.
But Parts Select is a great place to order from. Thank you.
Parts Used:

-
Lori from Chuluota, FL
-
Difficulty Level:Easy
-
Total Repair Time:Less than 15 mins
-
Tools:Screw drivers
12 of 19 people
found this instruction helpful.
Was this instruction helpful to you?
Thank you for voting!
I was cleaning the fridge and I broke the shelf into ten million pieces
Your service is wonderful! I found the part on my mobile phone with a very quick and simple search, then I called in to order. The ordering process took less than 3 minutes, and I had my new shelf in three days. I dreaded ordering, because I just knew that the replacement shelf would be super expensive, but the whole thing cost much less than I expected--less than a dinner out. Thank you so much for your efficient and friendly service!
Parts Used:

-
Sarah from Fayetteville, AR
-
Difficulty Level:Really Easy
-
Total Repair Time:Less than 15 mins
9 of 10 people
found this instruction helpful.
Was this instruction helpful to you?
Thank you for voting!
broken light switch

-
Richard from West Warwick, RI
-
Difficulty Level:Really Easy
-
Total Repair Time:Less than 15 mins
-
Tools:Screw drivers
12 of 20 people
found this instruction helpful.
Was this instruction helpful to you?
Thank you for voting!
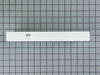
Breaks relatevely often when you accidently have either draws overloaded or open both of them at the same time
You need to lift up the glass part and simply fit it the center rail in, very simple
Parts Used:
-
Aggie from Prospect Hts, IL
-
Difficulty Level:Really Easy
-
Total Repair Time:Less than 15 mins
9 of 11 people
found this instruction helpful.
Was this instruction helpful to you?
Thank you for voting!
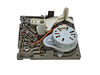
Ice maker motor would run continuously but the blades would not turn and no ice came out.
I wasn't sure what the problem was, but the ice maker seemed simple and on-line resources suggested the control and motor assemblty was at fault. I searched the internet and Partsource had great diagrams which I could match to the part in hand. The price was right (way less than the local stores) so I ordered it.
I unplugged the unit from the power in the freezer, but unplugging the entire refrigerator works too. I pried off the white cover on the front of the ice maker, which snaps in place top and bottom. There are three screws holding the contoller (the entire front piece), remove them, pull off the controller and push the new one in place. You may have to turn the blade shaft to line up the notch on the shaft to the motor. Then reinstall the three screws, The screws go into plastic so it is easy to cross thread them, so be careful, I actually think I did with no ill effects. Snap on the cover and repower the unit. Done. Simple and quick.
I unplugged the unit from the power in the freezer, but unplugging the entire refrigerator works too. I pried off the white cover on the front of the ice maker, which snaps in place top and bottom. There are three screws holding the contoller (the entire front piece), remove them, pull off the controller and push the new one in place. You may have to turn the blade shaft to line up the notch on the shaft to the motor. Then reinstall the three screws, The screws go into plastic so it is easy to cross thread them, so be careful, I actually think I did with no ill effects. Snap on the cover and repower the unit. Done. Simple and quick.
Parts Used:
-
Gary from Medway, MA
-
Difficulty Level:Really Easy
-
Total Repair Time:Less than 15 mins
-
Tools:Screw drivers
9 of 11 people
found this instruction helpful.
Was this instruction helpful to you?
Thank you for voting!
Light switch rocker broke, disabling freezer internal light, water dispenser, and ice dispenser
Very simple. Matched female plugs with respective male color coded prong; pushed together then inserted unit in slot of freezer sidewall and rotated into position...job done.
Parts Used:
-
Kenneth from Newton Grove, NC
-
Difficulty Level:Really Easy
-
Total Repair Time:Less than 15 mins
10 of 14 people
found this instruction helpful.
Was this instruction helpful to you?
Thank you for voting!
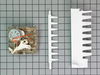
Icemaker Would Not Produce Ice
Contacted sears home service to perform repair. Quote for repair was $307. 43. ( $196. 90 For labor ,$102. 58 For part) plus $75. 00 For service call. Based on the charge, I refused the repair and ordered the appropriate part from "part select" (733947) (wpl 8201515) motor module for a cost of $81. 84. To my surprise, the part arrived the next day and in 15 minutes the icemaker was in a position to make ice, and has been producing ice ever since. To perform the module replacement, I had to remove one screw with a nutdriver, pull the icemaker out, disconnect a wire harness, replace the module and do the reverse procedure to complete the installation. I saved a total of $225. 59 By doing this repair myself. A lesson learned. . . . . I will always investigate doing a repair myself with the help from the people at part select. Very professional and they sent the correct part the first time.
Parts Used:
-
ROBERT from INVERNESS, IL
-
Difficulty Level:Easy
-
Total Repair Time:15 - 30 mins
-
Tools:Nutdriver
8 of 8 people
found this instruction helpful.
Was this instruction helpful to you?
Thank you for voting!
Refrigerator wouldn't cool
First I removed the six screws from the cover. I then disconnected the two wires and pulled the small motor out with its base and removed two screws that hold it in place. I then changed the old one for the new one and set it back in its place. I then set the cover back and turned it on. I was happy again.
Parts Used:

-
Fidel from Forest, MS
-
Difficulty Level:Easy
-
Total Repair Time:30 - 60 mins
-
Tools:Screw drivers
10 of 15 people
found this instruction helpful.
Was this instruction helpful to you?
Thank you for voting!
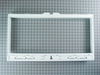
Center crisper rail broken and crisper frame cracked
No instructions came with the parts, however, on the website where we ordered the parts was a video that walked you through every step. We followed the video and had the repair done in no time.
Parts Used:
-
Bonnie from PENSACOLA, FL
-
Difficulty Level:Easy
-
Total Repair Time:30 - 60 mins
-
Tools:Screw drivers
8 of 9 people
found this instruction helpful.
Was this instruction helpful to you?
Thank you for voting!
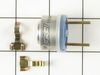
replacing thermostat did not help
Icecubes came out half-way, and refrooze. I figured out, that the melter does not work (HEATER in the icemaker) Voltage measured 105V no load. Studied the Internet, and folloved an advice: shorted the back wire and the blackwire with white stripes.these go to relay contacts. It seems, that the relay contacts are no good on Infrared receiver boaed. I turn off manually the icemaker, when needed
Parts Used:
-
John from Rocky River, OH
-
Difficulty Level:Difficult
-
Total Repair Time:More than 2 hours
-
Tools:Pliers, Screw drivers, Socket set
10 of 15 people
found this instruction helpful.
Was this instruction helpful to you?
Thank you for voting!
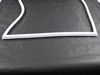
worn out gasket
very quickly took old out and popped new one in place using a popsicle sttick to make sure new gasket was seated
Parts Used:
-
Darla from Linesville, PA
-
Difficulty Level:Really Easy
-
Total Repair Time:15 - 30 mins
9 of 12 people
found this instruction helpful.
Was this instruction helpful to you?
Thank you for voting!
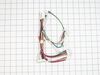
Refrigerator would not cool,freezer worked.
Took too panel down. Remove.bulbs . Unplugged refrigerator. Removed electronic control board .installed new electronic control board. Plugged in refrigerator , programmed control for ice in about 1 hour refrigerator went to work and got cold Simple operation. Donald Harrell, Don's Repair Service .
Parts Used:
-
Donald from SAN SABA, TX
-
Difficulty Level:Very Easy
-
Total Repair Time:15 - 30 mins
-
Tools:Screw drivers
9 of 12 people
found this instruction helpful.
Was this instruction helpful to you?
Thank you for voting!