




















59676254701 Kenmore Refrigerator - Instructions
Keep searches simple. Use keywords, e.g. "leaking", "pump", "broken" or "fit".
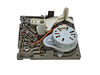
icemaker was overfolwing with water
ordered the part, pulled out the icemaker unit, removed the module, put the new module in, reinstalled the ice maker unit and let it run.
Parts Used:
-
David from West Bloomfield, MI
-
Difficulty Level:Really Easy
-
Total Repair Time:Less than 15 mins
-
Tools:Screw drivers
5 of 9 people
found this instruction helpful.
Was this instruction helpful to you?
Thank you for voting!
Raplaced switch
Repair went well,took about five to ten minutes to disconnect the power from the fridge removed the defective switch installed the new one ,reconnected the power,,,and Let there be light and there was light!
Parts Used:

-
Winston A from Brooklyn, NY
-
Difficulty Level:Really Easy
-
Total Repair Time:Less than 15 mins
-
Tools:Pliers
5 of 9 people
found this instruction helpful.
Was this instruction helpful to you?
Thank you for voting!
Broken clips on old part
-
Rose from OCOEE, FL
-
Difficulty Level:Really Easy
-
Total Repair Time:Less than 15 mins
3 of 3 people
found this instruction helpful.
Was this instruction helpful to you?
Thank you for voting!
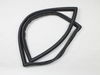
Freezer freezing up. Frost everywhere.
Old gasket pulled of easily with no tools. New gasket was placed on floor and heated with blow dryer to straighten. Then installed new gasket by pressing in with my hands. Noticed that the old gasket was hard and not flexible. All was great. Fit perfectly. No frost after a week. Happy.
Parts Used:
-
Daniel from LAKE CITY, FL
-
Difficulty Level:Very Easy
-
Total Repair Time:Less than 15 mins
3 of 3 people
found this instruction helpful.
Was this instruction helpful to you?
Thank you for voting!
Broken center crisper rail
Total time 10 minutes. 9 minutes to clear out the food and 1 minute to install the part. Installation was self evident and could have been done blindfolded. Part just snapped in.
Parts Used:

-
Allan from Tucson, AZ
-
Difficulty Level:Very Easy
-
Total Repair Time:Less than 15 mins
3 of 3 people
found this instruction helpful.
Was this instruction helpful to you?
Thank you for voting!
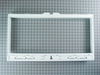
Both pieces were broken.
Just replaced old with new. The glass shelf was good so just moved it to the new pieces. Everything fit perfectly, thank you.
Parts Used:
-
Karen from Riverside, CA
-
Difficulty Level:Very Easy
-
Total Repair Time:15 - 30 mins
3 of 3 people
found this instruction helpful.
Was this instruction helpful to you?
Thank you for voting!
Top section warm, but freezer okay.
Popped off the control panel at the top behind the door. Found the thermistor and replaced it, cutting the wires and splicing the new one in. Immediately the warm section of the refrigerator was getting below freezing temperature readings, so the cooling vent was not opening. I put the old one back on and the temperature readings went back to being accurate. So this was not the problem. I believe now that the fan somehow is not blowing enough cold air up. So now I'll probably buy a fan motor and maybe a blade and try that. Otherwise the computer module I priced at $500 so I hope it isn't that. I replace the fan motor a few years ago already.
Parts Used:
-
Christopher from HOMESTEAD, FL
-
Difficulty Level:Easy
-
Total Repair Time:15 - 30 mins
-
Tools:Screw drivers
3 of 3 people
found this instruction helpful.
Was this instruction helpful to you?
Thank you for voting!
Old fill tube was blocked
Cut old fill tube into pieces, removed and replaced with new tube. Extremely easy.
Parts Used:
-
David from VESTAL, NY
-
Difficulty Level:Very Easy
-
Total Repair Time:15 - 30 mins
-
Tools:Pliers
3 of 3 people
found this instruction helpful.
Was this instruction helpful to you?
Thank you for voting!
Door Gasket had a tear in it.
To repair the problem,I ordered a new gasket. Once I received the gasket, I laid it flat on the floors and hot the blow dryer and blow out the creases in the gasket. I then took off the door by removing the four screws from the door and rest the door on the table. I then removed the old gasket and replaced it with the new one. It took about 15 minutes. My frig. Stop freezing up.
Parts Used:
-
Ida Mae from MEDLEY, FL
-
Difficulty Level:Very Easy
-
Total Repair Time:15 - 30 mins
-
Tools:Screw drivers
3 of 3 people
found this instruction helpful.
Was this instruction helpful to you?
Thank you for voting!
Fresh Food Compartment occasionally going down to 28-30 degrees F
Failure detected as Damper Control at upper rear of compartment would continuously open/close, would never stay open or closed. Sometimes the main board would turn it off (maybe a low thermistor limit?), but it would stick open a bit, and keeping letting freezer air into fridge. Could have potentially been control board, but as it turns out after disassembly of the defective damper, the internal microswitch was stuck in the closed position so it wouldn't shut off the motor. Easy fix by gently pulling the cover off the damper control, pull out Styrofoam encasement, then a phillips to remove the damper assembly. Gently push tabs to release wire connectors. Reverse the process and you're done! If I really wanted to go on the cheap, I could have just changed the microswitch, but that looked like a shaky maneuver at best. This site saved me on this one, so happy to share my experience with this Maytag and its nasty habit of freezing my milk and eggs!! :)
Parts Used:

-
Galen from WASECA, MN
-
Difficulty Level:Really Easy
-
Total Repair Time:15 - 30 mins
-
Tools:Screw drivers
3 of 3 people
found this instruction helpful.
Was this instruction helpful to you?
Thank you for voting!
Ice Maker stopped making ice.
Unplug power to refridg/freezer. Removed the screw in rt. rear bottom of ice maker to remove. After removing slightly, unplug pigtail. Remove ice maker completely. Remove large square cover from left side to expose motor. Remove screws to remove motor. Replce with new. Replace ice maker to freezer, plug pigtail back in, put screw back in rt rear bottom, plug refridg/freezer back into power source. Ice was making in about 2 1/2 hours.
Parts Used:
-
Martin from Palm Coast, FL
-
Difficulty Level:Really Easy
-
Total Repair Time:15 - 30 mins
-
Tools:Screw drivers, Socket set
3 of 3 people
found this instruction helpful.
Was this instruction helpful to you?
Thank you for voting!
The icemaker quit making ice.
With instructions from PartSelect.com this was an easy fix. I tested the motor's electric as suggested and was satisfied that the Motor Module (WPL W10190935) would correct the problem. UNPLUG THE REFRIGERATOR! I popped the outside plastic cover off to expose the unit. (1) remove the wire unit that runs the length of the cube maker (2) remove the 3 screws that secure the motor unit and carefully remove it (3) carefully line up the new unit, slide in place and replace the 3 screws (4) install the wire that was removed in step(1). Connect electric to the refrigerator and wait about 2 hours for your first ice cubes. PartSelect.com is the ONLY supplier that you will ever need! Great instructions and trouble shooting suggestions. Shipping is incredibly fasssst! Customer contact is awesome. Don't hesitate to buy from them! Saved me about $200.! Good luck....Tom in SC
Parts Used:
-
Tom from Summerville, SC
-
Difficulty Level:Really Easy
-
Total Repair Time:15 - 30 mins
-
Tools:Screw drivers
3 of 3 people
found this instruction helpful.
Was this instruction helpful to you?
Thank you for voting!
Broke the Rocker Switch in Fridge side
Popped out with butter knife and unplugged 3 prong connector and reversed with anew switch.
But, unfortunately it got broken again exactly same way as before.
So, I ordered same switch again for 2nd time.
Maytag should recall that Rocker Switch and build with better materials.
But, unfortunately it got broken again exactly same way as before.
So, I ordered same switch again for 2nd time.
Maytag should recall that Rocker Switch and build with better materials.
Parts Used:

-
Sung-Su from BISMARCK, ND
-
Difficulty Level:Very Easy
-
Total Repair Time:Less than 15 mins
4 of 6 people
found this instruction helpful.
Was this instruction helpful to you?
Thank you for voting!
No ice

-
LYNN from PANORA, IA
-
Difficulty Level:Really Easy
-
Total Repair Time:15 - 30 mins
-
Tools:Screw drivers
4 of 6 people
found this instruction helpful.
Was this instruction helpful to you?
Thank you for voting!
lights wouldn't come on/work in refrigerator
Referencing the info/schematics you have on your website, I unscrewed/unattached top-front panel (carefully), from behind the panel you have to detach the wires (2) from the switch, pushed "in" the switch to remove, put in new switch and attach wires to test BEFORE remounting panel. Tada!! Thank you PartSelect! You saved me at least $80...would have been at least $100 to have a repair person come to the house!
Parts Used:
-
Jane from Albuquerque, NM
-
Difficulty Level:Easy
-
Total Repair Time:15 - 30 mins
-
Tools:Pliers, Screw drivers, Socket set
4 of 6 people
found this instruction helpful.
Was this instruction helpful to you?
Thank you for voting!