




















4100 - Instructions
Keep searches simple. Use keywords, e.g. "leaking", "pump", "broken" or "fit".
LE code appeared
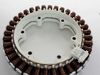
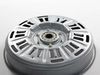
From my research, I thought I needed to replace the Hall Sensor (also known as the Rotor Positioning Sensor). The Part Select site informed me that I might need to also replace the Rotor Assembly. The site said that I could not order just the Hall Sensor - I needed to order the Washer Motor Stator which would include the Hall Sensor. When I received the order, I found that the Motor Stator did not include the Hall Sensor. I found that I could order a part that matched the Hall Sensor I removed from my machine. I then ordered that part. I installed just the new Hall Sensor - the machine worked. I have returned the unused parts.
Parts Used:
-
Denise from LAKE PLACID, NY
-
Difficulty Level:Easy
-
Total Repair Time:30 - 60 mins
-
Tools:Screw drivers, Socket set
19 of 20 people
found this instruction helpful.
Was this instruction helpful to you?
Thank you for voting!
Pump rotor broke off shaft.
There are two pumps in this system. I turned the washer on its side and took off bottom plate. There are several screws holding this on. I then took the entire pump assembly off. There are 3 screws holding each pump on the brown plastic body. Each pump has a positive and negative lead. I switched out the pump and reassembled. The hardest part is getting the 3 "shock absorbers in place with the rubber sleeves. I think the book suggest getting to the pump from the front side but I went through the bottom. Worked good. I did wonder however if the other pump was working. Do you need two pump working to get flow? By replacing one pump I went from no flow to good flow. Cost me $75.00
Parts Used:
-
Bill from COTTAGE GROVE, WI
-
Difficulty Level:A Bit Difficult
-
Total Repair Time:30 - 60 mins
-
Tools:Pliers, Screw drivers
23 of 33 people
found this instruction helpful.
Was this instruction helpful to you?
Thank you for voting!
Wouldn't Keep Water In Dishwasher - Bad Drain Solenoid
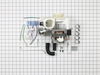
Rather than remove the dishwasher from the counter, I performed the repair inplace, which was much less work (although I did have to lay on the floor).
After turning off the power, I removed the two access panels at the bottom of the unit, disconnected the wiring from the pump and solenoid, loosened the drain hose fitting and drained most of the water out of the unit and into a shallow pan (the drain solenoid was stuck open, so this was pretty easy - otherwise, I still could have manually actuated the drain valve & solenoid to drain water through this hose).
There was alot of water in the unit and my pan overflowed a little. If I was doing this again, think I would have disconnected the drain hose from under the sink and drained out through that into a bucket (I could have controlled that flow better).
Once the water was out, there are just two hose clamps that hold the pump onto the unit (one on top and one in the back), and a stabilizer bar that connects the motor to the front frame. Removed these and the whole unit came right out.
The replacement pump & motor was exactly the same as the one that came out, so I didn't need any of the hose or wire adapters that came in the kit.
Reconnected the two pump connections, motor bracket and wiring, and the unit was good-to-go!
After turning off the power, I removed the two access panels at the bottom of the unit, disconnected the wiring from the pump and solenoid, loosened the drain hose fitting and drained most of the water out of the unit and into a shallow pan (the drain solenoid was stuck open, so this was pretty easy - otherwise, I still could have manually actuated the drain valve & solenoid to drain water through this hose).
There was alot of water in the unit and my pan overflowed a little. If I was doing this again, think I would have disconnected the drain hose from under the sink and drained out through that into a bucket (I could have controlled that flow better).
Once the water was out, there are just two hose clamps that hold the pump onto the unit (one on top and one in the back), and a stabilizer bar that connects the motor to the front frame. Removed these and the whole unit came right out.
The replacement pump & motor was exactly the same as the one that came out, so I didn't need any of the hose or wire adapters that came in the kit.
Reconnected the two pump connections, motor bracket and wiring, and the unit was good-to-go!
Parts Used:
-
Christopher from Nellysford, VA
-
Difficulty Level:Easy
-
Total Repair Time:15 - 30 mins
-
Tools:Nutdriver, Pliers, Screw drivers
20 of 24 people
found this instruction helpful.
Was this instruction helpful to you?
Thank you for voting!
Water was filling continues even the machine was unplugged
I did repaired while looking at video at your site .thanks to your team ..
Parts Used:
-
Sanjay from HOLTSVILLE, NY
-
Difficulty Level:Really Easy
-
Total Repair Time:Less than 15 mins
-
Tools:Pliers, Screw drivers, Wrench (Adjustable)
20 of 24 people
found this instruction helpful.
Was this instruction helpful to you?
Thank you for voting!
Washer was not draining
I shut the water off, unplugged the machine, and had to scoop the water out of the drum. When I opened the drain filter, about another half gallon of water came out. There are two screws that hold on each clip that secures the top. They are hard to see if you have a cramped laundry room and can't see behind the machine. The top slides back about 1-2 inches and lifts up, it can be tough to get it started. The rest of the machine came apart easily, just go slow and look for more screws if it does not come apart. I pried on the band that secures door near the spring to keep from distorting it. The website video was pretty good. The pump assembly has to come out the machine to replace it, the use a 10MM socket. Be careful not to over tighten when you reinstall. They are threading back into plastic. A long set of needle nose pliers works well for the clamps on the 3 hoses. Be sure to get all wiring back into it holders or vibration could cause grounding or shorting issues. I took some time to clear the small drain that is in the door seal. It was clogged with debris. The band was the most difficult thing to put back on. Start at the top. I used a flat screwdriver to help, but be careful not to poke a hole in the seal.
Parts Used:
-
Bryant from USK, WA
-
Difficulty Level:A Bit Difficult
-
Total Repair Time:More than 2 hours
-
Tools:Pliers, Screw drivers, Socket set
19 of 23 people
found this instruction helpful.
Was this instruction helpful to you?
Thank you for voting!
Small leak below lower right corner of door
I took the inner door panel off as described by others on this website, cleaned out all the gunk left by 27 yrs of use, and replaced the door gasket and tub baffles. A Phillips-head screwdriver was required to remove the door panel, but no tools were required to replace any of the parts I ordered. I didn't find it necessary to soak the door gasket in warm water as it was pretty flexible right out of the package. I recommend stretching the gasket slightly while pressing it into the groove, particularly around corners, or it will end up being too short at the end. The rinse aid tank had also been leaking Jet-Dry for a long time, so I cleaned that mess up as well and tried to replace the tank. Unfortunately, the new tank did not fit my model of dishwasher even though this website and GE's stated that it did. The shaft on the tank that pokes through the inner door panel to the inside of the dishwasher was too short because >2 mm of it was taken up by a thick rubber washer and a hard plastic collar (fused to the shaft to hold the washer in place) that had not been part of my original rinse aid tank. PartSelect was very good about refunding me for the incorrectly identified rinse aid tank and stated that they would contact GE about correcting this error on their website as well. I therefore cleaned up my original rinse aid tank, rinsing out all Jet-Dry residue inside it, and put it back into the inner door panel. I researched this part and found that GE has redesigned it twice since my dishwasher was manufactured in 1985 -- my original part is no longer available anywhere. So, I will just not use Jet-Dry and will maybe upgrade to a dishwasher powder that includes rinse agent (e.g., Cascade Complete). Replacing the gasket and tub baffles and cleaning up my original rinse aid tank stopped the leak for less than the cost of a repairman's service call and diagnosis fees -- it would have cost me 3X more if he had provided the parts and done the repairs! Replacing my dishwasher was out of the question as they do not make them like they used to (i.e., no microchips or motherboards to fail in a few years) -- this is the first problem I've had with my dishwasher in 27 years! As a side note, I also learned from my research that my front door panel insert is reversible. I was able to remove a side trim piece, slide out the panel, and turn it over so the color is now white rather than the outdated almond. It's like I have a brand new dishwasher that is ready to go for another 27 years.
Parts Used:

-
Kristina from Springfield, VA
-
Difficulty Level:Easy
-
Total Repair Time:30 - 60 mins
-
Tools:Screw drivers
20 of 26 people
found this instruction helpful.
Was this instruction helpful to you?
Thank you for voting!
Washer would not drain OE error on screen
Wife wanted to spend $800 on a new washer." You don't know what your doing" she said. Parts Select not only showed me how to take it apart, but easy instructions to put back together and a "how bout them apples" to the wife!!!
Parts Used:
-
Karl from BERLIN, CT
-
Difficulty Level:Very Easy
-
Total Repair Time:30 - 60 mins
-
Tools:Pliers, Screw drivers
17 of 18 people
found this instruction helpful.
Was this instruction helpful to you?
Thank you for voting!
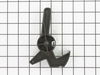
Detergent Cup would not latch closed
I ordered parts before opening. My theory was to have the parts so that the dishwasher was not apart for longer than necessary, in the hope of avoiding the wrath of momma bear who just wants a new one... Once I opened up the door I realized the spring for the main lever arm had broken its mount. I drilled a new hole and reattached the spring. I did not need any parts. However, the original parts corresponding to the three parts I ordered were all beat up and brittle, so I was happy to replace anyway. I did not even explain, she is happy the cup looks new and is happy with the dishwasher. It even says Cascade on it, almost like an upgrade :). If your cup does not latch I would order the three parts I did and also order the lever spring. It was very corroded after 30 years, so I would have replaced if I purchased it. Next time.. :)
Parts Used:

-
Jared from MARLBOROUGH, CT
-
Difficulty Level:Really Easy
-
Total Repair Time:30 - 60 mins
-
Tools:Screw drivers
17 of 18 people
found this instruction helpful.
Was this instruction helpful to you?
Thank you for voting!
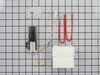
oven comes on to temp but will not reheat to a new temp third time trouble with same range
first of all i have one advantage even though i am 70 yrs old i had a appliance shop for sears in the 60s and 70s and have not forgotten to much of the basics i am still in the security business and up on electronics. last time i had the company repair the oven , 70 dollars for the part 75 dollars for the svs call. (first igniter was on full warranty) well this time i decided to look for trhe part myself, i just went on line typed in oven repair parts and eventually all these sites came up. yours was the most professional looking and i took a chance. guess what everything you promised you delivered. price quality USA made parts and delivered in three days . opened package went to work less than fifteen minutes back in business.
will sure use you again if the need arises thank you
will sure use you again if the need arises thank you
Parts Used:
-
william from newport, VT
-
Difficulty Level:Really Easy
-
Total Repair Time:Less than 15 mins
-
Tools:Nutdriver, Screw drivers
17 of 18 people
found this instruction helpful.
Was this instruction helpful to you?
Thank you for voting!
Oven wouldn't lite
Pulled off the oven door, just lift straight up. Pulled out the floor of the oven, very easy just lift from the back. The only problem I had was the screws holding the old igniter wouldn't come out, they just spun. I snipped them off and picked up two new ones at the hardware store. Pull the wiring harness in through the hole in the back of the oven. Unsnap old wiring harness, snap in new one. Reattach the new igniter, replace floor, replace door. Turn on oven and cook food... fairly easy repair.
Parts Used:
-
E Blake from Dauphin Island, AL
-
Difficulty Level:Easy
-
Total Repair Time:15 - 30 mins
-
Tools:Screw drivers
20 of 27 people
found this instruction helpful.
Was this instruction helpful to you?
Thank you for voting!
Little/no water coming in & dirty dishes
1. Remove access panel under door. 2.Shut off hot water.3. Shut off electric to washer.4. Disconnect water line from water inlet valve.5. Remove small outlet water line from valve. Replace valve & reconnect. OR !!! 1.Take solenoid valve & bracket off of original inlet valve 2. Pull out white plastic diaphragm cover. 3. Remove diaphragm & clean out water holes with a pin. 4. Reassemble valve. 5. Reinstall original water inlet valve & save $27.00
Parts Used:

-
William from Polson, MT
-
Difficulty Level:Really Easy
-
Total Repair Time:30 - 60 mins
-
Tools:Pliers, Socket set, Wrench (Adjustable)
17 of 19 people
found this instruction helpful.
Was this instruction helpful to you?
Thank you for voting!
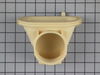
Mice ate holes in the Sump housing
First shut off the Power and Water to Dishwasher, removed from under counter, removed sump screen and retaining clamp from sump housing and then loosened seal from inside dishwasher cavity. Upon removal I went in search of a replacement part and found Parts Select on the web, entered my model and make at there web site and found the part I needed, I could verify the size by the easy picture on a one inch tile background for the dimenision . I called in the order since I wanted overnight service, I received the part and after cleaning the area where it goes I proceded to put things back together, this took about a hour and a half and the dishwasher is back in service
Parts Used:
-
David from East Greenwich, RI
-
Difficulty Level:A Bit Difficult
-
Total Repair Time:1- 2 hours
-
Tools:Nutdriver, Pliers, Screw drivers, Wrench (Adjustable)
16 of 18 people
found this instruction helpful.
Was this instruction helpful to you?
Thank you for voting!
Gas oven took longer and longer to light off even though glow igniter was glowing. When the time grew to 10 minutes and more I knew a repair was needed.
I first removed the bottom of the oven and the flame guide to uncover the igniter assembly. Then I applied WD40 to the two Philip head screws and unscrewed them to release the old igniter. The two wire leads from the igniter went into the back of the oven and I could not reach the connection block. So I pulled the oven out far enough to get behind it and took off the panel covering the electrical wires in back. I had previously disconnected the electrical cord from the wall outlet. After I determined that I could not remove the connection block I returned to the igniter and cut the two existing wires close to the ceramic igniter assembly. I marked the top wire with a Sharpie pen so that I would not mix up the new leads when I install the new igniter. Although it was awkward to work inside the small oven space I was able to strip the insulation back about 1/2 inch and then connect the new igniter wires using the twist caps supplied with the kit. I pushed the wires back into the space and added the insulating material supplied. The igniter assembly was then installed with the original two screws and the other oven covers and flame guide reinstalled easily. After reconnecting the power outlet the oven was back in operation with ignition of gas flame within a minute or so. It was a good feeling and now we do not need to consider replacing the gas range.
Parts Used:
-
Joseph from West Hartford, CT
-
Difficulty Level:A Bit Difficult
-
Total Repair Time:30 - 60 mins
-
Tools:Pliers, Screw drivers
15 of 16 people
found this instruction helpful.
Was this instruction helpful to you?
Thank you for voting!
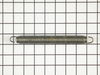
DW door had wood panel, was too heavy to open easily
1) Remove kick plate of dishwasher.
2) Release DW from cabinet.
3) Slide DW forward 6-8" to reveal existing door springs.
4) Lift spring off of door and release spring from frame. Reattach new spring.
5) Slide DW back to original position; reposition to cabinet, and reattach kick plate.
2) Release DW from cabinet.
3) Slide DW forward 6-8" to reveal existing door springs.
4) Lift spring off of door and release spring from frame. Reattach new spring.
5) Slide DW back to original position; reposition to cabinet, and reattach kick plate.
Parts Used:
-
Iris from Bluffton, SC
-
Difficulty Level:Really Easy
-
Total Repair Time:15 - 30 mins
-
Tools:Pliers, Screw drivers, Socket set
17 of 22 people
found this instruction helpful.
Was this instruction helpful to you?
Thank you for voting!
Washer drain pump failure
I watched the video on repairing an LG front load washer. Even though mine is a washer/dryer all-in-one unit to repair was pretty much the same. the only real change with my unit is there are two screws in the area of the bottom filter/drain hose that needs to be removed to be able to take the bottom panel off. This will reveal two more screws to take the front door panel off. To avoid a wet mess, take a wet/dry vac and suck as much water out of the drain hose as you can and have to available to catch any left over water that spills when the hoses are removed. Another thing that can be very useful is to use a piece of cardboard. When you remove the various screws, push them into the cardboard and label each set for reassembly.
Parts Used:
-
Chris from ITHACA, NY
-
Difficulty Level:Easy
-
Total Repair Time:30 - 60 mins
-
Tools:Pliers, Screw drivers
14 of 14 people
found this instruction helpful.
Was this instruction helpful to you?
Thank you for voting!