




















4100 - Instructions
Keep searches simple. Use keywords, e.g. "leaking", "pump", "broken" or "fit".
LG washing machine drain pump failure
PartSelect's instruction video on replacing this drain pump makes this repair doable even for a first timer like me. In addition to following the video instructions, I found that using plastic bicycle tire levers to reinstall the band clamp around the bellows was easier than using a screwdriver and less likely to scratch or damage the area. Beginners might want to take photos when disassembling the washer for reference if needed during reassembly. My washer's innards weren't exactly like the one in the instruction video, and the photos gave me a way to double check as I put it back together.
Parts Used:
-
Steven from LODI, CA
-
Difficulty Level:Easy
-
Total Repair Time:More than 2 hours
-
Tools:Nutdriver, Pliers, Screw drivers
14 of 15 people
found this instruction helpful.
Was this instruction helpful to you?
Thank you for voting!
Washing machine not draining / stopping after wash cycle
I first checked to make sure that there was not a clogged pipe. After making sure that was not the issue, I replaced the drain pump. It was VERY easy following this youtube video, step by step. The hardest part was the getting the ring (with a spring on it) back around the part by the door. I had someone help me stretch it, and hold it so that I could feed it back on. A tool to stretch the spring would have been helpful.
Parts Used:
-
Steve from CHARLOTTE, NC
-
Difficulty Level:Really Easy
-
Total Repair Time:30 - 60 mins
-
Tools:Pliers, Screw drivers
14 of 15 people
found this instruction helpful.
Was this instruction helpful to you?
Thank you for voting!
Seals and gasket corroded
First I removed the old gasket and seals. I replaced the seals and had difficulty getting the gasket to seal at the bottom of the door. I had to remove the seven door screws and was able to manipulate the gasket. Do not lift the inside door cover too far, as the latch may become disengaged, thus creating another problem to repair. I did this repair myself (female).
Parts Used:
-
Bonnie from Broomfield, CO
-
Difficulty Level:A Bit Difficult
-
Total Repair Time:30 - 60 mins
-
Tools:Screw drivers
15 of 18 people
found this instruction helpful.
Was this instruction helpful to you?
Thank you for voting!
Oven stopped while the wife was cooking.
Range is 20+ year old 'condo issue' and difficult to pull from wall since previous owner had tiled it in. Going in from the back was going to be a pain.
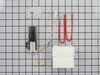
Removed the oven door by opening slightly and pulling up. Removed grilles. Removed bottom of oven by sliding 2 latches in the back forward and pulling it up. Removed 2 screws holding igniter (long-style) to the rear of the burner. Cut power to the range and snipped the 2 igniter wires as close to the igniter as possible, leaving me only about 1 inch of wire to work with. Removed 2 screws holding old plate to rear of the back of the interior of the oven. Snipped off the connector on the new igniter. Carefully stripped about 3/8" of insulation off of all wires and used hemostat to hold wires together while applying the wire nuts. Used hemostat to work the wire nuts and excess wire back into the hole. Stuffed the hole with supplied insulation. Attached new back plate with original screws and attached igniter to burner with original screws. Reapplied power to range and did a test light. It worked, so I reassembled the rest. For me, the worst part was holding the wires together so the wire nuts would 'take', while working inside of the oven. But, an easy and successful job!
Removed the oven door by opening slightly and pulling up. Removed grilles. Removed bottom of oven by sliding 2 latches in the back forward and pulling it up. Removed 2 screws holding igniter (long-style) to the rear of the burner. Cut power to the range and snipped the 2 igniter wires as close to the igniter as possible, leaving me only about 1 inch of wire to work with. Removed 2 screws holding old plate to rear of the back of the interior of the oven. Snipped off the connector on the new igniter. Carefully stripped about 3/8" of insulation off of all wires and used hemostat to hold wires together while applying the wire nuts. Used hemostat to work the wire nuts and excess wire back into the hole. Stuffed the hole with supplied insulation. Attached new back plate with original screws and attached igniter to burner with original screws. Reapplied power to range and did a test light. It worked, so I reassembled the rest. For me, the worst part was holding the wires together so the wire nuts would 'take', while working inside of the oven. But, an easy and successful job!
Parts Used:
-
Marsha from Concord, MA
-
Difficulty Level:A Bit Difficult
-
Total Repair Time:15 - 30 mins
-
Tools:Pliers, Screw drivers
15 of 18 people
found this instruction helpful.
Was this instruction helpful to you?
Thank you for voting!
Drain pump replacement
Watched instructional video. Made it easy
Parts Used:
-
Randall from RAYNHAM, MA
-
Difficulty Level:Really Easy
-
Total Repair Time:30 - 60 mins
-
Tools:Pliers, Screw drivers
13 of 13 people
found this instruction helpful.
Was this instruction helpful to you?
Thank you for voting!
Washer would not drain
I followed the steps outlined on (several) web sites detailing the replacement process. Just Google " LG front load washer won't drain". A couple of small quirks cropped up that required some adaptations such as: I had to purchase an automotive hose clamp to reinstall the main tub drain hose to the pump manifold. I couldn't get the oem clamp back on. It kept slipping out to the jaws of my pliers and I don't own a pair of those clamp pliers that make the job easy. Also, the hex head/phillips screws used to attach the front panel to the frame were very tightly installed AND they had their heads rounded off! I didn't have the hand strength to make the phillips screwdriver loosen them so I used a pair of vise grips to carefully start the process and used the phillips to finish. Finally, the wire loop used to retain the big gasket that seals the front had door is tricky to reinstall. It took two people to get it right. All in all , the videos make the job pretty routine.
Parts Used:
-
David from MURRYSVILLE, PA
-
Difficulty Level:Easy
-
Total Repair Time:1- 2 hours
-
Tools:Pliers, Screw drivers
13 of 14 people
found this instruction helpful.
Was this instruction helpful to you?
Thank you for voting!
Dishwasher pump leaked all the time
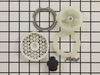
I received my dishwasher as a hand me down, my Aunt never liked the way it cleaned. After it sitting for about 2 years i installed it in my house and found that it leaked all the time from where motor shaft went into the pump housing. After disassembling everything and scouring parts sites online, I found the parts, ordered them. 3 days later i had the parts, and the next day I had a fully functioning leak free dishwasher.
Parts Used:
-
Rob from Newell, IA
-
Difficulty Level:A Bit Difficult
-
Total Repair Time:30 - 60 mins
-
Tools:Pliers, Screw drivers, Socket set, Wrench (Adjustable)
15 of 21 people
found this instruction helpful.
Was this instruction helpful to you?
Thank you for voting!
A small leak from lower R door
The hardest part was figuring out how to disassemble the door to replace the baffles and door gasket. No pictures or clues on the internet or my owners manual. I figured it out myself and the rest was a piece of cake. When the 7 screws were removed, the door liner lifted right out and new parts fit right in.
Parts Used:
-
Louise from Manhattan Beach, CA
-
Difficulty Level:Easy
-
Total Repair Time:30 - 60 mins
-
Tools:Screw drivers
14 of 20 people
found this instruction helpful.
Was this instruction helpful to you?
Thank you for voting!
leak
removed then installed new unit by hand. received order the next day-am. delivery time great.
Parts Used:
-
George from Plainville, MA
-
Difficulty Level:Really Easy
-
Total Repair Time:Less than 15 mins
-
Tools:Screw drivers
12 of 14 people
found this instruction helpful.
Was this instruction helpful to you?
Thank you for voting!
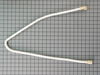
leaking from top filler tube
I replaced the top filler tube. (The $65 price for the filler tube is outrageous. Glad I didn't have a service man fix it. With mark-up it would have cost me over $100 for a 3 foot plastic tube. Crazy!)
While I was add it, I replaced the corner tub baffles.
While I was add it, I replaced the corner tub baffles.
Parts Used:
-
Louis from Lake Katrine, NY
-
Difficulty Level:Easy
-
Total Repair Time:30 - 60 mins
-
Tools:Screw drivers, Wrench set
15 of 24 people
found this instruction helpful.
Was this instruction helpful to you?
Thank you for voting!
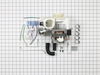
Dishwasher leaking from pump shaft seal
first, I removed the screws holding the dishwasher to the countertop.Then I removed the dishwasher from under the counter. I turned the dishwasher on it's back and loosened the three hose clamps securing the water connections to the pump assembly. I then removed the electrical plug to the motor and the screw holding the support rod to the motor. Then I worked the loosened water connections apart and removed the pump and motor assembly.
Then I removed the hose clamp and plug from one of the orifices on the new pump, and aligned all of the water connections and wiggled the new pump assembly into place. I tightened the hose clamps, Installed the new screw and support bar to the motor, and connected the electrical plug. I then turned the dishwasher upright, reconnected the power cord, water supply and drain lines and started a wash cycle to check the new system for leaks. I found that the extraneous drain solenoid that came attached to the new pump was loose and rattling, so I secured the solenoid shaft and linkage to the pump housing with electrical tape to stop the rattling.
Then I removed the hose clamp and plug from one of the orifices on the new pump, and aligned all of the water connections and wiggled the new pump assembly into place. I tightened the hose clamps, Installed the new screw and support bar to the motor, and connected the electrical plug. I then turned the dishwasher upright, reconnected the power cord, water supply and drain lines and started a wash cycle to check the new system for leaks. I found that the extraneous drain solenoid that came attached to the new pump was loose and rattling, so I secured the solenoid shaft and linkage to the pump housing with electrical tape to stop the rattling.
Parts Used:
-
John from Brentwood, CA
-
Difficulty Level:Really Easy
-
Total Repair Time:15 - 30 mins
-
Tools:Nutdriver, Screw drivers
12 of 15 people
found this instruction helpful.
Was this instruction helpful to you?
Thank you for voting!
Plunger fell out broken tab.
-
Wayne from AUBURN, CA
-
Difficulty Level:Really Easy
-
Total Repair Time:Less than 15 mins
14 of 21 people
found this instruction helpful.
Was this instruction helpful to you?
Thank you for voting!
Tab broke on the magnetic door plunger and wouldn't stay in
Pulled out the old plunger and inserted new one. Just have to make sure the tabs align with the slots.
Parts Used:
-
David from ALLEN, TX
-
Difficulty Level:Very Easy
-
Total Repair Time:Less than 15 mins
11 of 12 people
found this instruction helpful.
Was this instruction helpful to you?
Thank you for voting!
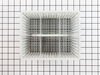
One of my top rack rollers had broken and the rack could not hold any weight
I simply detatched the broken old roller and snapped in the new one. It was very simple and I did not need any tools.
Parts Used:
-
Louis from Fairfield, CA
-
Difficulty Level:Really Easy
-
Total Repair Time:Less than 15 mins
13 of 18 people
found this instruction helpful.
Was this instruction helpful to you?
Thank you for voting!
tub corner baffles were falling apart
I opened the D/W door, used needle nose pliers to remove the old baffles. They come right out. I cleaned the area using paper towels and installed the new baffles. They just sit in the corners with nothing holding them. Simple job.
Parts Used:
-
ROBERT from GLOBE, AZ
-
Difficulty Level:Really Easy
-
Total Repair Time:Less than 15 mins
-
Tools:Pliers
11 of 12 people
found this instruction helpful.
Was this instruction helpful to you?
Thank you for voting!