




















4100 - Instructions
Keep searches simple. Use keywords, e.g. "leaking", "pump", "broken" or "fit".
wheels were worn out and kept falling off
popped old wheel off popped new one on
for the rack roller i took the ends off and slid old rollers off then slid new ones on.
for the rack roller i took the ends off and slid old rollers off then slid new ones on.
Parts Used:
-
JOHN from PURCELLVILLE, VA
-
Difficulty Level:Really Easy
-
Total Repair Time:15 - 30 mins
78 of 83 people
found this instruction helpful.
Was this instruction helpful to you?
Thank you for voting!
Insufficient fill water, dishes not getting clean (valve diaphram had ruptured)
1. Remove lower cover skirt.
2. Shut of water at undersink valve.
3. Unplug power cord or turn off circuit breaker.
4. Disconnect water supply line from fill valve.
5. Unplug the electrical connector from the valve.
6. Remove the 2 valve mounting bracket screws.
7. With loose valve in hand, rotate to gain access to allow release of outlet hose clamp for hose removal.
8. Remove brass fitting from old valve and install on new valve. Use teflon tape on the pipe threads only.
Install new valve by reversing the procedure.
2. Shut of water at undersink valve.
3. Unplug power cord or turn off circuit breaker.
4. Disconnect water supply line from fill valve.
5. Unplug the electrical connector from the valve.
6. Remove the 2 valve mounting bracket screws.
7. With loose valve in hand, rotate to gain access to allow release of outlet hose clamp for hose removal.
8. Remove brass fitting from old valve and install on new valve. Use teflon tape on the pipe threads only.
Install new valve by reversing the procedure.
Parts Used:

-
Don from Mount Vernon, IL
-
Difficulty Level:Easy
-
Total Repair Time:30 - 60 mins
-
Tools:Nutdriver, Screw drivers, Wrench set
71 of 77 people
found this instruction helpful.
Was this instruction helpful to you?
Thank you for voting!
oven failed to light
My son replaced the broiler igniter this spring, so I had a clue as to what was required. This was even easier and since I had back surgery recently & my husband was out of town that was a giant plus!
I unplugged the oven, removed the oven door, found the release latch and removed the oven floor. I then removed the 2 screws that held the igniter in place (I received this stove used and the igniter had evidently been replaced before as it was the same shorter version included in the kit). I pulled the igniter out then removed some insulation and tugged the connector out of the oven floor. I disconnected the igniter and plugged the new one in. I then replaced the connector in the floor, attached the igniter with the screws, replaced the insulation and did a test run (plugged in the oven & turned it on). That was successful so I put the floor back in and put the door back on.
Ta-Dah!
I unplugged the oven, removed the oven door, found the release latch and removed the oven floor. I then removed the 2 screws that held the igniter in place (I received this stove used and the igniter had evidently been replaced before as it was the same shorter version included in the kit). I pulled the igniter out then removed some insulation and tugged the connector out of the oven floor. I disconnected the igniter and plugged the new one in. I then replaced the connector in the floor, attached the igniter with the screws, replaced the insulation and did a test run (plugged in the oven & turned it on). That was successful so I put the floor back in and put the door back on.
Ta-Dah!
Parts Used:
-
Beryl from Dawsonville, GA
-
Difficulty Level:Really Easy
-
Total Repair Time:Less than 15 mins
-
Tools:Screw drivers
71 of 79 people
found this instruction helpful.
Was this instruction helpful to you?
Thank you for voting!
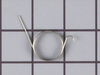
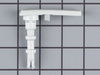
Detergent Dispenser Door Would Not Stay Closed
Completely remove the door from the dishwasher - It's easier to work on this way.
First the spring tension is NOT that critical - the spring just needs to not be mangled and really out of shape. Unless someone has taken a pair of pliers to it, it should be o-k
to use. I even mangled up the slot in the lever with a pair of pliers to try and jeery-rig it and it still works fine - you MUST at least have some resemblance of a groove here for the spring to
catch.
1) hook the hook on the inside of the lever where the slanted groove is on the cam. (see your great diagram)
Put all the pieces together at this point, shaft,spring and lever
2) There are two sets of grooves that correspond to matching notches in both the lever and the dispenser shaft. Make sure these match up to one another.
3) Using a pair of hemostats or tiny pliers pull the other side of the spring clockwise - gently - until you can hook it on the stop that is on the inside door. There will be some
tension of the spring around the shaft to cause the hook to engage to the slot in the plastic lever.
[*]This is where MOST of my problems were at:
4) Test the dispenser door to make sure when you close it, it springs back up. It WILL NOT hold when the door is off.
[*][I was trying to get the dispenser door to stay shut while the door was removed from the washer - this will NOT happen]
5) If number four is happening above, attach the door to the dishwasher.
Very Important: The door will only stay closed when the dishwasher is in the OFF position. Otherwise it will spring open when you try to shut it, because it is suppose to because at this time
in the cycle the detergent would be dispensing - hence the door being OPEN and the door not latching.
First the spring tension is NOT that critical - the spring just needs to not be mangled and really out of shape. Unless someone has taken a pair of pliers to it, it should be o-k
to use. I even mangled up the slot in the lever with a pair of pliers to try and jeery-rig it and it still works fine - you MUST at least have some resemblance of a groove here for the spring to
catch.
1) hook the hook on the inside of the lever where the slanted groove is on the cam. (see your great diagram)
Put all the pieces together at this point, shaft,spring and lever
2) There are two sets of grooves that correspond to matching notches in both the lever and the dispenser shaft. Make sure these match up to one another.
3) Using a pair of hemostats or tiny pliers pull the other side of the spring clockwise - gently - until you can hook it on the stop that is on the inside door. There will be some
tension of the spring around the shaft to cause the hook to engage to the slot in the plastic lever.
[*]This is where MOST of my problems were at:
4) Test the dispenser door to make sure when you close it, it springs back up. It WILL NOT hold when the door is off.
[*][I was trying to get the dispenser door to stay shut while the door was removed from the washer - this will NOT happen]
5) If number four is happening above, attach the door to the dishwasher.
Very Important: The door will only stay closed when the dishwasher is in the OFF position. Otherwise it will spring open when you try to shut it, because it is suppose to because at this time
in the cycle the detergent would be dispensing - hence the door being OPEN and the door not latching.
Parts Used:
-
Joe from Waxhaw, NC
-
Difficulty Level:Easy
-
Total Repair Time:15 - 30 mins
-
Tools:Pliers, Screw drivers
82 of 117 people
found this instruction helpful.
Was this instruction helpful to you?
Thank you for voting!
Oven would not ignite
This repair project was too easy!...and cheap. Sears quoted the price of the igniter at $280 plus the service call and the item cost $41 on PartSelect. The part was received the next day after the order was placed...WOW! So easy, turn off the power to the oven, open the oven door, remove the oven racks and lift the bottom pan of the oven up from the back and set it aside. There you see the flat type igniter in plain view at the back of the oven. Remove two screws with nuts using a nut driver (I had trouble because the screws were corroded and I had to use some, um, force to get them out and swore a little too). Once the screws were out, pull the igniter elecrtic wires and connector from the entrance hole in the back after moving a little insulation out of the way. Release the connector plug and unplug the old igniter and simply plug in the new one. Find new screws and reinstall in reverse order. Be sure to push the connector and wiring back into the hole and cover with the insulation. Very easy job that anyone could do.
Parts Used:
-
Jerry from Paris, TN
-
Difficulty Level:Really Easy
-
Total Repair Time:30 - 60 mins
-
Tools:Nutdriver
57 of 61 people
found this instruction helpful.
Was this instruction helpful to you?
Thank you for voting!
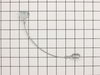
Dishwasher door became really heavy to operate
Note: This procedure assumes replacement of both eyelet cables. It is recommended that both eyelet cables be replaced at the same time.
1. Using a Philips' head screwdriver, remove the four screws holding the lower front panel (below dishwasher door).
2. Remove the faulty eyelet cable(s) hooked into the springs at one end and the door hinges at the other.
3. Take the new eyelet cables and hook them onto the door hinge on either side. Ensure a secure fit.
4. Guide the eyelet cable around the spinwheel on one side and insert the hooks of the springs into the eyelets.
5. Pull on the springs and insert their hooks into the eyelets of the other cable, ensuring a secure fit.
6. Test the door by opening and closing it a few times to ensure the spring has tension.
7. Replace the lower front panel cover removed in step 1 with its screws.
1. Using a Philips' head screwdriver, remove the four screws holding the lower front panel (below dishwasher door).
2. Remove the faulty eyelet cable(s) hooked into the springs at one end and the door hinges at the other.
3. Take the new eyelet cables and hook them onto the door hinge on either side. Ensure a secure fit.
4. Guide the eyelet cable around the spinwheel on one side and insert the hooks of the springs into the eyelets.
5. Pull on the springs and insert their hooks into the eyelets of the other cable, ensuring a secure fit.
6. Test the door by opening and closing it a few times to ensure the spring has tension.
7. Replace the lower front panel cover removed in step 1 with its screws.
Parts Used:
-
Karthik from Springfield, VA
-
Difficulty Level:Really Easy
-
Total Repair Time:Less than 15 mins
-
Tools:Screw drivers
56 of 62 people
found this instruction helpful.
Was this instruction helpful to you?
Thank you for voting!
noisy operation, sometimes did not drain, gave OE code
Thank you for the very helpful YouTube video. After watching the video, I was able to diagnose the problem, buy the part from your website, and complete the repair. This is my personal machine - I am not a professional repairman.
Parts Used:
-
Michael from RALEIGH, NC
-
Difficulty Level:Really Easy
-
Total Repair Time:30 - 60 mins
-
Tools:Pliers, Screw drivers
59 of 80 people
found this instruction helpful.
Was this instruction helpful to you?
Thank you for voting!
Dishwasher leaks from bottom of door......when operated.
Removed 7 screws holding "inner door" in place ( note: 2 bottom screws are different than the rest...keep separate).....remove rinse aid plug....press "tabs" inward to release rinse aid container. ( in this instance....the gasket had failed...which was "part" of the reason dishwasher was leaking during operation)
install new rinse aid container ...making sure that "trip arm" is positioned correctly........and press into place. ( Tabs should expand when container is properly positioned...creating a tight seal).....reuse old rinse aid filler plug.
Replace "inner door" cover....tighten screws.....
remove faulty tub corner baffles....place new ones in corresponding positions ( the baffles form a suction .....to stay in place....no adhesive needed)
Close door and operate as usual........no more leaks!
This is a super easy "no brainer"...that would have cost about half the price of a new dish washer ...had I hired a "professional" to do the repairs!!!!
install new rinse aid container ...making sure that "trip arm" is positioned correctly........and press into place. ( Tabs should expand when container is properly positioned...creating a tight seal).....reuse old rinse aid filler plug.
Replace "inner door" cover....tighten screws.....
remove faulty tub corner baffles....place new ones in corresponding positions ( the baffles form a suction .....to stay in place....no adhesive needed)
Close door and operate as usual........no more leaks!
This is a super easy "no brainer"...that would have cost about half the price of a new dish washer ...had I hired a "professional" to do the repairs!!!!
Parts Used:

-
Richard from Pattonsburg, MO
-
Difficulty Level:Really Easy
-
Total Repair Time:15 - 30 mins
-
Tools:Screw drivers
52 of 60 people
found this instruction helpful.
Was this instruction helpful to you?
Thank you for voting!
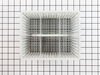
Basket was lost
Opened package from Parts Select.
Removed Silverware basket from package.
Opened Dishwasher.
Inserted Silverware Basket in rack.
Closed Dishwasher.
Discarded shipping package.
Told wife I fixed Dishwasher.
Sat down & had a beer.
Removed Silverware basket from package.
Opened Dishwasher.
Inserted Silverware Basket in rack.
Closed Dishwasher.
Discarded shipping package.
Told wife I fixed Dishwasher.
Sat down & had a beer.
Parts Used:
-
Joseph from Elmendorf, TX
-
Difficulty Level:Really Easy
-
Total Repair Time:Less than 15 mins
49 of 52 people
found this instruction helpful.
Was this instruction helpful to you?
Thank you for voting!
front twoo rack rollers broken ,bottom rack roller broken
for the top rollers you must remove thethe end cap. this was easy ,i placed a block of wood on the outside .placed the punch on the inside where the channel is pushed in to hold cap on. smacked it till it was pushed out far enough to remove end cap. new rollers simply snap on. very easy,
Parts Used:
-
Russell from Pueblo, CO
-
Difficulty Level:Really Easy
-
Total Repair Time:Less than 15 mins
78 of 142 people
found this instruction helpful.
Was this instruction helpful to you?
Thank you for voting!
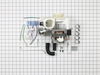
Motor was getting noisier every time we used the dishwasher. We knew it was just a matter of time before it totally quit.
The most difficult part was removing the dishwasher from below the counter. Once that was complete, I simply turned the washer onto it's front surface to access the pump easier. Simply disconnected the electrical connectors, loosened the three hose clamps holding the hoses to the pump. Lastly removed a stiff arm bracket holding the pump. Reversed the order to install the new one using a longer bracket provided with the new unit. Hooked up the electrical connections last and slid the washer back in place. The washer runs like new now and is not making noise. The replacement part was a perfect match.
Parts Used:
-
Glenn from Clemmons, NC
-
Difficulty Level:Easy
-
Total Repair Time:30 - 60 mins
-
Tools:Nutdriver, Pliers, Screw drivers
48 of 53 people
found this instruction helpful.
Was this instruction helpful to you?
Thank you for voting!
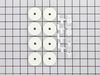
Broken wheel
Siimply removed the rack and replaced the wheel assembly. Very easy
Parts Used:
-
Bennett from Burke, VA
-
Difficulty Level:Really Easy
-
Total Repair Time:Less than 15 mins
-
Tools:Pliers
74 of 139 people
found this instruction helpful.
Was this instruction helpful to you?
Thank you for voting!
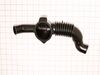
leaking tub-to-pump drain hose
Pull washer away from wall. Unplug cord and remove drain hose from receptacle. Remove 4 screws holding panel to rear of washer. Squeeze and slide back hose clamps on each end of drain hose and loosen center clamp with screwdriver. Remove old hose. Reinstall new hose in reverse order using existing clamps. Re-install back panel.
Parts Used:
-
Leslie from STOWE, VT
-
Difficulty Level:Easy
-
Total Repair Time:30 - 60 mins
-
Tools:Screw drivers
52 of 76 people
found this instruction helpful.
Was this instruction helpful to you?
Thank you for voting!
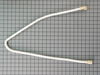
water coming our of dishwasher from upper part of spray arm water supply hose, hole in upper part of hose due to corosion
unscrewed 2 screws found on upper part of dishwasher that connected hose to spray arm found inside of dishwasher to remove hose. gently squeezed rubber gasket to work it into the hole found at the top center of the dishwasher, made sure rubber disc shaped gasket was seated properly into spray arm, screw spray arm back into place. The job was much easier than I thought It took about 20 minutes it saved me from buying a new dishwasher, the delivery of the hose was faster than the speed of light it took about i business day, I order the hose on saturday it arrived tuesday evening. Thanks for your excellent service
Parts Used:
-
Skteven from Philadelphia, PA
-
Difficulty Level:Really Easy
-
Total Repair Time:15 - 30 mins
-
Tools:Socket set
40 of 42 people
found this instruction helpful.
Was this instruction helpful to you?
Thank you for voting!
glow bar would light but oven would not light
I removed the rear access panel on the oven in order to get to the igniter wires. While testing the output voltage of the old igniter when on, I found that it was producing less than 3 volts ac. This was my clue that although the igniter glowed, it was going bad and needed to be replaced. I unpluged the oven, shut off the gas feed to the oven then removed the oven bottom pan (pull two push pins back, lift up and out) and removed the burner baffle wing nut with baffle. This gave easy access to the igniter and it's two mounting screws which i removed using a phillips screw driver. I unpluged the old igniter from the connector, pluged in the new one after routing it through the access hole from inside the oven to the back of the oven where the connector is located.
Mounted the new igniter, replaced the burner baffle, baffle nut, oven bottom, rear access panel cover, checked and turned on the gas, plugged the oven back in and sure enough it fired up right away. if you check the system of how your oven works and find the problem, it's easy to fix it yourself and save serious money...and look like a hero to the rest of the family.
Mounted the new igniter, replaced the burner baffle, baffle nut, oven bottom, rear access panel cover, checked and turned on the gas, plugged the oven back in and sure enough it fired up right away. if you check the system of how your oven works and find the problem, it's easy to fix it yourself and save serious money...and look like a hero to the rest of the family.
Parts Used:
-
David from Van Nuys, CA
-
Difficulty Level:Easy
-
Total Repair Time:Less than 15 mins
-
Tools:Screw drivers
39 of 42 people
found this instruction helpful.
Was this instruction helpful to you?
Thank you for voting!