




















22304 - Instructions
Keep searches simple. Use keywords, e.g. "leaking", "pump", "broken" or "fit".
freezer and fridg would not cool.
Turn off power. unscrewed and removed the panel in the freezer compartment exposing the defroster(6 screws). pulled off the two defroster wires from their lugs. Removed the two plates (4 screws) holding the two heater elements. unsnapped the two heater elements from the plates. installed new heater elements. attached the plates.attached the two wires to the lugs.done
Parts Used:
-
Dennis from Palm Ciity, FL
-
Difficulty Level:Really Easy
-
Total Repair Time:Less than 15 mins
-
Tools:Screw drivers
5 of 6 people
found this instruction helpful.
Was this instruction helpful to you?
Thank you for voting!
Replace broken ice cube trays
-
C MARTIN from TAMPA, FL
-
Difficulty Level:Really Easy
-
Total Repair Time:Less than 15 mins
5 of 6 people
found this instruction helpful.
Was this instruction helpful to you?
Thank you for voting!
Not defrosting
Removed existing and installed the new part. The hard part is reaching to the back of freezer as it not very wide and is farily deep. Hard to get to arms in at the same time.
Parts Used:
-
DON from CHANDLER, AZ
-
Difficulty Level:A Bit Difficult
-
Total Repair Time:30 - 60 mins
-
Tools:Screw drivers
5 of 6 people
found this instruction helpful.
Was this instruction helpful to you?
Thank you for voting!
Downdraft Motor Bearings Shot
I first had to purchase the replacement motor which was quoted from a high of $236 to a low at graingers of$100. 00. The counterman at graingers removed the blower fan from the motor for me with a special long handled allen key. I then degreased and cleaned the blower fan. I had to cut off the screws on the motor and replace the 3 motor isolators and the urethane foam around the motor. I had to thread the 3 wires from the new motor through the bx cable from the old motor and reattach the fan to the motor. Anyone wanting more detailed informatioin may contact me at:mablume@optonline. Net
Parts Used:

-
MICHAEL from LAKE GROVE, NY
-
Difficulty Level:Difficult
-
Total Repair Time:More than 2 hours
-
Tools:Nutdriver, Screw drivers, Socket set, Wrench set
5 of 6 people
found this instruction helpful.
Was this instruction helpful to you?
Thank you for voting!
high blower vibration
blower wheel was caked with dried grease clumps; replaced blower wheel, urethan foam and 3 motor isolators; blower/fan no longer vibrating cooktop.
Parts Used:

-
Lawrence from Chandler, TX
-
Difficulty Level:Really Easy
-
Total Repair Time:1- 2 hours
-
Tools:Nutdriver, Pliers, Screw drivers, Socket set
10 of 21 people
found this instruction helpful.
Was this instruction helpful to you?
Thank you for voting!
refrigerator not cooling properly
Replaced refrigerator cooling control. No luck. Replaced freezer cooling control. No luck. Coils were icing up. Unplugged frig and allowed coils to defrost. After more poking around, found that condenser fan was not spinning. Touch it and it'd start. That was definitely in need of replacement. Replacement was easy. Refrigerator is now running as it should.
Parts Used:

-
Ernie from Windsor, CA
-
Difficulty Level:Really Easy
-
Total Repair Time:1- 2 hours
6 of 9 people
found this instruction helpful.
Was this instruction helpful to you?
Thank you for voting!
Water Fill Cup Broke
The Ice maker unit had to be removed and the shaft had to also be removed, which required dis-assembling the motor drive. The thickness of the shaft and the bearing fill cup prevents it from simply pushing it in place. Other than that I have Ice.
Parts Used:

-
Sam from Las Vegas, NV
-
Difficulty Level:A Bit Difficult
-
Total Repair Time:30 - 60 mins
-
Tools:Screw drivers
5 of 7 people
found this instruction helpful.
Was this instruction helpful to you?
Thank you for voting!
Ice maker eitehr wouldn't make ice, or made odd shaped cubes
First, I shut off the water going to the refrigerator, then removed the ice bin. Then I loosened the two screws on the top of the ice maker (the one toward the front was a little tricky, since you can't see it at all), then removed the screw that fastens the lower bracket to the side of the frig. Then I lifted up on it slightly to remove it from the two upper screws, then unplugged the wiring harness from the side of the refrigerator and lifted the whole unit out of the frig.
I then removed the plastic cover on the front of the ice maker, pressed on the tab to remove the wiring harness from the old ice maker, and installed it on the new ice maker. I then removed the metal arm from the old ice maker and installed it on the new unit as well. The last part that I moved from the old ice maker to the new one was the lower bracket, as the bracket on the new ice maker was bent during shipping.
Once those parts were swapped, I put the plastic cover on the new ice maker, plugged the wiring harness back into the side of the frig, routed the fill tube into the back on the ice maker assembly, and set the unit back on the two upper screws. I then put the screw back in the lower bracket, tightened the two upper screws, and then put the ice bin back in and turned the water back on. After a couple of hours, I threw out the first couple of batches of ice and it is now working as it had in the past.
I also noticed, when looking at the old ice maker, that the black plastic coating was coming off the ice cube tray, so it was a good time to be replacing it anyway. Overall, a very easy job (I was prepared for swearing, parts being slightly off, etc.) and it would have been a shame to have paid someone to do it.
I then removed the plastic cover on the front of the ice maker, pressed on the tab to remove the wiring harness from the old ice maker, and installed it on the new ice maker. I then removed the metal arm from the old ice maker and installed it on the new unit as well. The last part that I moved from the old ice maker to the new one was the lower bracket, as the bracket on the new ice maker was bent during shipping.
Once those parts were swapped, I put the plastic cover on the new ice maker, plugged the wiring harness back into the side of the frig, routed the fill tube into the back on the ice maker assembly, and set the unit back on the two upper screws. I then put the screw back in the lower bracket, tightened the two upper screws, and then put the ice bin back in and turned the water back on. After a couple of hours, I threw out the first couple of batches of ice and it is now working as it had in the past.
I also noticed, when looking at the old ice maker, that the black plastic coating was coming off the ice cube tray, so it was a good time to be replacing it anyway. Overall, a very easy job (I was prepared for swearing, parts being slightly off, etc.) and it would have been a shame to have paid someone to do it.
Parts Used:

-
J. Bradley from Wellsville, NY
-
Difficulty Level:Easy
-
Total Repair Time:Less than 15 mins
-
Tools:Nutdriver
4 of 4 people
found this instruction helpful.
Was this instruction helpful to you?
Thank you for voting!
Ice Maker was leaking
Used socket set to remove screws. Removed the wire harness, then removed lift arm from old ice maker and then put lift arm on the new ice maker. Reinstall wire harness then installed back in freeze with the screws. Video was very helpful. I will do business with Partselect in the future. Shipping was very fast. Thanks Partselect
Parts Used:
-
Robert from Severn, MD
-
Difficulty Level:Really Easy
-
Total Repair Time:Less than 15 mins
-
Tools:Screw drivers, Socket set
4 of 4 people
found this instruction helpful.
Was this instruction helpful to you?
Thank you for voting!
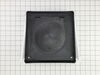
Wall vent cap & damper were broken.
Attached spring to damper, placed on existing 5" duct and secured. Used screwdriver to attach vent cover to damper.
Parts Used:
-
Jim from Sulphur, OK
-
Difficulty Level:Really Easy
-
Total Repair Time:Less than 15 mins
-
Tools:Screw drivers
5 of 7 people
found this instruction helpful.
Was this instruction helpful to you?
Thank you for voting!
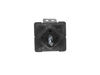
burner would only get super hot. could not control temp.
removed 4 screws holding burner controls. removed wires off old and placed on new burner control. very pleased with quick shippig of part. two days and range was as good as new. excellent company to buy from
Parts Used:
-
Thomas from Exeter, NH
-
Difficulty Level:Really Easy
-
Total Repair Time:Less than 15 mins
-
Tools:Screw drivers
5 of 7 people
found this instruction helpful.
Was this instruction helpful to you?
Thank you for voting!
Reusable Grease filter was old and worn out.
The Model number could no longer be read clearly on the stove electric grill with a down draft vent system, so all I had was the size and looks of the old grease/air filter. I was very happy to come across Parts Select by way of an amazon.com search. Their web site's design and the parts pictures with detailed descriptions made it easy to find exactly what I needed. The grease filter fit perfectly in no time. I have successfully used my cooking grill again.
Parts Used:
-
Gloria from Galveston, TX
-
Difficulty Level:Really Easy
-
Total Repair Time:Less than 15 mins
5 of 7 people
found this instruction helpful.
Was this instruction helpful to you?
Thank you for voting!
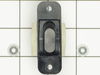
Original switch was cracked, then shorted and melted.
The repair was super-easy, the hardest part was removing the old screws and switch. I slid a putty knife under the old switch and used that to pry up while I unscrewed the nuts. The new switch was a very snug fit on the two studs, which was nice, but the nuts included with the new switch were too small as-is. I could have driven a punch through to increase the diameter, but I kept my old nuts and re-used them instead.
Parts Used:
-
Michael from Bremerton, WA
-
Difficulty Level:Really Easy
-
Total Repair Time:Less than 15 mins
-
Tools:Nutdriver
4 of 4 people
found this instruction helpful.
Was this instruction helpful to you?
Thank you for voting!
Burner switch on stove top burned out
First I turned off the circuit breaker at the control panel to my Jenn-Air stove-top. At 220-volts, don't take any chances with electricity!
Then I removed two screws that hold the burner switch panel in place and lifted up the panel to expose the wires that are connected to all 4 of the burner switches, the exhaust fan and pilot lights that indicate if a burner is turned on.
I used a circuit tester to determine that the power was indeed off to the switches. Again, it is extremely important to respect 220-volts of electricity.
I ensured that all of the wires were already labeled the same as the terminal connections on the switch (i.e. H-1, H-2, P, etc.). If they are not, label them yourself with masking tape around each wire. Then I removed each of the wires connected to the burned out switch with a pair of needle-nose pliers.
Next I removed the two screws attaching the burner switch to the panel.
To install the new switch, repeat all of these directions in reverse, making sure to attach each labeled wire to the correct terminal on the burner switch.
Turn the circuit back on at the circuit breaker. Then test the burner switch and see if the burner heats up. Hopefully, you'll be cooking in no time...............
Then I removed two screws that hold the burner switch panel in place and lifted up the panel to expose the wires that are connected to all 4 of the burner switches, the exhaust fan and pilot lights that indicate if a burner is turned on.
I used a circuit tester to determine that the power was indeed off to the switches. Again, it is extremely important to respect 220-volts of electricity.
I ensured that all of the wires were already labeled the same as the terminal connections on the switch (i.e. H-1, H-2, P, etc.). If they are not, label them yourself with masking tape around each wire. Then I removed each of the wires connected to the burned out switch with a pair of needle-nose pliers.
Next I removed the two screws attaching the burner switch to the panel.
To install the new switch, repeat all of these directions in reverse, making sure to attach each labeled wire to the correct terminal on the burner switch.
Turn the circuit back on at the circuit breaker. Then test the burner switch and see if the burner heats up. Hopefully, you'll be cooking in no time...............
Parts Used:
-
Tom from Lenexa, KS
-
Difficulty Level:Easy
-
Total Repair Time:15 - 30 mins
-
Tools:Pliers, Screw drivers
4 of 5 people
found this instruction helpful.
Was this instruction helpful to you?
Thank you for voting!
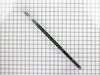
the hinge sring broke on one side of the oven door
Remove the screws from bottom of door to gain access to the hinge screws. Remove the bottom hinge screws and then open the door to gain access to the top hinge screws. CAUTION after removing the top screws close the door as far as possible while still griping the sides of the door. Pull up on the sides to remove the door from the stove. The springs are fully loaded if you have the door open all the way and try to lift up (like I did) the hinge will spring back and get your finger. Install the new hinge, put the door back into the oven, install all the screws and then remove the temporary rivet that comes installed in the new hinge.
Parts Used:
-
stephen from canton, MA
-
Difficulty Level:A Bit Difficult
-
Total Repair Time:15 - 30 mins
-
Tools:Screw drivers
4 of 5 people
found this instruction helpful.
Was this instruction helpful to you?
Thank you for voting!