




















22304 - Instructions
Keep searches simple. Use keywords, e.g. "leaking", "pump", "broken" or "fit".
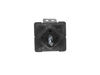
burner would not get hot, switch did not feel right
It would have been nice if basic instructions were supplied ( eg. how to remove switch panel ) but it went rather smoothly.
First killed power the electric stove.
I then removed the screws from the bottom of the panel and then pried the top of the control panel down and then out. I copied the positioning and wire colors.Removed wires from prongs, removed the two screws, replaced old switch with new one .
First killed power the electric stove.
I then removed the screws from the bottom of the panel and then pried the top of the control panel down and then out. I copied the positioning and wire colors.Removed wires from prongs, removed the two screws, replaced old switch with new one .
Parts Used:
-
Richard from Howell, NJ
-
Difficulty Level:Really Easy
-
Total Repair Time:15 - 30 mins
-
Tools:Screw drivers
4 of 5 people
found this instruction helpful.
Was this instruction helpful to you?
Thank you for voting!
broken switch
Took the (6) screws holding the top of the stove out, then removed the switch screws(2). Then lifted the top, so as I could reach and get at the switch. And then I repeated the above. It was alot easier the second time. Duh I erred the first time and replaced the wrong one and before I relized it, I opened the switch to check out. All in all. I still got satisfaction from doing it myself. Thanks Parts Select
Parts Used:
-
Al from Monroe Twp, NJ
-
Difficulty Level:Really Easy
-
Total Repair Time:Less than 15 mins
-
Tools:Screw drivers, Socket set
4 of 5 people
found this instruction helpful.
Was this instruction helpful to you?
Thank you for voting!
Fan switch was broke; fan would start on it's own, but not when I needed it. Grease filter was in pieces.
Be sure to turn power off; then follow the instructions on the older posts.
Parts Used:

-
Bertram from Blacksburg, VA
-
Difficulty Level:Really Easy
-
Total Repair Time:Less than 15 mins
-
Tools:Screw drivers
4 of 5 people
found this instruction helpful.
Was this instruction helpful to you?
Thank you for voting!
Front element would not turn on
I removed the 4 screws that held on the front panel as well as the knob of the defective switch. With the panel free, I pulled the wire connections from the rear of the switch with needle-nose pliers. I then removed the 2 screws which secured the switch and removed it. I then reversed the process with the new switch. It could not have been easier.
Parts Used:
-
Arthur from Cardinal, VA
-
Difficulty Level:Really Easy
-
Total Repair Time:15 - 30 mins
-
Tools:Pliers, Screw drivers
4 of 5 people
found this instruction helpful.
Was this instruction helpful to you?
Thank you for voting!
Water overflowing ice maker
Removed the 3 screws that hold the ice maker in place and remove the cover and level wire. Put the cover and wire on new part and install the 3 screws. Had ice within 1 hour. A very easy job for the do it yourselfer. Suspect the heat coil that melts the cubes was not working in the old unit and cubes stayed in the tray.
Parts Used:

-
James from Denver, NC
-
Difficulty Level:Really Easy
-
Total Repair Time:Less than 15 mins
-
Tools:Nutdriver
5 of 8 people
found this instruction helpful.
Was this instruction helpful to you?
Thank you for voting!
leaking ice maker,big chunks ot ice were forming and had to remove them 2-3 times a day
removed old ice maker by taking out a couple of screws in the back of freezer,when new ice maker arrived i saw that it didn't have the same hose apparatus as old one so I easily took apart old one then took apart new one and switched them out-very-- easily done for a 61 yr old lady I might add-- also had to reinstall ice maker arm off old ice maker as new one does not come with one Then installed new ice maker in freezer I am very very pleased,sure saved a lot of money doing it my self
Parts Used:
-
Linda from Johnson City, NY
-
Difficulty Level:Really Easy
-
Total Repair Time:30 - 60 mins
-
Tools:Screw drivers
4 of 5 people
found this instruction helpful.
Was this instruction helpful to you?
Thank you for voting!
Ice maker just stopped making ice
This was the third icemaker replaced since January 1999. Improvement need to be made in the design of the icemaker so that more than 2-3 years of life is available.
The most difficult part was disconnecting the power plug in the back of the icemaker. You must squeeze the upper and lower tabs together and pull out at the same time to disconnect. Once this is done, take out one nut head screw, lift up on the icemaker and remove from the hanger. Be careful that you don't break the plastic tabs on the hangers. Replace new icemaker in reverse, feed water supply where it must go in the back, resnap onto hangers, replace the nut head screw and snap in the power plug. It took about 2 hours before the icemaker began making ice. It has been working fine ever since. PS. I saved about $200.00 over having a repairman come in and replace the unit.
The most difficult part was disconnecting the power plug in the back of the icemaker. You must squeeze the upper and lower tabs together and pull out at the same time to disconnect. Once this is done, take out one nut head screw, lift up on the icemaker and remove from the hanger. Be careful that you don't break the plastic tabs on the hangers. Replace new icemaker in reverse, feed water supply where it must go in the back, resnap onto hangers, replace the nut head screw and snap in the power plug. It took about 2 hours before the icemaker began making ice. It has been working fine ever since. PS. I saved about $200.00 over having a repairman come in and replace the unit.
Parts Used:
-
Thomas from Valencia, PA
-
Difficulty Level:A Bit Difficult
-
Total Repair Time:1- 2 hours
-
Tools:Nutdriver
4 of 5 people
found this instruction helpful.
Was this instruction helpful to you?
Thank you for voting!
Fill cup broke.
Very easy to order from parts select. Took seconds to replace.
Parts Used:

-
Aliki from Miami, FL
-
Difficulty Level:Really Easy
-
Total Repair Time:Less than 15 mins
6 of 12 people
found this instruction helpful.
Was this instruction helpful to you?
Thank you for voting!
Ice maker stopped making ice
Remove 1 screw under ice maker. Gently pull downwards to unhook ice maker. Disconnected 4 pin wire connector. Remove and set aside the cover and wire loop you will need on new ice maker. Reverse the steps to install new maker. Once new ice maker is installed you will have to wait 2-4 hours for ice. There is a thermostat that will need to reach 10 degrees F to operate.
Parts Used:
-
Daniel from DAVISBURG, MI
-
Difficulty Level:Really Easy
-
Total Repair Time:Less than 15 mins
-
Tools:Nutdriver, Screw drivers
3 of 3 people
found this instruction helpful.
Was this instruction helpful to you?
Thank you for voting!
just old and worn out
I had the most difficulty finding the right place to purchase replacement parts,after that it all went swimmingly.I took off the old grille and screen,dropped in the new ones,
Parts Used:
-
john from fleming island, FL
-
Difficulty Level:Really Easy
-
Total Repair Time:Less than 15 mins
4 of 6 people
found this instruction helpful.
Was this instruction helpful to you?
Thank you for voting!
Burner got excessively hotand couldn't be regulated
The hardest part was breaking the caulk seal between the range and the cabinet. An extra set of hands made the job easier, by holding the panel while I connected the switch. The switch was delivered promptly and I am very happy with Parts Select. I found the other repair stories very helpful.
Parts Used:
-
Vernon from Wells, ME
-
Difficulty Level:Easy
-
Total Repair Time:15 - 30 mins
-
Tools:Pliers, Screw drivers
3 of 3 people
found this instruction helpful.
Was this instruction helpful to you?
Thank you for voting!
broken vent cap
-
Robert from Shaker Hts, OH
-
Difficulty Level:Really Easy
-
Total Repair Time:15 - 30 mins
-
Tools:Screw drivers
3 of 3 people
found this instruction helpful.
Was this instruction helpful to you?
Thank you for voting!
Replaced Fan Switch on Jenn Air Stove Top
Very easy repair. Disconnected the old fan switch, replaced with new one...The only problem with the new one is the round nuts that come with the new switch are not big enough to fit around the fixed posts on the stove...The solution...I saved the old ones.....
Parts Used:
-
Tom from Wilmington, NC
-
Difficulty Level:Really Easy
-
Total Repair Time:Less than 15 mins
-
Tools:Screw drivers
3 of 3 people
found this instruction helpful.
Was this instruction helpful to you?
Thank you for voting!
Ice Build Up On Evap Coil
Removing the old heater coil was a bit of a task as you need to take off all the brackets holding the heater coil and then remove the wiring from back of the coil. Installing the new heater coil assembly in the brackets and feeding the wirings back up to the top was a major task. Need to have long arms as the heater is located way back in the freezer compartment. The part was the exact match. The part was delivered in 2 days. Thanks alot. Will use your site again.
Parts Used:
-
bobbie from belleville, IL
-
Difficulty Level:Very Difficult
-
Total Repair Time:1- 2 hours
-
Tools:Nutdriver, Pliers
4 of 6 people
found this instruction helpful.
Was this instruction helpful to you?
Thank you for voting!
Refridgerator constandly running
Turned out the defrost heater has burnt out in the freezer compartment on both heater tubes. To get to it. 1) take out all the shelves 2)remove the light bulb 3)unscrew 6 screws for back panel 4)Mine had a lot frost build up on the evaporator coils which I used a portable heater to defrost. which it took about 2 hrs to get all the frost thawed out. 5) Defrost heaters are located below each of the coils remove 2 screws on each plate there are 2 plates holding the heaters in place. 5) You may have to bend the sheet metal in order to get the heaters out and trace the wires to where it connects to towards the top or the freezer. 6) Put in the new heaters and plug in then put back together. 7) I also replaced the Defrost thermometer which it is easy to replaced while I had it apart. Now the fridge works perfect just like new.
Parts Used:

-
David from Clintonville, WI
-
Difficulty Level:Easy
-
Total Repair Time:More than 2 hours
-
Tools:Nutdriver, Screw drivers
3 of 3 people
found this instruction helpful.
Was this instruction helpful to you?
Thank you for voting!