




















22304 - Instructions
Keep searches simple. Use keywords, e.g. "leaking", "pump", "broken" or "fit".
condenser fan stopped working
1. Removed the cardboard cover.
2. Removed the terminal block and unplugged the old motor.
3. Removed three screws that held old motor to the bracket.
4. Removed the fan blade from the old motor.
5. Installed the fan blade (after cleaning) to the new motor.
6. Crimped on new wire terminals onto the leads on the new motor.
7. Installed the new motor using the fasteners provided.
8. Plugged the new motor wires onto the proper terminals in the terminal block.
9. remounted the terminal block.
10. reinstalled the cardboard cover.
2. Removed the terminal block and unplugged the old motor.
3. Removed three screws that held old motor to the bracket.
4. Removed the fan blade from the old motor.
5. Installed the fan blade (after cleaning) to the new motor.
6. Crimped on new wire terminals onto the leads on the new motor.
7. Installed the new motor using the fasteners provided.
8. Plugged the new motor wires onto the proper terminals in the terminal block.
9. remounted the terminal block.
10. reinstalled the cardboard cover.
Parts Used:

-
Steven from Brigham City, UT
-
Difficulty Level:Really Easy
-
Total Repair Time:15 - 30 mins
-
Tools:Nutdriver
10 of 12 people
found this instruction helpful.
Was this instruction helpful to you?
Thank you for voting!
Oven light stays on when door is shut.
I replaced the hinges as described in other posts and the problem was solved. When the oven was 2 years old it had the same problem but the hinges should not have fatigued at that point. The engineering problem someone mentioned is that the pin of the light switch is too short. I touched it with lipstick, closed the oven door, and opened the door to see exactly where the door touched the pin. I drilled a small hole in the door and screwed in a self tapping metal screw...problem solved for 8 years until the hinges fatigued. After replacing the hinges I tried removing the screw but the light stayed on so I put the screw back.
Parts Used:
-
ALAN from OSWEGO, IL
-
Difficulty Level:Easy
-
Total Repair Time:15 - 30 mins
-
Tools:Screw drivers
10 of 12 people
found this instruction helpful.
Was this instruction helpful to you?
Thank you for voting!
Freezer Cooling Problems - would get too warm then too cold. Condenser fan would run sometime but not always
Unplug
Remove entire back panel (both chipboard and metal fan grill)
Unscrew both fan mount plate screws - fan won't be able to come out because it is still plugged in
When looking at back of fridge, locate a small plastic box to the immediate left of the condenser. It's a circuit block. Release the metal spring clip holding the plastic cover in place, and trace the fan wire connections back to the fan. Make a note of which wire is connected to which terminal (1 of the fan wires has white lettering and 1 is just black)
Unplug both fan wire connects from circuit block to release the fan power cable.
Remove the fan mounting plate
Release fan blade clip by pressing fan against motor and unscrewing and remove fan blades
Unscrew motor from brackets - note alignment of motor on brackets
Mount new motor on brackets. Leave plug wire disconnected (replacement motor has a harnessed plug wire)
Connect new plug wire to the circuit block keeping wires connected to the proper terminals
Snake new plug wire behind condenser like the old wire was and run through cable bracket to the back right of the condenser
Plug wire harness into motor and re-mount fan mount plate
Reattach fan blade and secure using blade mount kit
Replace back panels
Remove entire back panel (both chipboard and metal fan grill)
Unscrew both fan mount plate screws - fan won't be able to come out because it is still plugged in
When looking at back of fridge, locate a small plastic box to the immediate left of the condenser. It's a circuit block. Release the metal spring clip holding the plastic cover in place, and trace the fan wire connections back to the fan. Make a note of which wire is connected to which terminal (1 of the fan wires has white lettering and 1 is just black)
Unplug both fan wire connects from circuit block to release the fan power cable.
Remove the fan mounting plate
Release fan blade clip by pressing fan against motor and unscrewing and remove fan blades
Unscrew motor from brackets - note alignment of motor on brackets
Mount new motor on brackets. Leave plug wire disconnected (replacement motor has a harnessed plug wire)
Connect new plug wire to the circuit block keeping wires connected to the proper terminals
Snake new plug wire behind condenser like the old wire was and run through cable bracket to the back right of the condenser
Plug wire harness into motor and re-mount fan mount plate
Reattach fan blade and secure using blade mount kit
Replace back panels
Parts Used:
-
JAMES from Middleboro, MA
-
Difficulty Level:A Bit Difficult
-
Total Repair Time:30 - 60 mins
-
Tools:Nutdriver, Screw drivers, Socket set
10 of 13 people
found this instruction helpful.
Was this instruction helpful to you?
Thank you for voting!
The freezer section would work OK but the refrigerator stopped cooling
Tips from internet forums helped me figure out the problem: The defroster heaters were not working and the freezer side would frost up and prevent cold air from entering the refrigerator side. I removed the drawers, drawer slides, ice maker, then the back panel to expose the cooling coils. You can check the heaters for continuity before rempving them by disconnecting the two lead wiresonce you have the back panel removed. Not getting any continuity, I removed the old heaters after defrosting the coils. Removing the heaters was the most difficult part as they are a little "long" for where they fit, but with care it can be done, the same applies to installing the new heaters. I had to cut the connecting wire on one of the heaters to remove it, but got the new set installed OK. Works fine now, the bottom heater was defective, and since the are wired in series neither one will work independently. Everything works fine now, problem solved.
Parts Used:
-
Kenneth from Laingsburg, MI
-
Difficulty Level:A Bit Difficult
-
Total Repair Time:1- 2 hours
-
Tools:Nutdriver, Pliers, Screw drivers
9 of 11 people
found this instruction helpful.
Was this instruction helpful to you?
Thank you for voting!
fan had stopped-freezer not performing etc.
simply removed old motor and replaced new. I'm over 82 and it was hard to get down and up to floor level!! One thing was a little puzeling -that was to insert the right screws which had a nitch in the end of the threds to keep it from loosening- I thought I was spoiling the threds cause I had to use a little pressure to start the screws and thought I had the wrong screws--they had sent several sets of them for different name brands- but II got it and everything seems to be allright - Could you tell me if I could purchase a replacement compressor and some refrigerent -the new kind. thank you, George Erlandson Only if my comp. goes out!!!
Parts Used:
-
George from Glenwood, MN
-
Difficulty Level:A Bit Difficult
-
Total Repair Time:1- 2 hours
-
Tools:Nutdriver, Pliers
8 of 8 people
found this instruction helpful.
Was this instruction helpful to you?
Thank you for voting!
Exhaust Fan Switch broke so you couldn't turn the fan on.
I removed the screws that hold the escutcheon assembly in place and lifted it from the range top. I slipped the wire connectors from the old switch and removed the push nuts. Removing the push nuts was the most difficult part. I wedged a small screwdriver under them and made enough space to cut them off with wire cutters (DON'T CUT THE POLES THE PUSH NUTS ARE ATTACHED TO!). There may be an easier way to remove them, but I'm a rookie and don't know what the easier way would be.
I attached the wires back to the same poles on the new switch as they were positioned on the old switch and pushed on the push nuts that came with the new switch to hold it in place. There isn't much room to work with so I used a small socket from a socket wrench set to hold the new push nuts in place while I pushed them on. The push nuts I received with the new switch were really too small. I forced one on, but broke the other one. I bought another slightly larger one at my local hardware store and it worked great.
I reattached the escutcheon assembly and was back in business. Overall, it took me about 30 minutes.
I attached the wires back to the same poles on the new switch as they were positioned on the old switch and pushed on the push nuts that came with the new switch to hold it in place. There isn't much room to work with so I used a small socket from a socket wrench set to hold the new push nuts in place while I pushed them on. The push nuts I received with the new switch were really too small. I forced one on, but broke the other one. I bought another slightly larger one at my local hardware store and it worked great.
I reattached the escutcheon assembly and was back in business. Overall, it took me about 30 minutes.
Parts Used:
-
James from Norcross, GA
-
Difficulty Level:Easy
-
Total Repair Time:30 - 60 mins
-
Tools:Screw drivers
10 of 14 people
found this instruction helpful.
Was this instruction helpful to you?
Thank you for voting!
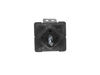
Burner switch was malfunctioning.
1. Removed all four switch knobs (to be replaced with new knobs purchased with the replacement switch.(unnecessary if you are not going to replace all the knobs)
2. Removed the switch plate assembly by removing two sheet metal screws.
3. Inverted plate assembly and removed five wires and then removed two additional screws that secured the faulty switch to the plate assembly.
4. Reconnected the five wires and attached the new switch to the plate assembly.
5. Re-positioned the assembly on the cooktop and secured with the two sheet metal screws.
GAME OVER!
2. Removed the switch plate assembly by removing two sheet metal screws.
3. Inverted plate assembly and removed five wires and then removed two additional screws that secured the faulty switch to the plate assembly.
4. Reconnected the five wires and attached the new switch to the plate assembly.
5. Re-positioned the assembly on the cooktop and secured with the two sheet metal screws.
GAME OVER!
Parts Used:
-
James L. from Lilburn, GA
-
Difficulty Level:Really Easy
-
Total Repair Time:15 - 30 mins
-
Tools:Pliers, Screw drivers
9 of 11 people
found this instruction helpful.
Was this instruction helpful to you?
Thank you for voting!
replace door hinge
The repair was very easy to perform, but the springs in the new hinge were not as strong as the old one. The door would not close all the way unless you held it closed. The hinge looked identical but spring had less tension.
Parts Used:
-
Larry from Oak Grove, MO
-
Difficulty Level:Really Easy
-
Total Repair Time:15 - 30 mins
-
Tools:Screw drivers
9 of 11 people
found this instruction helpful.
Was this instruction helpful to you?
Thank you for voting!
replacing thermostat did not help
Icecubes came out half-way, and refrooze. I figured out, that the melter does not work (HEATER in the icemaker) Voltage measured 105V no load. Studied the Internet, and folloved an advice: shorted the back wire and the blackwire with white stripes.these go to relay contacts. It seems, that the relay contacts are no good on Infrared receiver boaed. I turn off manually the icemaker, when needed
Parts Used:
-
John from Rocky River, OH
-
Difficulty Level:Difficult
-
Total Repair Time:More than 2 hours
-
Tools:Pliers, Screw drivers, Socket set
10 of 15 people
found this instruction helpful.
Was this instruction helpful to you?
Thank you for voting!
didn't eject icecubes
R & R Icemaker Assembly. Took out 3 screws and unpluged Icemaker & replaced with new part. very easy and the service from PartSelect was fantastic.
Very Satisfied,
Ron Martin
Very Satisfied,
Ron Martin
Parts Used:

-
Ronald from Marion, IL
-
Difficulty Level:Really Easy
-
Total Repair Time:15 - 30 mins
-
Tools:Nutdriver
9 of 12 people
found this instruction helpful.
Was this instruction helpful to you?
Thank you for voting!
Ice maker leaked water
Overall, replacing the ice maker wasn't too bad but it wasn't nearly as easy for me as it seems to have been for some. In my case, the fridge was an Amana and the ice maker was mounted in such a way that disconnecting the power connector was difficult. The ice maker had to be completely dismounted before any access to the power connector was even possible. The short power cables made it very difficult to get the ice maker into a position where I had a good view of the power connector enabling me to see how to release it. The only other challenge was the cup that the water line goes into. The replacement ice maker did not come with the right cup - the instructions said to replace the provided one with the old one. No instructions for this procedure were provided and it looked to me like it might involve significant disassembly, something I wanted to avoid for fear of breaking a plastic part on the new ice maker (something I had already done when disassembling the old ice maker). So instead of replacing the cup, I modified the new one to match the old one. This involved removing a cutout on one side and covering a hole on the other. Installation of the new ice maker went fine and the water leak problem was fixed.
Parts Used:
-
Robert from Pennsylvania Furnace, PA
-
Difficulty Level:A Bit Difficult
-
Total Repair Time:30 - 60 mins
-
Tools:Screw drivers, Socket set
10 of 15 people
found this instruction helpful.
Was this instruction helpful to you?
Thank you for voting!
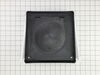
Didn't like the appearance of a cheap-looking dryer vent on an exposed area of my new house.
I enlarged the vent access hole from four (4) inches to five (5) inches to accomodate a larger pipe. I then purchased locally a 5" to 4" transition and installed it in the enlarged opening, and sealed the space with expanding foam for a bug-proof air-tight fit. On the inside of the house I attached a short length of 4" pipe to attach the dryer vent pipe. On the outside, in the place of the aluminum vent cap, I installed the 5" Jenn-Aire vent cover purchased from PartSelect.com. The new vent is large enough to completely cover the chiseled out masonry area, and the 5" outlet reduces air noise from the dryer, but best of all the new vent provides the high quality look I needed to match the brick of my new home.
Parts Used:
-
Robert from Jacksonville, AL
-
Difficulty Level:Easy
-
Total Repair Time:30 - 60 mins
-
Tools:Pliers, Screw drivers
7 of 8 people
found this instruction helpful.
Was this instruction helpful to you?
Thank you for voting!
Broken Piece

-
anthony from georgetown, IL
-
Difficulty Level:A Bit Difficult
-
Total Repair Time:30 - 60 mins
-
Tools:Screw drivers
7 of 8 people
found this instruction helpful.
Was this instruction helpful to you?
Thank you for voting!
The Old Hinges broke off and the door would not stay closed
I removed the single screw on each side of the oven by the hinge to remove the hinge cover plate and expose the hinge opening. I lifted off the glass oven door up and out and set it on my work bench. The door is heavy because its glass so make sure the doors on the way to the garage are open to your work bench area. I installed the cover plates back on so i would not loose the little covers and screws. I removed the screws all around the door and set them in a cup and lifted up the inner part of the door and the hinges are exposed. After removing the screws that hold on the hinges it lifted right out. I cleaned all the glass and set the new hinges in and locked them down with the screws and installed back the inner part of the door to the outer part and returned all the screws back. I then removed they screws on the hinge covers. I did not loose them with 4 kids running around and lifted the door back into the hinge openings and pushed down and it locked in. I then put a little pressure down on the door and removed the little locking pins. I pushed the door all the down and installed the hinge covers back on and it works beautiful. I think the new hinges are better than the set that came with the Jenn-Air wall oven. Thanks Parts Select. Also the new hinges came in 3 days as promised.
Parts Used:
-
Bruno from Scottsdale, AZ
-
Difficulty Level:Easy
-
Total Repair Time:15 - 30 mins
-
Tools:Screw drivers
7 of 8 people
found this instruction helpful.
Was this instruction helpful to you?
Thank you for voting!
Evaporator coils would freeze up solid
Removed everything from inside freezer compartment (food and shelves) Removed inside backpanel that covered the coils. At the top of the coils is where the thermostat was attached. Removed old one and installed new. Has been working since.
Parts Used:

-
Walt from Sutter, CA
-
Difficulty Level:Really Easy
-
Total Repair Time:15 - 30 mins
-
Tools:Pliers, Screw drivers
7 of 8 people
found this instruction helpful.
Was this instruction helpful to you?
Thank you for voting!