


Get in touch, we're here to help!
1-866-883-8386
Monday to Saturday
8am - 8pm EST
Cylinder Felt Seal WP37001132
Does this part fit my model?
Need help finding your model number?Cylinder Felt Seal Specifications

How Buying OEM Parts Can Save You Time and Money
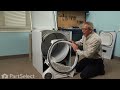
Replacing your Speed Queen Dryer Cylinder Felt Seal

- < Prev
- 1
- Next >
- < Prev
- 1
- Next >
- < Prev
- 1
- 2
- 3
- Next >

-
Tim from South Glens Falls, NY
-
Difficulty Level:Easy
-
Total Repair Time:30 - 60 mins
-
Tools:Nutdriver
2) Removed door
3) Removed Front Panel - removed connectors from switch and marked connections
4) Removed Front Bulkhead
5) Glides and Felt pads were missing, and brackets were nearly worn through
6) Removed and Replaced old brackets
7) Attached self-adhesive felt pads
8) Attached Drum Glides
9) Removed old felt seal
10) Glued new felt seal in place with 5-min epoxy
11) Allowed Epoxy to set and stop stinking
12) Re-attached front bulkhead
13) Re-attached remaining parts
Dryer works great, is quiet again, and no longer eats clothes!!!!!!


-
Jeffrey from Medina, OH
-
Difficulty Level:Easy
-
Total Repair Time:30 - 60 mins
-
Tools:Nutdriver

-
Dann from Claremont, CA
-
Difficulty Level:Really Easy
-
Total Repair Time:15 - 30 mins
-
Tools:Nutdriver, Screw drivers

-
Chad from Caldwell, ID
-
Difficulty Level:A Bit Difficult
-
Total Repair Time:1- 2 hours
-
Tools:Nutdriver, Pliers, Screw drivers, Socket set

-
joe from johnsburg, IL
-
Difficulty Level:Really Easy
-
Total Repair Time:1- 2 hours
-
Tools:Nutdriver, Screw drivers

-
christopher from sycamore, IL
-
Difficulty Level:Really Easy
-
Total Repair Time:30 - 60 mins
-
Tools:Nutdriver, Socket set
-
David from Pasadena, MD
-
Difficulty Level:A Bit Difficult
-
Total Repair Time:1- 2 hours
-
Tools:Nutdriver, Screw drivers
Then removed 2 screws at bottom of door assembly.
Pulled bottom door assembly forward and down.
Disconnected "can't go wrong" wiring connectors.
Then removed old cylinder glide rivets at bottom of cylinder using drill motor with 1/4" drill.
I installed new felt pads on new cylinder glides. Then installed glides with rivet gun.
Reconnected wire harness.
Installed door assembly and lower panel assembly.
BACK IN BUSINESS! THANK YOU!!!!!!!!!!
-
Billy from Woodsboro, TX
-
Difficulty Level:Really Easy
-
Total Repair Time:15 - 30 mins
-
Tools:Nutdriver, Screw drivers
-
Troy from Reading, PA
-
Difficulty Level:A Bit Difficult
-
Total Repair Time:30 - 60 mins
-
Tools:Nutdriver
Removed the front bottom panel first, then the middle panel and then the top panel. After removing the belt from the drum, it came out easily. Replaced both thermostats and fuse
just so they would be new in the unit.
Reglued the seals in place and waited til glue dried. Then reassembled everything back. Also lubricated the drum wheels. Everything worked and was quiet!
 – Part Number: WPY504514")

-
Daniel from Phoenix, AZ
-
Difficulty Level:Easy
-
Total Repair Time:30 - 60 mins
-
Tools:Nutdriver
- < Prev
- 1
- 2
- 3
- Next >
We're sorry, but our Q&A experts are temporarily unavailable.
Please check back later if you still haven't found the answer you need.
- < Prev
- 1
- 2
- Next >

8 people found this helpful.

4 people found this helpful.
3 people found this helpful.
2 people found this helpful.
2 people found this helpful.
2 people found this helpful.
1 person found this helpful.
1 person found this helpful.
- < Prev
- 1
- 2
- Next >


Manufacturer Part Number: WP37001132
Get in touch, we're here to help!
1-866-883-8386
Monday to Saturday
8am - 8pm EST