




















WM2011HW LG Washer - Instructions
Keep searches simple. Use keywords, e.g. "leaking", "pump", "broken" or "fit".
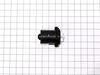
Error code "EO", Drain Pump not working
I followed the video on the PartSelect web site for this repair and it went just fine. I also replaced the drain hose while I had everything apart. Thank you PartSelect, same day shipping. Arrived within 3 day's and your video was spot on.
Parts Used:
-
Stephen from DEMING, NM
-
Difficulty Level:Really Easy
-
Total Repair Time:30 - 60 mins
-
Tools:Pliers, Screw drivers
1 of 2 people
found this instruction helpful.
Was this instruction helpful to you?
Thank you for voting!
Te error

-
Luis from LEHIGH ACRES, FL
-
Difficulty Level:Very Easy
-
Total Repair Time:Less than 15 mins
-
Tools:Screw drivers
3 of 8 people
found this instruction helpful.
Was this instruction helpful to you?
Thank you for voting!
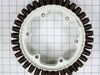
Gave LE code
Former LG repair looked under washer while it was engaging & noticed motor was not spinning. LG took forever I ordered the part from you guys. It looked different from original. Figured out to take extra port for front loader. I have top loader. Installed washer works great!!
Parts Used:
-
Michael from SAINT LOUIS, MO
-
Difficulty Level:Really Easy
-
Total Repair Time:15 - 30 mins
-
Tools:Socket set
1 of 2 people
found this instruction helpful.
Was this instruction helpful to you?
Thank you for voting!
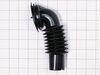
WASHER WOULD NOT EMPTY WATER DURING RINSE
I BROUGHT UP THE YOUTUBE REPAIR VIDEO AND FOLLOWED IT STEP BY STEP AND WORKED OUT GREAT THANKS
Parts Used:
-
michael from GRANTS PASS, OR
-
Difficulty Level:Easy
-
Total Repair Time:30 - 60 mins
-
Tools:Pliers, Screw drivers, Socket set
1 of 3 people
found this instruction helpful.
Was this instruction helpful to you?
Thank you for voting!
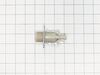
The hot water inlet valve was leaking at the seal between the valve and cellinoid.
Some screws, some clamps. Easy and straight forward. unplug machine, turn off water, disconnect water hose, unscrew top of machine (2 philips head screws), disconnect clamp from valve (use a towel for remaining water), disconnect wire, unscrew from place holder, remove entire valve, work backwards from there.
Parts Used:
-
john from pearl river, NY
-
Difficulty Level:Easy
-
Total Repair Time:15 - 30 mins
-
Tools:Pliers, Screw drivers
0 of 1 people
found this instruction helpful.
Was this instruction helpful to you?
Thank you for voting!
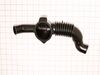
A leak was created via puncture of metal part of bra that fell out.
Remove old one and replace. Just make sure it is all the way on and secure or you will have a huge mess on your hands.
Parts Used:
-
Travis from Marietta, GA
-
Difficulty Level:Easy
-
Total Repair Time:15 - 30 mins
-
Tools:Pliers, Screw drivers
0 of 1 people
found this instruction helpful.
Was this instruction helpful to you?
Thank you for voting!
slow water leak
Pull the washer away from the wall to get behind it. Unplug the electrical power cord from the wall. I removed the top cover by unscrewing the 2 screws on the back of the washer. Slide the cover back about 1-2 inches towards the back of the washer and then lift the cover up and remove. It might be a little tight to slide back, you may need to wiggle the cover side to side or give it a good smack. The water inlet valve is directly at the top inside of the washer. I saw a slow leak dripping from the hot water inlet valve onto the back side of the drum. Turn off the water supply valve at the wall and then unscrew the supply water hose from the water inlet valve at the back of the washer. Disconnect the electrical connector and water hose from the inlet valve inside the washer. From the outside of the washer on the back, remove the screws holding the water valve and lift out the valve. Install in reverse order.
Parts Used:
-
mark from pleasant prairie, WI
-
Difficulty Level:Really Easy
-
Total Repair Time:Less than 15 mins
-
Tools:Screw drivers
0 of 1 people
found this instruction helpful.
Was this instruction helpful to you?
Thank you for voting!
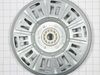
The bolt on the motor rotor loosened allowing the motor shaft to wallow out the plastic bushing in the rotor.
Unplugged the washer,removed the rear cover, removed the old rotor assembly & installed the new rotor with thread lock on the retaining bolt.
Parts Used:
-
william from Mobile, AL
-
Difficulty Level:Really Easy
-
Total Repair Time:Less than 15 mins
-
Tools:Nutdriver
Was this instruction helpful to you?
Thank you for voting!
The washer kept displaying "tE" error and the machine would stop.
First we unplugged the machine. Then turned off the water and disconnected the hoses. Pulled out the machine and laid it on its side to access the themsistor located on the drum. (No, you do not have to remove the control panel at all to replace this part) The thermsistor is clearly seen with a flashlight. There were plastic ties holding the wires of the thermsistor so we used small scissors to cut the ties. Then unplugged the old thermsistor and plugged in the new thermsistor and used a regular bag twist to secure the wires. Repair complete and the machine is back to normal. Thank you Part Select.
Parts Used:
-
William from Edgewood, MD
-
Difficulty Level:Really Easy
-
Total Repair Time:Less than 15 mins
Was this instruction helpful to you?
Thank you for voting!
My Washer was leaking
The repair went well and your parts are easy to find. This is the second time I have used your services and both times have been great. Your parts are at great prices and your delivery is a lot faster that one would think.
Thank you
Thank you
Parts Used:
-
Bruce from West Hills, CA
-
Difficulty Level:Really Easy
-
Total Repair Time:Less than 15 mins
-
Tools:Nutdriver, Pliers
Was this instruction helpful to you?
Thank you for voting!
the water inlet was leaking
pulled off top of washer to get at the inlet valve disconnect two hoses take two screws out and then you put it back together the way you took apart and your done
Parts Used:
-
gerald from wis dells, WI
-
Difficulty Level:Really Easy
-
Total Repair Time:Less than 15 mins
-
Tools:Pliers, Screw drivers
Was this instruction helpful to you?
Thank you for voting!
Very visible tear in hose. It was 1 1/2" long
Simply took hose off from inside machine and replaced it with new one. The tore one had a stopper on one end that wrapped to front machine; inside filter compartment. So I put stopper on the other end of new hose and wrapped it to it's holding spot in filter compartment.
Parts Used:
-
Tresa from McHenry, IL
-
Difficulty Level:Really Easy
-
Total Repair Time:Less than 15 mins
-
Tools:Screw drivers
Was this instruction helpful to you?
Thank you for voting!
leaky inlet valve
found the leak, went to the website, called customer service, ordered the part... $24 later, problem solved. Great customer service and on-line support
Parts Used:

-
Michael from Granite Bay, CA
-
Difficulty Level:Really Easy
-
Total Repair Time:Less than 15 mins
-
Tools:Pliers, Screw drivers
Was this instruction helpful to you?
Thank you for voting!
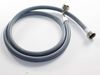
Inlet hot water valve was leaking.
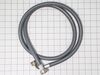
1. Unplug washer. 2. Shut off water supply (hot and cold). 3.Remove hot water hose at washer inlet. 4. Remove the 2 plastic pieces that hold the washer top to the washer body by removing the 2 retaining screws. 5. Pull the top back to remove and set the washer top off to the side. 6. Unclip the electric harness from the inlet water valve. 7. With your pliers, loosen the clamp on the water inlet valve discharge hose and remove the hose from the valve. 8. Loosen and remove the 2 screws holding the inlet valve to the washer body. Install new hot water inlet valve and follow steps in reverse. Check for leaks before plugging washer back in. Run washer and check for leaks. Note: Excellent video available on You Tube. Consider replacing both the hot and cold water connecting hoses during the repair if they are old.
Parts Used:
-
John from Houston, TX
-
Difficulty Level:Really Easy
-
Total Repair Time:Less than 15 mins
-
Tools:Pliers, Screw drivers
Was this instruction helpful to you?
Thank you for voting!
Water inlet valve coil was leaking water.
Unplug Washing machine first. Then remove 2 screws at the back of the top cover. Slide the top cover back then lift and remove. Unplug electrical connector @ inlet valve and remove water lines 1 going in and 1 out of valve. Remove 2 screws holding assembly in place then install new valve assembly and all other components in reverse order.
Parts Used:
-
Robert from Asheville, NC
-
Difficulty Level:Really Easy
-
Total Repair Time:Less than 15 mins
-
Tools:Pliers, Screw drivers
Was this instruction helpful to you?
Thank you for voting!