




















WD-10412BD LG Washer - Instructions
Keep searches simple. Use keywords, e.g. "leaking", "pump", "broken" or "fit".
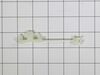
Drum spring broke
Removed top panal found broken parts and pieces, replaced spring and plastic spring holder. Straightened out and reattached drum front boot.
Parts Used:
-
Todd from LAKEWOOD, CO
-
Difficulty Level:Really Easy
-
Total Repair Time:30 - 60 mins
-
Tools:Pliers, Screw drivers
4 of 4 people
found this instruction helpful.
Was this instruction helpful to you?
Thank you for voting!
washer dicharge water pump
-
stephen from FRANKLIN, NJ
-
Difficulty Level:Really Easy
-
Total Repair Time:30 - 60 mins
-
Tools:Pliers, Screw drivers
4 of 5 people
found this instruction helpful.
Was this instruction helpful to you?
Thank you for voting!
Error Code OE showed drain pump problem
I youtube searched this problem and found a video from partselect. I watched the video, purchased the part, and followed the video instruction step by step to repair the washer. Part with tax and shipping was $52.
Parts Used:
-
Joshua from DELTA, PA
-
Difficulty Level:Really Easy
-
Total Repair Time:30 - 60 mins
-
Tools:Nutdriver, Pliers, Screw drivers
5 of 8 people
found this instruction helpful.
Was this instruction helpful to you?
Thank you for voting!
Making noise on the spin cycle
Disassembled washer, replaced bearings, seals and gasket. Watched instructional video to familiarize myself with the repair. Followed all steps as recommended, repair was straight forward without any surprises. Hardest part was removing the drum from the machine, somewhat heavy. Disassembled and replaced all bearings, seals, spider and gasket. Reinstalled in reverse order. Note: Upon tear down, I found the seal was pushed out, causing the bearing failure. I also found that the seal was installed incorrectly from LG. They have the seal lip facing the bearings, should be facing the water. This repair seems to be difficult, but was fairly self explanatory. All plug ins are color coded, all hoses are accessible with little effort. If you have basic skills you should be able to handle this repair.
Parts Used:

-
Ritchie from HOUMA, LA
-
Difficulty Level:A Bit Difficult
-
Total Repair Time:More than 2 hours
-
Tools:Pliers, Screw drivers, Socket set, Wrench set
4 of 5 people
found this instruction helpful.
Was this instruction helpful to you?
Thank you for voting!
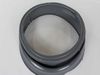
Water leaking on to floor.
Remove springs from front of door fold gasket in to drum to see the other spring that holds the gasket in place. When putting new gasket in use a little soap to help the gasket go easy. Then just reverse your steps. Hards thing is putting the springs back on.
Parts Used:
-
Kurt from MIDLAND, MI
-
Difficulty Level:A Bit Difficult
-
Total Repair Time:30 - 60 mins
-
Tools:Pliers, Screw drivers
4 of 5 people
found this instruction helpful.
Was this instruction helpful to you?
Thank you for voting!
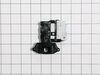
The locking mechanism had a fault and would not lock so the washer continually posted the locking error
Followed the video supplied by this site and everything was as described!
Parts Used:
-
Thomas from FENTON, MO
-
Difficulty Level:Really Easy
-
Total Repair Time:15 - 30 mins
-
Tools:Screw drivers
3 of 3 people
found this instruction helpful.
Was this instruction helpful to you?
Thank you for voting!
Washer wouldn't start when I closed the door. Door lock error code presented
Took the sealing ring off the gasket, unscrewed the door lock with two screws. Unplugged it. Plugged the new one in, screwed it back in. Put the ring back on and it started right up.
Parts Used:
-
Tom from BETHEL PARK, PA
-
Difficulty Level:Very Easy
-
Total Repair Time:Less than 15 mins
-
Tools:Screw drivers
3 of 3 people
found this instruction helpful.
Was this instruction helpful to you?
Thank you for voting!
replace door locking mechanism
remove 2 screws from top panel - pull top panel back and lift off washer. reach down on front side and remove wire harness that is attached to door lock assembly. remove the 2 screws on front of door lock,remove and replace with new assembly. attach wire harness and then tighten assembly with the 2 screws. replace top of washer panel and tighten with 2 screws.
Parts Used:
-
Barry from WAUSAU, WI
-
Difficulty Level:Really Easy
-
Total Repair Time:15 - 30 mins
-
Tools:Screw drivers
3 of 3 people
found this instruction helpful.
Was this instruction helpful to you?
Thank you for voting!
Door Lock Switch Replacement
The video from PartSelect showed removing the retaining ring from the rubber washer tub boot to then allow access the door lock located behind the boot for replacement. That ring can sometimes be a real pain to put back on. This can be avoided altogether!
It's much easier to access the door lock switch by removing the two retaining screws on the top cover of the washer found in the back of the machine. Remove the top cover and you can then reach down to remove the wiring connector, unscrew the two phillips screws on the front of the door latch and remove the door lock. Put the new switch on in reverse order; plug in the connector, replace all screws and the top cover, and you are done! This method took than 10 minutes from start to finish.
Please note that the washer should be unplugged from power while working on any electrical component.
It's much easier to access the door lock switch by removing the two retaining screws on the top cover of the washer found in the back of the machine. Remove the top cover and you can then reach down to remove the wiring connector, unscrew the two phillips screws on the front of the door latch and remove the door lock. Put the new switch on in reverse order; plug in the connector, replace all screws and the top cover, and you are done! This method took than 10 minutes from start to finish.
Please note that the washer should be unplugged from power while working on any electrical component.
Parts Used:
-
Charles from EATON, CO
-
Difficulty Level:Really Easy
-
Total Repair Time:15 - 30 mins
-
Tools:Screw drivers
3 of 3 people
found this instruction helpful.
Was this instruction helpful to you?
Thank you for voting!
grinding noise, at spin
I followed instructions, posted by this site ln so doing, I saved at least $ 800. Dll`s
Parts Used:
-
Joe from OCEANSIDE, CA
-
Difficulty Level:Really Easy
-
Total Repair Time:More than 2 hours
-
Tools:Screw drivers, Socket set
3 of 3 people
found this instruction helpful.
Was this instruction helpful to you?
Thank you for voting!
Alarms about "Door Open"
Just removed the top cover only. Reached down and unplugged the door switch. Then removed the switch with 2 phillips head screws. Replaced with new switch. Reached down and plugged that new switch in. Problem solved!
Parts Used:
-
MARY from ANDERSON, IN
-
Difficulty Level:Really Easy
-
Total Repair Time:30 - 60 mins
-
Tools:Screw drivers
4 of 6 people
found this instruction helpful.
Was this instruction helpful to you?
Thank you for voting!
Drain pump inoperable
1 tilt washer back
2 remove cover plate screw from front of drain filter access panel.
3 Remove cover plate and remove 2 more mounting screws .
4 go below washer and pull down sliding clip and move pump assembly back.
5 remove wires and 3 mounting screws around pump housing
6 Swap pump and re-attch wires
2 remove cover plate screw from front of drain filter access panel.
3 Remove cover plate and remove 2 more mounting screws .
4 go below washer and pull down sliding clip and move pump assembly back.
5 remove wires and 3 mounting screws around pump housing
6 Swap pump and re-attch wires
Parts Used:
-
Gregory from PITTSBURGH, PA
-
Difficulty Level:Really Easy
-
Total Repair Time:30 - 60 mins
-
Tools:Pliers, Screw drivers
2 of 2 people
found this instruction helpful.
Was this instruction helpful to you?
Thank you for voting!
Dishwasher would not fill
Used Youtube to look for a set of repair instructions. From start to end 35 min.
The difficult part was getting the door back on. Only 1 Youtube video I watched stated Do not remove the 2 center screws at the top. Wish I had seen that video first.
Overall very easy to do.
The difficult part was getting the door back on. Only 1 Youtube video I watched stated Do not remove the 2 center screws at the top. Wish I had seen that video first.
Overall very easy to do.
Parts Used:
-
Jesse from CARNEGIE, PA
-
Difficulty Level:Really Easy
-
Total Repair Time:30 - 60 mins
-
Tools:Nutdriver, Pliers
2 of 2 people
found this instruction helpful.
Was this instruction helpful to you?
Thank you for voting!
door lock malfunction
ridiculously easy. removed the door gasket ring clamp. separated the gasket from the face. unscrewed the lock, removed the wire(gently). replaced the wire on the new lock. replaced the lock. replaced door gasket and ring clamp. washed clothes. Note- I had called a repair service and was given a $360 estimate in addition to the $130 dollar service charge. All total- $50 dollar part(with shipping), less than 45 min total time and I'm no mechanic!
Parts Used:
-
paul from DELAND, FL
-
Difficulty Level:Really Easy
-
Total Repair Time:30 - 60 mins
-
Tools:Pliers, Screw drivers
2 of 2 people
found this instruction helpful.
Was this instruction helpful to you?
Thank you for voting!
Water wouldn't drain
I followed the video. Everything worked exactly as described. i ran a quick cycle and everything seemed to be fine. Started a wash and the machine was going fine but stopped, and wouldn't drain. I thought that maybe it might be the Rotor Position Sensor assembly, which I had already purchased just in case.But first i drained the machine and checked out the pump filter. Plugged solid. I'm guessing when the pump went there must have been a lot of lint and debris in the machine. something you might want to check out, after that repair. Thanks. you guys saved me a couple of hundred dollars
Parts Used:
-
lawrence from DOBBS FERRY, NY
-
Difficulty Level:Really Easy
-
Total Repair Time:30 - 60 mins
-
Tools:Pliers, Screw drivers
2 of 2 people
found this instruction helpful.
Was this instruction helpful to you?
Thank you for voting!