




















TEF326FBC Tappan Range - Instructions
Keep searches simple. Use keywords, e.g. "leaking", "pump", "broken" or "fit".
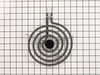
surface element burned out
-
Robert from SEEKONK, MA
-
Difficulty Level:Very Easy
-
Total Repair Time:Less than 15 mins
3 of 3 people
found this instruction helpful.
Was this instruction helpful to you?
Thank you for voting!
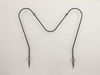
Bake element went out
The broil element and range were both working so I removed the bake element to test for continuity. Use a 1/4” socket or wrench to remove the two screws holding the bake element to the rear wall of the inside of the oven. Pull the ends of the element out of their recesses taking care not to lose a wire inside the back panel of the oven. Pull the wires off the element ends. You should be able to do this by hand; use a flathead screwdriver for a little prying if necessary. Visually inspect the element for physical damage. If you don’t see any, test the element with an ohmmeter or multimeter. If it reads anything other than 0 ohms (continuity), your element is defective. Installation process is reverse of removal.
Parts Used:
-
Nicholas from COTTONDALE, AL
-
Difficulty Level:Really Easy
-
Total Repair Time:Less than 15 mins
-
Tools:Socket set
4 of 6 people
found this instruction helpful.
Was this instruction helpful to you?
Thank you for voting!
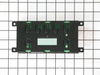
The LR surface burner and the oven were inoperable.
After receiving the parts in only two days, I first turned off the circuit breaker. Then I pulled the stove out from the wall. I used the nutdriver to remove the upper rear panel. Using the screw driver I removed the defective clock timer and used a pocket knife to carefully remove the clock timer face. I positioned the clock timer face on the new clock timer and installed same in the stove panel. (I had made a list of the wires and their colors to insure the proper placement on the new clock timer). Installed the four screws and on to the burner switch. Two front panel screws removed and the defective burner switch was out. Installed the new burner switch, connected the wires, installed the two screws, pushed on the knob and I was ready to go. Re-installed the reap panel, pushed stove back in, turned on the circuit breaker and tested the burner and oven. All worked correctly. A very easy repair!
Parts Used:

-
THEODORE from WAXAHACHIE, TX
-
Difficulty Level:Really Easy
-
Total Repair Time:15 - 30 mins
-
Tools:Nutdriver, Screw drivers
3 of 3 people
found this instruction helpful.
Was this instruction helpful to you?
Thank you for voting!
Burnt out baking element
Removed the back panel, disconnected the terminals and removed the old one and installed the new one.
Parts Used:
-
Joseph from HAMPTON, VA
-
Difficulty Level:Really Easy
-
Total Repair Time:15 - 30 mins
-
Tools:Nutdriver
3 of 3 people
found this instruction helpful.
Was this instruction helpful to you?
Thank you for voting!
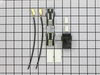
Element would not heat up
I couldn't explain how to do the job any better than your instructional video does. As long as you follow the video instructions you should have no problems.
Parts Used:
-
david from BUCKEYE, AZ
-
Difficulty Level:Very Easy
-
Total Repair Time:15 - 30 mins
-
Tools:Nutdriver, Pliers, Screw drivers
3 of 3 people
found this instruction helpful.
Was this instruction helpful to you?
Thank you for voting!
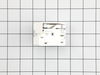
my burners would just heat up solid red even when i had controls turned down to 2 or 3. i would have to turn controls off and back on, then they still would just go back to glowing red
This was my first time ever working with electrical issues. My husband is not physically able to do repairs now. Very easy fix. Just viewed video repair instructions and it went exactly as instructed. Within 45 minutes, I had my stove repaired and cleaned and back in working order!! Great results. My range is working perfectly again and Mama is happy!!
Parts Used:
-
Leota from AUXVASSE, MO
-
Difficulty Level:Really Easy
-
Total Repair Time:30 - 60 mins
-
Tools:Nutdriver, Pliers, Screw drivers
3 of 3 people
found this instruction helpful.
Was this instruction helpful to you?
Thank you for voting!
Bake elemen t shorted out.
Turned off power to stove;removed baking racks , loosened Holden screws to pushon bake element removed old bake element,installed new pushon bake element.
Parts Used:
-
LARRY from LEES SUMMIT, MO
-
Difficulty Level:Really Easy
-
Total Repair Time:30 - 60 mins
-
Tools:Screw drivers
3 of 3 people
found this instruction helpful.
Was this instruction helpful to you?
Thank you for voting!
Repaired Oven Range Light Bulb
The bulb has a plastic clear cover. That cover can just be carefully removed using a screwdriver. It's held in by a metal bracket. After you remove the cover. You'll just need to replace the bulb and then re-install the cover and bracket.
Parts Used:

-
Alan from SAN MATEO, CA
-
Difficulty Level:Very Easy
-
Total Repair Time:Less than 15 mins
-
Tools:Screw drivers
3 of 3 people
found this instruction helpful.
Was this instruction helpful to you?
Thank you for voting!
the old bake element was corroded and non-funtional
Using a socket set and Robertson #3 (smallest) driver head,with the breaker shut off before working I removed the old element and disconnected the old element from the wire connections.I then installed the new element by connecting the terminals to the wire connection in the range before screwing the old retaining clips to the back of the oven compartment wall.Then I flipped the breaker switch back on and turned on the oven dial to 425 degrees to see the element heat up and glow red affirming the success of the repair.Total time to repair about 15 minutes.
Parts Used:
-
Stephen from RONAN, MT
-
Difficulty Level:Really Easy
-
Total Repair Time:Less than 15 mins
-
Tools:Screw drivers
5 of 9 people
found this instruction helpful.
Was this instruction helpful to you?
Thank you for voting!
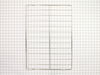
I forgot to remove something I had saved in the oven, planning to remove it before using the range.
Very simple. Removed oven rack that had melted residue on it and replaced it with the new one from your company. I want to tell you that the delivery service I received was just geat. Took less than 48 hours to arrive at my home from the time I placed the order on line. Keep up the good work and I will be happy to share my experience with those in need of you services. Thanks. Marilyn Kasson
Parts Used:
-
Marilyn from Clearwater, FL
-
Difficulty Level:Easy
-
Total Repair Time:Less than 15 mins
3 of 4 people
found this instruction helpful.
Was this instruction helpful to you?
Thank you for voting!
The draw glide was broken and the clock had stopped working.
With the draw glide, I simply had to slide it into position. To replace the clock, I had to remove the back panel and then replace the broken clock with the new one by simply turning a few screws and using a pair pliers to removing the color coded wires.
Parts Used:
-
Patty from Carlisle, KY
-
Difficulty Level:Really Easy
-
Total Repair Time:15 - 30 mins
-
Tools:Nutdriver, Pliers, Screw drivers
3 of 4 people
found this instruction helpful.
Was this instruction helpful to you?
Thank you for voting!
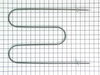
Broiler broke apart in pieces. Also we found an round honeycomb part
in the bottom of the oven when I was looking to see what was going on. My husband did the repair just as the video described. I suspect this part honeycomb round maybe ceramic piece goes over where the heat is vented from the oven. Where do I get another one of these and how does it attach in the oven-under the burner. HELP I tried to look on the schematics and did not see anything. The repair went fine, except when we turned everything back on it did not work. Then my husband remembered he forgot to plug the new part IN. Once plugged in it is working fine. Thanks
Parts Used:
-
Betty from KNIGHTDALE, NC
-
Difficulty Level:Really Easy
-
Total Repair Time:30 - 60 mins
3 of 4 people
found this instruction helpful.
Was this instruction helpful to you?
Thank you for voting!
Inside Oven Door Glass Panel Broke
Got a copy of the parts breakdown for the oven door from partselect. Com. Removed 8 screws from outer frame (3 top, 3 bottom, 1 on eah side). Removed the main glass pane from oven door, be careful when doing this as this is most of the weight of the door. It will want close on its own due to lack of weight. Removed the 2 top screws that attach the handle. Removed some screws from some plates that retain the 2 panes of glass of glass. Removed the third (most inner, broken) pane of glass. Replaced with new one. Reversed disassebly procedure for assembly.
Parts Used:

-
Penny from Topeka, IL
-
Difficulty Level:Easy
-
Total Repair Time:15 - 30 mins
-
Tools:Screw drivers
3 of 4 people
found this instruction helpful.
Was this instruction helpful to you?
Thank you for voting!
The inside glass on my oven was broken and falling out.
First I removed the oven door from the range by removing 2 screws from the door. Next I removed 2 more screws from the oven door to get to the panel beneath. Once the top portion of the door was removed there were 4 nuts holding the glass sections together. Once these nuts were out I removed the broken class, replaced it with the new glass and reassembled. It was a very easy and quick project. I was so happy to find the part. I thought I was going to have to buy a new range. Thanks.
Parts Used:
-
Taviatha from Dallas, TX
-
Difficulty Level:Easy
-
Total Repair Time:30 - 60 mins
-
Tools:Nutdriver, Screw drivers
3 of 4 people
found this instruction helpful.
Was this instruction helpful to you?
Thank you for voting!
Bake Element caught on fire
First we turned off the electic, then we took the back off the stove and pulled the wire off the bad element then replace the new element. It was very easy to do.
Parts Used:
-
Judy from Spencerville, OH
-
Difficulty Level:Really Easy
-
Total Repair Time:Less than 15 mins
-
Tools:Nutdriver, Screw drivers
4 of 7 people
found this instruction helpful.
Was this instruction helpful to you?
Thank you for voting!