




















SHX68T55UC (02) Bosch Dishwasher - Instructions
Keep searches simple. Use keywords, e.g. "leaking", "pump", "broken" or "fit".
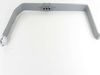
My flow tube had a hole in it
Initially, I received an E15 error. I evaluated for leaks but couldn't find anything except for water in the bottom of the dishwasher after about 30 minutes of the initial cycle. After discovering the hole in the flow tub, I order the part. It came a few days later & replace the part within a 15 minutes of receiving it. I didn't think it would resolve the issue but it did. Thank you!
Parts Used:
-
Rick from LANDENBERG, PA
-
Difficulty Level:Very Easy
-
Total Repair Time:15 - 30 mins
-
Tools:Screw drivers
4 of 5 people
found this instruction helpful.
Was this instruction helpful to you?
Thank you for voting!
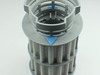
Over the years the filter became too clogged with embedded particles
Really simple. You pull out the drain filter plate and pull the filter off the support and replace. I gave everything a good cleaning and put it back in place.
Parts Used:
-
Jim from EDINA, MN
-
Difficulty Level:Really Easy
-
Total Repair Time:Less than 15 mins
4 of 5 people
found this instruction helpful.
Was this instruction helpful to you?
Thank you for voting!
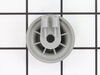
There was a roller missing from the lower washing rack.
There were 5 rollers still in place so I used them to show me how to snap the replacement roller in place.
Parts Used:
-
George from STURGEON BAY, WI
-
Difficulty Level:Really Easy
-
Total Repair Time:Less than 15 mins
6 of 11 people
found this instruction helpful.
Was this instruction helpful to you?
Thank you for voting!
Wheels on the bottom tray broke off
The repair was extremely simple. Just lined up and popped them on. No tools needed.
Parts Used:
-
Phyllis from BAYTOWN, TX
-
Difficulty Level:Really Easy
-
Total Repair Time:Less than 15 mins
4 of 5 people
found this instruction helpful.
Was this instruction helpful to you?
Thank you for voting!
Four wheels on the lower dishwasher rack came off and got lost.
I bought replacement wheels.
I put them on the post, and they snapped onto the vertical post very easily. Job done.
I put them on the post, and they snapped onto the vertical post very easily. Job done.
Parts Used:
-
james from PARSIPPANY, NJ
-
Difficulty Level:Really Easy
-
Total Repair Time:Less than 15 mins
3 of 4 people
found this instruction helpful.
Was this instruction helpful to you?
Thank you for voting!
We accidentally damaged the upper spray arm
Easily removed the old one by carefully pulling it and repeated this procedure to replace it. Total time took less than 15 minutes
Parts Used:
-
Sheldon from ROCKAWAY, NJ
-
Difficulty Level:Really Easy
-
Total Repair Time:Less than 15 mins
3 of 4 people
found this instruction helpful.
Was this instruction helpful to you?
Thank you for voting!
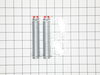
broken door hingespring
-
Brent from WESTON, WI
-
Difficulty Level:A Bit Difficult
-
Total Repair Time:30 - 60 mins
-
Tools:Pliers
3 of 4 people
found this instruction helpful.
Was this instruction helpful to you?
Thank you for voting!
cheap plactic clips on end of rope broke on the door counter balance spring
-
John from OOLOGAH, OK
-
Difficulty Level:Really Easy
-
Total Repair Time:30 - 60 mins
-
Tools:Pliers, Screw drivers
3 of 4 people
found this instruction helpful.
Was this instruction helpful to you?
Thank you for voting!
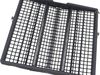
The metal support frame for my old cutlery basket was rusted which required replacement.
To remove the old cutlery drawer I had to pull the old drawer forward and work the rollers over the stops at the end of the permanently installed slides. To install the new cutlery drawer, I reversed the procedure and worked the rollers on the new drawer over the slide stops and seat the new basket. No tools were required.
As for the crockery baskets, the larger lower basket was very simple. Roll it forward onto the door and lift it out. To install the new basket reverse the procedure. Place the new basket on the door and slide it in on its rollers.
For the upper crockery basket the procedure is more complex. The retaining mechanisms for the upper basket appear to be very complet as they have a number of moving parts intricately engineered. With a little study, it become apparent releasing the locks and levers which keep the basket from rolling out and falling to the floor are well designed to both secure the basket and to remove. Each anchoring mechanism has a lever at the base and by depressing the lever it releases the basket so it can be rolled forward over the stops at the end of the slides. Some manual dexterity is required to maintain pressure on the mechanisms to ensure the basket will be released. The procedure is quickly mastered with a few attempts. The good thing is again no tools are required.
My new tray and baskets are working fine and it is a relief to have the old rusting and deteriorating tray and basket replaced. This is true for both safeguarding the crockery and cutlery form rust and chemical of deteriorating plastics, rusting metal, and bonding agents. More important, I am sure replacing the old deteriorating baskets and tray guards against any potential health issues.
As for the crockery baskets, the larger lower basket was very simple. Roll it forward onto the door and lift it out. To install the new basket reverse the procedure. Place the new basket on the door and slide it in on its rollers.
For the upper crockery basket the procedure is more complex. The retaining mechanisms for the upper basket appear to be very complet as they have a number of moving parts intricately engineered. With a little study, it become apparent releasing the locks and levers which keep the basket from rolling out and falling to the floor are well designed to both secure the basket and to remove. Each anchoring mechanism has a lever at the base and by depressing the lever it releases the basket so it can be rolled forward over the stops at the end of the slides. Some manual dexterity is required to maintain pressure on the mechanisms to ensure the basket will be released. The procedure is quickly mastered with a few attempts. The good thing is again no tools are required.
My new tray and baskets are working fine and it is a relief to have the old rusting and deteriorating tray and basket replaced. This is true for both safeguarding the crockery and cutlery form rust and chemical of deteriorating plastics, rusting metal, and bonding agents. More important, I am sure replacing the old deteriorating baskets and tray guards against any potential health issues.
Parts Used:


-
Reginald from Amarillo, TX
-
Difficulty Level:Really Easy
-
Total Repair Time:15 - 30 mins
3 of 4 people
found this instruction helpful.
Was this instruction helpful to you?
Thank you for voting!
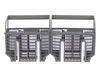
The old basket didn’t fit in the new lower rack
-
Pat from Wichita, KS
-
Difficulty Level:Very Easy
-
Total Repair Time:30 - 60 mins
3 of 4 people
found this instruction helpful.
Was this instruction helpful to you?
Thank you for voting!
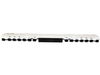
Dishwasher Panel - not illuminating, no power
Dishwasher panel unresponsive when pressed. Check electricity and power was going to unit. Dishwasher had successfully performed last washing cycle (no mechanical issues) so focused on Operating Module that is located at top of door panel (concealed when door is closed), This is an easy repair if you take your time and gently remove the components. First, unplug the unit or shut power off at the circuit. Open the door fully, and place a pad or blanket under the door as you will be removing the front dishwasher panel (this unit is stainless steel).
There are phillips head screws around the perimeter of the interior door panel, two sizes (keep track as you remove for reinstallation purposes). You will want to remove the bottom screws first, and when you get to the top of the door panel screws, support the exterior door panel with an assistant or your off-hand. Once all screws are out, the panel should be easily removed. You can now access the Operating Module.
The Operating Module is connected to the dishwater motor via the Cable Harness. The Cable Harness is connected to the Operating Module by two plugs. Disconnect the Cable Harness by depressing the outer area of the plugs, you do not need any tools. Once these are disconnected, notice how the wiring is is routed (take a picture) and you can remove if you are also replacing the Cable Harness (I ordered just in case but did not have to).
The Operating Module is held in place by a number of plastic clips, that when depressed, will release the unit. You may need something to depress the clips (standard screwdriver) but be careful to take your time to do not force. My unit is 8 years old, and the plastic is more fragile now and these are easy to break. After trial and error, I actually started in the middle of the Module and the worked to the outside of each end to remove it. Reinstalling is a breeze (as long as you don't break the plastic clips), follow your steps in reverse. Allow 45 minutes for the whole process, but take whatever time is necessary. Much cheaper than a new dishwasher. Good Luck!
There are phillips head screws around the perimeter of the interior door panel, two sizes (keep track as you remove for reinstallation purposes). You will want to remove the bottom screws first, and when you get to the top of the door panel screws, support the exterior door panel with an assistant or your off-hand. Once all screws are out, the panel should be easily removed. You can now access the Operating Module.
The Operating Module is connected to the dishwater motor via the Cable Harness. The Cable Harness is connected to the Operating Module by two plugs. Disconnect the Cable Harness by depressing the outer area of the plugs, you do not need any tools. Once these are disconnected, notice how the wiring is is routed (take a picture) and you can remove if you are also replacing the Cable Harness (I ordered just in case but did not have to).
The Operating Module is held in place by a number of plastic clips, that when depressed, will release the unit. You may need something to depress the clips (standard screwdriver) but be careful to take your time to do not force. My unit is 8 years old, and the plastic is more fragile now and these are easy to break. After trial and error, I actually started in the middle of the Module and the worked to the outside of each end to remove it. Reinstalling is a breeze (as long as you don't break the plastic clips), follow your steps in reverse. Allow 45 minutes for the whole process, but take whatever time is necessary. Much cheaper than a new dishwasher. Good Luck!
Parts Used:

-
Randall from APPLE VALLEY, MN
-
Difficulty Level:Really Easy
-
Total Repair Time:30 - 60 mins
-
Tools:Screw drivers
2 of 2 people
found this instruction helpful.
Was this instruction helpful to you?
Thank you for voting!
Dishwasher door dropping
After researching YouTube, I figured out the problem was the left side of the door was dropping. Took some screws out where the dishwasher was attached to the counter and cabinets. It took a bit to pull the dishwasher out but when done, the fix was easy. Reverse the process, make sure there’s power and hoses are back.
Parts Used:
-
Khanh from CHICAGO, IL
-
Difficulty Level:Really Easy
-
Total Repair Time:15 - 30 mins
-
Tools:Screw drivers
2 of 2 people
found this instruction helpful.
Was this instruction helpful to you?
Thank you for voting!
New Sray arm and wheel replacement
-
Charles from SANTA ROSA, CA
-
Difficulty Level:Really Easy
-
Total Repair Time:Less than 15 mins
4 of 8 people
found this instruction helpful.
Was this instruction helpful to you?
Thank you for voting!
Water leakage from the dishwasher; unknown source.
Followed the video on your site and it was an easy install with no more leakage.
Parts Used:
-
Bill from Seattle, WA
-
Difficulty Level:Really Easy
-
Total Repair Time:Less than 15 mins
2 of 2 people
found this instruction helpful.
Was this instruction helpful to you?
Thank you for voting!
Spray arm plug into water source became worn out and difficult to engage
The spray arm makes a slide in attachment to a slide out drawer. It was removed by forcing out of the connection on the back of the drawer and the replacement was installed by sliding it into the same connection point.
Parts Used:
-
David from Sequim, WA
-
Difficulty Level:Really Easy
-
Total Repair Time:Less than 15 mins
2 of 2 people
found this instruction helpful.
Was this instruction helpful to you?
Thank you for voting!