




















SD19W-C Amana Refrigerator - Instructions
Keep searches simple. Use keywords, e.g. "leaking", "pump", "broken" or "fit".
My Refrigerator got warm, stopped making ice and I could see the coils were frozen over
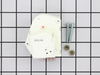
This is the easiest repair to perform, figuring out what was wrong took a little longer. I have the bottom freezer Amana refrigerator and the defrost timer is just behind the bottom front grill, removing four screws and plugging in the new timer took maybe 15 minutes. To find out what was not working correctly I removed the panel covering the coils in the freezer and it was totally frozen up, this is why it stopped making ice and wasn't keeping things cold. I defrosted the coils and checked the resistance of the heater to make sure it was working, it was fine so it was the defrost timer.
Parts Used:
-
Christopher from Carpinteria, CA
-
Difficulty Level:Easy
-
Total Repair Time:Less than 15 mins
-
Tools:Nutdriver, Screw drivers
0 of 1 people
found this instruction helpful.
Was this instruction helpful to you?
Thank you for voting!
Inconsistent cooling
Removed the kick plate then removed four screws and unplugged the old timer. Plugged in the new part and replaced cover and kick plate.
Parts Used:
-
Ann from Fort Wayne, IN
-
Difficulty Level:Really Easy
-
Total Repair Time:Less than 15 mins
-
Tools:Screw drivers
0 of 1 people
found this instruction helpful.
Was this instruction helpful to you?
Thank you for voting!
Ice bin had been lost
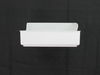
1. Removed part from packaging. 2. Cleaned part with foodsafe cleaners. 3. Rinsed thoroughly. 4. Dried thoroughly to prevent frost. 5. Placed bin in freezer. 6. Turned on ice maker. 7. Waited. 8. Discarded first batch to clear supply line. 9. Waited. 10. Enjoyed ice. 11. Provided these inductions.
Parts Used:
-
Bruce from Fort Wayne, IN
-
Difficulty Level:Really Easy
-
Total Repair Time:Less than 15 mins
0 of 1 people
found this instruction helpful.
Was this instruction helpful to you?
Thank you for voting!
took out old switch, replaced with new one from parts select.
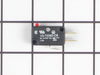
Took out icemaker,it had been letting in too much water, foynd switch was not working anymore, ordered new one from PartSelect, got it in a few days,took icemaker out put new switch in & it is working like new. I was amazed I could still get parts for a 28 year old whirlpool. And with the help I got from PartSelect,I am really thankful. JoAnne, Easley, S.C.
Parts Used:
-
Jo Anne from Easley, SC
-
Difficulty Level:Really Easy
-
Total Repair Time:Less than 15 mins
-
Tools:Screw drivers
0 of 1 people
found this instruction helpful.
Was this instruction helpful to you?
Thank you for voting!
Defrost timer had quit working
The repair was relatively simple.
The hard part was diagnosing the problem. Two of the sheet metal screws were hard to get at.
The online support helped in isolating and fixing the problem. The frig works fine again.
The hard part was diagnosing the problem. Two of the sheet metal screws were hard to get at.
The online support helped in isolating and fixing the problem. The frig works fine again.
Parts Used:
-
Michael from Wasilla, AK
-
Difficulty Level:Easy
-
Total Repair Time:15 - 30 mins
-
Tools:Nutdriver, Wrench set
0 of 1 people
found this instruction helpful.
Was this instruction helpful to you?
Thank you for voting!
Ice maker stop making ice
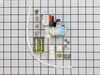
Looked up the part and found it on PartSelect. I was exactly like the same as the part I had to replace, there for I didn't have to make any new adjustments to the part to fit. I also read the story by others that had the same problem on the website. I had anticipated the part was bad, because no water was getting to the tray. I ordered the part and did the repair pretty quick.
Parts Used:
-
Roy from Blanchard, OK
-
Difficulty Level:Easy
-
Total Repair Time:15 - 30 mins
-
Tools:Wrench set
0 of 1 people
found this instruction helpful.
Was this instruction helpful to you?
Thank you for voting!
Ice Maker quit workin
Turned off water supply and electricity. Removed old valve by removing two 1/4 in nut screws and water supply line and the ice maker suppy line. Disconnected the electrical line.Reattached water supply line,the icemaker supply line and the electrical connector. Put valve back into refrigerator and attached the two 1/4 in nut screw. Turned on water supply and electricity. Bled water thru system and now have plenty of ice.
Parts Used:
-
Charles from Orange Park, FL
-
Difficulty Level:Really Easy
-
Total Repair Time:15 - 30 mins
-
Tools:Pliers, Socket set
0 of 1 people
found this instruction helpful.
Was this instruction helpful to you?
Thank you for voting!
Ice maker stopped producing ice
Checked the manuals and found the needed part. Having worked with solenoids before gave me an idea that it was the defective part. The valve would open when water was needed and you would hear this gushing sound. Water supplt was okay and the ice making unit was also working. Bought the part from this website, switched the unit and now the ice maker is working perfectly. This could not have been any easier. Make sure to keep your manuals handy!
Parts Used:
-
Melvin from Irvine, CA
-
Difficulty Level:Really Easy
-
Total Repair Time:15 - 30 mins
-
Tools:Screw drivers, Wrench set
0 of 1 people
found this instruction helpful.
Was this instruction helpful to you?
Thank you for voting!
Freezer was 40 degrees
Past experiences told me it was the defrost timer. Turned the timer wheel, the compressor came on and that told me the timer wasn't working correctly. I ordered the timer and put it in.
Parts Used:
-
Lee from Sherman, ME
-
Difficulty Level:Really Easy
-
Total Repair Time:Less than 15 mins
-
Tools:Nutdriver
0 of 2 people
found this instruction helpful.
Was this instruction helpful to you?
Thank you for voting!
ice melts
-
thomas from north huntingdon, PA
-
Difficulty Level:Very Difficult
-
Total Repair Time:More than 2 hours
-
Tools:Nutdriver
0 of 2 people
found this instruction helpful.
Was this instruction helpful to you?
Thank you for voting!
elderly neighbor"s refridgerator would not defrost
I ordered the defrost timer and then read a couple of repair history stories. The timer was fairly easy to install. Then I advanced the small knob until I felt a "click". The covers were reinstalled inside the freezer. And the appliance is normal. Plug and Play. I learned that the timer is for the activation of a heater in or under the freezer"s aluminum fin assembly. Alot of folks don"t know that a refrigerator gets it"s supply of cold air from the freezing compartment. Everybody is happy. Thanks
Parts Used:
-
Mark from Port Lavaca, TX
-
Difficulty Level:Easy
-
Total Repair Time:30 - 60 mins
-
Tools:Nutdriver
0 of 2 people
found this instruction helpful.
Was this instruction helpful to you?
Thank you for voting!
noisey fan

-
Richard from Morgan, UT
-
Difficulty Level:Really Easy
-
Total Repair Time:15 - 30 mins
-
Tools:Nutdriver, Pliers, Screw drivers
0 of 4 people
found this instruction helpful.
Was this instruction helpful to you?
Thank you for voting!
Bottom freezer not cold enough
Removed bottom air vent and removed/ replaced defrost timer by removing 4 bolts with nutdriver, disconnecting the plug connections and then reversing process. Very simple. Unfortunately, this did not solve the problem. Next step was replacing the thermostat. Again a simple procedure, but required removing freezer shelves and the rear panel. You have to exchange one lead from old thermostat to new, but very simple. Again, unfortunately, it did not solve my problem. Temp still down around 24 degrees F but needs to get to about 0 degrees. In both cases, I noticed no frosting up on the evaporator coils, just a little on the tubing that the thermostat attaches to. I'm thying to decide next step. Any help will be appreciated.
Parts Used:
-
Jack from Reynoldsburg, OH
-
Difficulty Level:Really Easy
-
Total Repair Time:15 - 30 mins
-
Tools:Nutdriver
Was this instruction helpful to you?
Thank you for voting!
refridgerator was not cooling to the proper temps and finally would not cool at all
Pulled refridgerator forward away from the wall. Remove the cardboard back behind the appliance.I saw that the condenser fan motor was not working. Unplugged the appliance from the electrical outlet. Removed a 3 wire plug from the condenser fan motor. Remove 3 screws (with a nut driver) which held the condenser fan motor in place. Remove the condenser fan motor from the appliance. Looked up the part needed for repair using the appliance model number. Found which part was applicable for the appliance. Placed the order from Price Select on a Monday morning and recieved the part 2 days later on Wednesday via FedEx. The item shipped was a 2 wire condenser fan motor. Read the instructions that came with the part. Using wire cutters, cut the old 3 wire plug. The center wire is a green and yellow striped wire. Use the same colored wire that is also shipped in the box and has connectors on both ends. Cut one of the connectors off and use the wire strippers to remove plastic wire coating. Connect both ends from the appliance and the green and yellow wire that was shipped. Use a wire nut (also shipped in the box) to connect the wires. You will have 2 black wires left on the new condenser fan motor that need to be connected to the appliance. You should have an orange colored wire and another wire that is black with a white stripe. Connect one wire from the new fan motor to the orange wire and use a wire nut to attach both wires together. Use the other black wire from the new fan motor to the black/white striped wire from the appliance. Use the wire nut to attach both those wires. Place the new condenser fan motor back in the appliance using the screws that come with the motor. Attach the green and white wire with the connector on the end to one of the 3 screws that hold the motor in place and secure the screws. Use the electical tape to hold the wires all together and away from the fan motor. Plug the appliance into the outlet. You can see the condenser fan motor working properly. Note that when connecting the 2 black wires from the new condenser fan motor to the orange and the black/white wire from the appliance, for my appliance, it did not matter which wires were connected as the fan motor was a clockwise motor. Place the cardboard appliance backing, back on to the appliance and push the refridgerator back in place. Allow about 5-6 hours to get the freezer to between 0-5 degrees. The refidgerator should be between 34-38 degrees and will take a little longer to get to that projected temp.
Parts Used:
-
John from LAS CRUCES, NM
-
Difficulty Level:Easy
-
Total Repair Time:15 - 30 mins
-
Tools:Nutdriver, Screw drivers
Was this instruction helpful to you?
Thank you for voting!
condenser motor broke
opened box,read directions,took out bad motor,installed new one.PRESTO CHANGO way to go.
Parts Used:
-
patrick from livonia, MI
-
Difficulty Level:Easy
-
Total Repair Time:15 - 30 mins
-
Tools:Nutdriver, Pliers, Screw drivers
Was this instruction helpful to you?
Thank you for voting!