




















NTW4750YQ1 Amana Washer - Instructions
Keep searches simple. Use keywords, e.g. "leaking", "pump", "broken" or "fit".
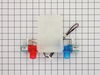
Water would not stop running over filled the washer
Unplugged the washer turned off the water disconnected the water lines then took the cover off and disconnected the wires and took 2 screws out and took the old part out and put the new 1 in
Parts Used:
-
Mary from GROVER HILL, OH
-
Difficulty Level:Very Easy
-
Total Repair Time:30 - 60 mins
-
Tools:Socket set
4 of 4 people
found this instruction helpful.
Was this instruction helpful to you?
Thank you for voting!
tub motor shot
Please check the order was refused so I would not have to pay to ship back. The lady I spoke to on the phone said to do it this way. I have been TRYING to call for 2 weeks but no one is answering the phone due to CV19!!
The order is back at your warehouse. Please give me my refund!! Plus I have emailed your CS dept. numerous times with NO answer, only automated.
The order is back at your warehouse. Please give me my refund!! Plus I have emailed your CS dept. numerous times with NO answer, only automated.
Parts Used:

-
melanie from GREENFIELD, IN
-
Difficulty Level:Really Easy
-
Total Repair Time:30 - 60 mins
5 of 7 people
found this instruction helpful.
Was this instruction helpful to you?
Thank you for voting!
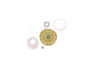
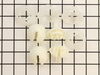
Lid wouldn't lock
Removed 5 screws on back, released 2 retention clips on front, lifted top of washer to expose lock assembly, removed 2 screws holding lock assembly in place followed electrical line back to plug behind control panel plugged new lock in, and reassembled in reverse order. Done!
Parts Used:
-
James from INDIAN LAKE, NY
-
Difficulty Level:Easy
-
Total Repair Time:30 - 60 mins
-
Tools:Nutdriver, Pliers, Screw drivers
4 of 4 people
found this instruction helpful.
Was this instruction helpful to you?
Thank you for voting!
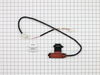
rod came loose from one upper suspension bushing
Per your directions. Note that part has been updated from original. Looks like an improvement, adds tab to grab rod, but changes installation.
Parts Used:
-
Norman from MOBILE, AL
-
Difficulty Level:Really Easy
-
Total Repair Time:30 - 60 mins
4 of 5 people
found this instruction helpful.
Was this instruction helpful to you?
Thank you for voting!
making noise when starting spin cycle
Watch video on the site and the insulation will be easy and take about 30 min.
Parts Used:
-
JERRY W. from CARROLLTON, GA
-
Difficulty Level:Really Easy
-
Total Repair Time:30 - 60 mins
-
Tools:Nutdriver, Screw drivers, Socket set
4 of 5 people
found this instruction helpful.
Was this instruction helpful to you?
Thank you for voting!
wasn't cleaning very well

-
Brian from GREENBRIER, AR
-
Difficulty Level:Really Easy
-
Total Repair Time:30 - 60 mins
-
Tools:Nutdriver, Pliers, Screw drivers, Socket set
3 of 3 people
found this instruction helpful.
Was this instruction helpful to you?
Thank you for voting!
Washer -Maytag Centennial- would NOT agitate. It would run through all cycles as indicated by the lights and even spin at the end, but never agitated. It also did not appeared to go into "sensing" mode at the start. Took a long time to move from "sensing" light to "wash" light. Did not hear or see a
There are a number of videos showing how to do this repair:
>Disconnect power and water - cold, hot and drain.
>Put washer on its side on a stand (low platform) to get to the bottom.
Better than than just laying front of washer on floor.
>Used a drop light to help see bottom.
>Removed Pulley Cover using nut driver - has 2 screws with nut
heads.
>Removed and replaced the Shift Actuator (part provided) using a
Phillips screw driver - 2 green screws. Unplugged electrical
connector which should be reconnected before new unit is screwed
back down.
Replacement part is not the same as the original. From what I read.
this part has been a problem with these washers.
>Put Pulley Cover back on.
>Reset washer upright.
>Reconnected water and power.
>Ran "CALIBRATION". In Diagnostic Test Mode, turned to "rinse"
light on and pushed "start" button.
>Ran "AUTOMATIC TEST". In Diagnostic Test Mode, turned to "spin"
light on and pushed "staet" button. Washer agitated in first cycle
- "sensing" and in "wash".
.
Washer has been working as it should and I a very happy with the results.
I must say that PartSelect Identified the bad part as the Shift Actuator right off from the symptoms I provided.
>Disconnect power and water - cold, hot and drain.
>Put washer on its side on a stand (low platform) to get to the bottom.
Better than than just laying front of washer on floor.
>Used a drop light to help see bottom.
>Removed Pulley Cover using nut driver - has 2 screws with nut
heads.
>Removed and replaced the Shift Actuator (part provided) using a
Phillips screw driver - 2 green screws. Unplugged electrical
connector which should be reconnected before new unit is screwed
back down.
Replacement part is not the same as the original. From what I read.
this part has been a problem with these washers.
>Put Pulley Cover back on.
>Reset washer upright.
>Reconnected water and power.
>Ran "CALIBRATION". In Diagnostic Test Mode, turned to "rinse"
light on and pushed "start" button.
>Ran "AUTOMATIC TEST". In Diagnostic Test Mode, turned to "spin"
light on and pushed "staet" button. Washer agitated in first cycle
- "sensing" and in "wash".
.
Washer has been working as it should and I a very happy with the results.
I must say that PartSelect Identified the bad part as the Shift Actuator right off from the symptoms I provided.
Parts Used:

-
Maxwell from RINGWOOD, NJ
-
Difficulty Level:Easy
-
Total Repair Time:30 - 60 mins
-
Tools:Nutdriver, Screw drivers
3 of 3 people
found this instruction helpful.
Was this instruction helpful to you?
Thank you for voting!
washer would not spin on wash cycle
My daughter is the handy one in the family. She followed Steve's video installation steps and in an hour i was washing clothes.
Parts Used:
-
Kim from MOUNT UNION, PA
-
Difficulty Level:Really Easy
-
Total Repair Time:30 - 60 mins
-
Tools:Screw drivers, Socket set
3 of 3 people
found this instruction helpful.
Was this instruction helpful to you?
Thank you for voting!
Actuator clicking not going into spin mode
I laid the washer on its front side to access underneath. I removed the original washer pulley system and actuator very easily to replace them with the new parts. The new/updated model actuator for my machine was a little bit challenging to maneuver around existing parts to make work, but I eventually got it installed. The plug was angled very differently than the original plug on the actuator, but it was a tight fit. There was no issue installing the washer pulley system. Hooked washer back up to power, water lines, drain line, and the washer has been working perfectly since.
Parts Used:
-
Courtney from Hollis, NH
-
Difficulty Level:Easy
-
Total Repair Time:30 - 60 mins
-
Tools:Pliers, Socket set
3 of 3 people
found this instruction helpful.
Was this instruction helpful to you?
Thank you for voting!
Burning smell, ASSUMED it was the belt
Once we put the washer on it's side noticed lots of oil on the floor and in the belt cover area. Replaced belt anyway but issue is the leaking transmission. Starting warranty process since Maytag carries a 10-year part warranty and machine is 6.5 years old. Wish me luck !!!
Parts Used:
-
James from MAHWAH, NJ
-
Difficulty Level:A Bit Difficult
-
Total Repair Time:30 - 60 mins
-
Tools:Nutdriver
4 of 6 people
found this instruction helpful.
Was this instruction helpful to you?
Thank you for voting!
Stripped screws on a hub drive replacement
Getting to the actual hub is a bit difficult as it involves removing the accetuator and takes some time and patience, but when I tried to replace with a new hub, I found that the screws were stripped, so PartSelect walked me through the ordering process and helped me choose the exact size screws that I needed. Parts came quickly...I already had the hub waiting to be secured and the screws tightened easily. (We had tried using a similar size, but you REALLY need the whirlpool screws that go in there) No more spinning problems, and the machine is not jumping around anymore. Works just like before. This particular machine has to have this part replaced at least twice a year (luckily it's cheap),but saves us from having to buy a whole new machine. My son also told me that since I replace the part so often, best to replace the screws every other time as well.
Parts Used:
-
Bruce from GLOBE, AZ
-
Difficulty Level:Easy
-
Total Repair Time:15 - 30 mins
-
Tools:Screw drivers
3 of 3 people
found this instruction helpful.
Was this instruction helpful to you?
Thank you for voting!
cold water inlet valve bad
Ordered the inlet assembly from this site. Received it the day after I received the notice it shipped. Watched their video of how to replace the part. Easy job, done in 15 minutes. Only needed a screwdriver to take the cover off the back of the washer control panel. A company wanted $400 to replace the part.
Definitely recommend the company and will use again.
Definitely recommend the company and will use again.
Parts Used:
-
Doris from CONCORD, NC
-
Difficulty Level:Easy
-
Total Repair Time:15 - 30 mins
-
Tools:Screw drivers
3 of 3 people
found this instruction helpful.
Was this instruction helpful to you?
Thank you for voting!
washer shaking
the repair went well but I still haven't received a refund for the order was was sent incorrectly. Order #22085769 order date 2/3/23
Parts Used:

-
Oralia from DALLAS, TX
-
Difficulty Level:Easy
-
Total Repair Time:30 - 60 mins
-
Tools:Pliers
3 of 3 people
found this instruction helpful.
Was this instruction helpful to you?
Thank you for voting!
Making a loud noise for a while then stopped spinning
Removed two screws to remove guard. Two screws to remove another part with wires. Pulley nut was already missing. Component was twist locking tabs.
Parts Used:
-
Lucas from ARKANSAS CITY, KS
-
Difficulty Level:Really Easy
-
Total Repair Time:15 - 30 mins
-
Tools:Screw drivers, Wrench set
3 of 3 people
found this instruction helpful.
Was this instruction helpful to you?
Thank you for voting!
No agitation
Pop center cover off wash plate. Remove bolt. Lift off washplate. Slide retainer off with screwdriver and hammer. Slide new retainer on. Replace washplate.
Parts Used:

-
Jim from ACUSHNET, MA
-
Difficulty Level:Very Easy
-
Total Repair Time:15 - 30 mins
3 of 3 people
found this instruction helpful.
Was this instruction helpful to you?
Thank you for voting!