




















MDS251RER0 Frigidaire Dishwasher - Instructions
Keep searches simple. Use keywords, e.g. "leaking", "pump", "broken" or "fit".
latch broke unable to open door
Take front off about 12 screws two screws held latch on took four wires off two white two black very simple to replace.
Parts Used:
-
Don from Casa Grande, AZ
-
Difficulty Level:Really Easy
-
Total Repair Time:15 - 30 mins
-
Tools:Screw drivers
1 person
found this instruction helpful.
Was this instruction helpful to you?
Thank you for voting!
Old gasket melted.
Watched installation video and followed directions. All went smoothly.
Parts Used:
-
Al from WOODBURY, MN
-
Difficulty Level:Very Easy
-
Total Repair Time:15 - 30 mins
-
Tools:Pliers, Screw drivers
1 person
found this instruction helpful.
Was this instruction helpful to you?
Thank you for voting!
Missing part

-
Michael from STEWARTSVILLE, NJ
-
Difficulty Level:Very Easy
-
Total Repair Time:Less than 15 mins
1 person
found this instruction helpful.
Was this instruction helpful to you?
Thank you for voting!
Brass nuts holding heating element in place had split
All you have to do power down the unit, then disconnect the power connections at the element and remove the old nuts and replace them with the new ones and tighten. Don't tighten too much, the element has a rubber seal that just needs the nut to snug it up.
Parts Used:

-
Jonathan from New Hope, PA
-
Difficulty Level:Really Easy
-
Total Repair Time:Less than 15 mins
-
Tools:Pliers, Wrench (Adjustable)
2 of 4 people
found this instruction helpful.
Was this instruction helpful to you?
Thank you for voting!
Water was not filling the dishwasher at the approbriate time in the cycle.
Pulled the dishwasher out, turned it on the side to gain access to the inlet valve, removed the inlet valve. The hard part was getting the valve fitting that didn't come with the inlet valve. I had to use liqued wrench to loosen the hard water deposits to get it off. Once it was off, putting the new valve on was easy. Also of note, when I tested the old vlalve with an Ohm meeter it read 8 M ohm, not infinity. The new one only measured at about 1k ohm.
Parts Used:
-
Michael from Surprise, AZ
-
Difficulty Level:A Bit Difficult
-
Total Repair Time:1- 2 hours
-
Tools:Nutdriver, Pliers, Screw drivers, Wrench (Adjustable)
2 of 4 people
found this instruction helpful.
Was this instruction helpful to you?
Thank you for voting!
The latch was not broken
The repair was pretty straightforward. If somebody is attempting, they should make sure that screws close the bottom part of the door should be opened. You only need to open the top 4 screws.
Parts Used:
-
Rishi from San Jose, CA
-
Difficulty Level:Easy
-
Total Repair Time:30 - 60 mins
-
Tools:Screw drivers
2 of 4 people
found this instruction helpful.
Was this instruction helpful to you?
Thank you for voting!
Dishwasher Sprang a Huge Leak
I pulled out the dishwasher and found the inlet tubing had a tear in the accordion part of the tube. I searched online for the model number and was directed to PartSelect. I ordered the inlet tubing, and it only took a few days to get to me. I then watched the video and was able to install the new tubing.
PartSelect is a life saver and I saved lots of money by not having to call a repairman.
PartSelect is a life saver and I saved lots of money by not having to call a repairman.
Parts Used:
-
Rita from MEDANALES, NM
-
Difficulty Level:Very Easy
-
Total Repair Time:30 - 60 mins
-
Tools:Pliers, Screw drivers
1 person
found this instruction helpful.
Was this instruction helpful to you?
Thank you for voting!
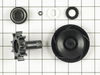
heard a noise while dishwasher was in operation, opened door and noticed the dishes were dry, no water was spraying out and dishwasher was making a whirling noise.
After I received the Motor Shaft Kit I removed the spray arm tower and removed all screws, the center screw would not come out of the impeller, was stripped. Used a hammer and chisel to split the center of impeller and was able to remove. Also had to split the bottom impeller because it would not come out. All the parts that came in kit fit perfectly. Thank you Very much.
Parts Used:
-
Joe from Arvada, CO
-
Difficulty Level:A Bit Difficult
-
Total Repair Time:More than 2 hours
-
Tools:Nutdriver, Pliers, Screw drivers, Wrench set
1 of 2 people
found this instruction helpful.
Was this instruction helpful to you?
Thank you for voting!
latch broke off on door
I read other descriptions on how to repair this item at this site. All were spot on. Simply unscrew the control panel (6 screws on inside of unit), then unscrew the two screws holding the latch in place (it's a one piece unit), then remove the (4) leads to the latch paying attention to where each of the colored wires goes...re-attach all screws and you are done. It worked like a breeze after I was done. I did forget to turn off the power to the dishwasher as I thought i did but due to the broken latch the unit wouldn't function so I misjudged it. Next time (hopefully there isn't one) I will make sure power is off. I didn't use the gasket but have it in case something leaks down the road. Took less than 10 minutes and my 11 year old son helped too!
Parts Used:
-
Timothy from Suffolk, VA
-
Difficulty Level:Really Easy
-
Total Repair Time:Less than 15 mins
-
Tools:Pliers, Screw drivers
1 of 2 people
found this instruction helpful.
Was this instruction helpful to you?
Thank you for voting!
Broken door latch assembly
This repair turned out quite easy. I removed the 6 phillips head screws that held the door latch cover in place, dropped the cover and let it hang while I removed the latch assembly that was held in place by two torx head screws. I used needle nosed pliers to gently disconnect the wiring connectors from the old latch assembly one at the time, then carefully attached the wire to corresponding lug on the new latch. Once all wiring was transferred, I installed the new latch using the two torx head screws, replaced the cover, and reinstalled the 6 phillips head screws to secure the cover. There was no need to replace the gasket, so I'm holding on to it for future use.
Parts Used:
-
Tony from Troutman, NC
-
Difficulty Level:Really Easy
-
Total Repair Time:15 - 30 mins
-
Tools:Pliers, Screw drivers
1 of 2 people
found this instruction helpful.
Was this instruction helpful to you?
Thank you for voting!
Dish washer does not start
I was recommended to try the latch and gasket kit. The latch was easy to remove and install.
Parts Used:
-
Goran from Mountain View, CA
-
Difficulty Level:Really Easy
-
Total Repair Time:15 - 30 mins
-
Tools:Pliers, Screw drivers
1 of 2 people
found this instruction helpful.
Was this instruction helpful to you?
Thank you for voting!
Dishwasher ran through cycle but no water ever entered the washer.
Turned off water & pulled plug from electrical outlet. Two screws removed the lower cover, two more screws hidden behind the opened door allowed the removal of the bottom panel. Laid a towel under the valve on the lower left to catch water & disconnected the inlet fitting with a 1/2" wrench. Remove the two screws holding water inlet valve next. With valve loose, remove electrical connector and drain hose (pliers). Valve has an elbow fitting that will need to be removed and installed on new valve - use Teflon tape or paste for a leak-free assembly. Reattach the drain hose & electrical connector before installing the valve using the two screws. Once in place, re-attach the inlet fitting (no Teflon required on tapered seats) and make sure everything is tight. Test washer through one cycle for water flow and no leaks. If all is good, remove towel and tools, then re-install the two lower panels. Clean up and you are done!
Parts Used:
-
Ronald from Chardon, OH
-
Difficulty Level:Really Easy
-
Total Repair Time:15 - 30 mins
-
Tools:Pliers, Screw drivers, Wrench set
2 of 5 people
found this instruction helpful.
Was this instruction helpful to you?
Thank you for voting!
Broken Handle
Didn't have a Torx screwdriver, but an Allen Wrench worked just fine. Also had to replace the gasket. Was worried about the fit of the door when closed with the new latch as the handle was very limp compared with the original. Also suspected that the new latch would cause the door to seat differently on the old gasket. Eventually found out from a repairman that the replacement handle does feel limp when the door is shut, and that they include the new gasket in case the old one is worn or that the new latch causes the door to seat differently on the old gasket.
Parts Used:
-
William from Maryville, IL
-
Difficulty Level:A Bit Difficult
-
Total Repair Time:30 - 60 mins
-
Tools:Screw drivers
1 of 2 people
found this instruction helpful.
Was this instruction helpful to you?
Thank you for voting!
Dishwasher panel would light up and go through cycle but not start washing
I used the diagnostic tool to determine which part I needed and ordered it. After receiving the part very quickly I took off the front panel easily enough and removed the old part as per video instructions. I realized it did not look exactly the same. I wasted a good bit of time calling both the parts co. and Fridgidaire to find out that there had been numerous problems with the old part so a new part was designed differently and therefore did not look the same but should work. Reviewing the video again I installed it and Voila the dishwasher was once again operational. The big mistake is I took the complete front part of the dishwasher off which took a while to reinstall. All in all the experience was a good one. Saved me money and God knows these days every penny counts.
Parts Used:
-
Linda from Hollywood, FL
-
Difficulty Level:A Bit Difficult
-
Total Repair Time:30 - 60 mins
-
Tools:Pliers, Screw drivers
1 of 2 people
found this instruction helpful.
Was this instruction helpful to you?
Thank you for voting!
dishwasher leaked around the door
First I pulled out the old gasket, used this to measure for the new gasket, cut to right length, pushed new gasket into the track and washed a load of dishes. No leaks! This took about 2 minutes to complete.
Parts Used:
-
Karla from Hickory, NC
-
Difficulty Level:Really Easy
-
Total Repair Time:Less than 15 mins
2 of 5 people
found this instruction helpful.
Was this instruction helpful to you?
Thank you for voting!