




















MDS251RER0 Frigidaire Dishwasher - Instructions
Keep searches simple. Use keywords, e.g. "leaking", "pump", "broken" or "fit".
Door Latch Broke Off, Can't Close Door
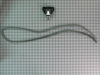
Very easy to remove old broken door latch assembly, easier to install replacement. With door fully opened, I removed the 8 screws holding down the whole front casing, including the controls casing. Removed 2 Torx screws holding door latch assembly and then made sure that I marked all 4 wires before disconnecting them from door latch assembly. Connected wires to new door latch assembly, secured it with the 2 Torx screws, aligned and secured the controls and front cover casings with 8 screws. Done within 30 mins. Thanks guys for posting how-tos and thanks to PartSelect for a very fast shipping!!!
Parts Used:
-
Giovanni from Glen Burnie, MD
-
Difficulty Level:Easy
-
Total Repair Time:15 - 30 mins
-
Tools:Screw drivers
2 of 3 people
found this instruction helpful.
Was this instruction helpful to you?
Thank you for voting!
Dishwasher was leaking water
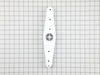
The spray arm had become damaged on one side -- one side had apparently melted off. I replaced it, and it seems to have fixed the problem for now.
Parts Used:
-
Seth from Seattle, WA
-
Difficulty Level:Really Easy
-
Total Repair Time:Less than 15 mins
-
Tools:Wrench set
2 of 3 people
found this instruction helpful.
Was this instruction helpful to you?
Thank you for voting!
needed wheels for the roller part of dishwasher
Just snapped the wheels on and attached the bracket to the existing part.
Parts Used:

-
Jeanette from Fort Lauderdale, FL
-
Difficulty Level:Really Easy
-
Total Repair Time:Less than 15 mins
2 of 3 people
found this instruction helpful.
Was this instruction helpful to you?
Thank you for voting!
Missing roller made it difficult to move rack.
-
Racquel from Lake Charles, LA
-
Difficulty Level:Really Easy
-
Total Repair Time:Less than 15 mins
3 of 6 people
found this instruction helpful.
Was this instruction helpful to you?
Thank you for voting!
missing a wheel on dish rack
-
Pam from Cherokee, AL
-
Difficulty Level:Really Easy
-
Total Repair Time:Less than 15 mins
2 of 3 people
found this instruction helpful.
Was this instruction helpful to you?
Thank you for voting!
Lower repair arm failed and did not allow dishwasher to complete wash cycle. Repair completed in less than 10 minutes and dishwasher is now functional. Thanks.
remove center nut retaining the arm to the unit and replaced the arm.
replaced the nut.
complete.
replaced the nut.
complete.
Parts Used:
-
Donald from Prior Lake, MN
-
Difficulty Level:Really Easy
-
Total Repair Time:Less than 15 mins
-
Tools:Wrench set
2 of 3 people
found this instruction helpful.
Was this instruction helpful to you?
Thank you for voting!
Dishwasher racks would come off track
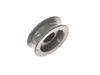
I clipped the wheels onto the rack. It couldn't be any easier. then i removed the # 25 torx screw which attached the broken slide wheel to the tub and installed the new wheel with the same torx screw.
Parts Used:
-
chris from staten island, NY
-
Difficulty Level:Really Easy
-
Total Repair Time:Less than 15 mins
3 of 7 people
found this instruction helpful.
Was this instruction helpful to you?
Thank you for voting!
Broken handle
Simple- Disconnect electric to washer, Remove inner door panel with philips screw driver, disconnect electrical wires watching exactly how they are to be replaced. remove star screws securing handle mechanism. Replace with new handle, connect wiring, replace inner door panel and your all set. Good luck.
Parts Used:
-
Steve from Carrollton, KY
-
Difficulty Level:Really Easy
-
Total Repair Time:Less than 15 mins
-
Tools:Screw drivers
1 person
found this instruction helpful.
Was this instruction helpful to you?
Thank you for voting!
The bottom trim peice was badly twisted and bent.
The dishwasher was already lose so laying on it's back was easy. Two phillip screws were all that held the piece in place .... and the replacement was a simple slide in.
Parts Used:

-
Anthony from Ozone Park, NY
-
Difficulty Level:Really Easy
-
Total Repair Time:Less than 15 mins
-
Tools:Screw drivers
1 person
found this instruction helpful.
Was this instruction helpful to you?
Thank you for voting!
Door latch broke
Removed the screws that held the cover on, then removed the 2 screws that held the door latch in place. Disconnected the broken door latch and attached the new one. Put all the screws back in and that was it! Also, the shipment of the part was SO QUICK!
Parts Used:
-
Jennifer from Milford, PA
-
Difficulty Level:Really Easy
-
Total Repair Time:Less than 15 mins
-
Tools:Screw drivers
1 person
found this instruction helpful.
Was this instruction helpful to you?
Thank you for voting!
Plastic handle had broken
First dissconnect power, and remove the 6 phillips-head screws from the back/upper side of the door, next remove the 2 torx screws holding the handle assembly, and unplug the 2 micro switches attached to the handle. Reverse this procedure and you're finished. It's so easy, a caveman could do it.
Parts Used:
-
Steven from Tampa, FL
-
Difficulty Level:Easy
-
Total Repair Time:Less than 15 mins
-
Tools:Screw drivers
2 of 4 people
found this instruction helpful.
Was this instruction helpful to you?
Thank you for voting!
door latch assembly broke
I opened the control knob panel. The latch assembly is located behind inside the panel along w/ the wires. This is my second replacement of the assembly. The last one lasted about 2 years. They should make a sturdier latch assembly next time.
Parts Used:
-
TITUS from LEVITTOWN, PA
-
Difficulty Level:Really Easy
-
Total Repair Time:Less than 15 mins
-
Tools:Pliers, Screw drivers
1 person
found this instruction helpful.
Was this instruction helpful to you?
Thank you for voting!
Door latch broken on one side
Removed the screws that hold the panel on ( just the top ones-no need to go all the way down the sides. Need a "star" headed screwdriver to remove the switch itself. Then removed the wires (4),one be one, so as not to mix them up. reinstalled all thescres for the switch, then the panel. Job done.
What amazes me is that Frigidaire doesn't read your page to realize that the handle assembly was defective and send out a recall. look at all the repars listed in your site , and these re just from the people that have responded with comments and who use your service. New handle/switch is much more sturdy with a higher density plastic that the original. Your service is easy to use, prompt and accurate. Fixed the dishwasher while my wife went to the store. Dishwasher done in 15 minutes and watched theNCCA tournament for 2hours in complete peace !!!!! No need to tell the wife only spent 15 minutes.
What amazes me is that Frigidaire doesn't read your page to realize that the handle assembly was defective and send out a recall. look at all the repars listed in your site , and these re just from the people that have responded with comments and who use your service. New handle/switch is much more sturdy with a higher density plastic that the original. Your service is easy to use, prompt and accurate. Fixed the dishwasher while my wife went to the store. Dishwasher done in 15 minutes and watched theNCCA tournament for 2hours in complete peace !!!!! No need to tell the wife only spent 15 minutes.
Parts Used:
-
Michael E from Commerce Township, MI
-
Difficulty Level:Really Easy
-
Total Repair Time:Less than 15 mins
-
Tools:Screw drivers
1 person
found this instruction helpful.
Was this instruction helpful to you?
Thank you for voting!
Door latch was broken
First i removed the screws on the back panel, unscrewed the latch, removed the wires and installed the new latch.
I found the latch is too expensive for a little plastic part.
I found the latch is too expensive for a little plastic part.
Parts Used:
-
Rulph from Maimi, FL
-
Difficulty Level:Really Easy
-
Total Repair Time:Less than 15 mins
-
Tools:Screw drivers
1 person
found this instruction helpful.
Was this instruction helpful to you?
Thank you for voting!
Latch handle assembly broke. Dishwasher would not close
Removed the screws on the inside of the door gaining access to the handle assembly. Lifted broken assembly out, inserted and secured the new handle assembly according to the directions.
The part was ordered and received the next day. The entire process was extremely easy. A repair person would have charged twice the amount of the part plus labor just to come out!!
The part was ordered and received the next day. The entire process was extremely easy. A repair person would have charged twice the amount of the part plus labor just to come out!!
Parts Used:
-
Shauna from Mount Olivet, KY
-
Difficulty Level:Really Easy
-
Total Repair Time:Less than 15 mins
-
Tools:Screw drivers
1 person
found this instruction helpful.
Was this instruction helpful to you?
Thank you for voting!