




















MDE14PSADW Maytag Dryer - Instructions
Keep searches simple. Use keywords, e.g. "leaking", "pump", "broken" or "fit".
Squealing noise while operating
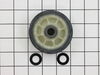
Went on line and got a diagram of the dryer. Removed four screws around the door. Removed the door and then the front cover. The toughest part was removing the drum. Once I got that out of the way replacing the rollers was easy. Re installed the drum. The belt was a little tricky but worked. Then replaced the front of the dryer and the door. The dryer works fine now and no more noise. Pretty easy.
Parts Used:
-
Jeff from Alameda, CA
-
Difficulty Level:Easy
-
Total Repair Time:30 - 60 mins
-
Tools:Screw drivers, Socket set
1 person
found this instruction helpful.
Was this instruction helpful to you?
Thank you for voting!
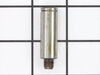
shaft had become worn , making loud noise and also causing drum roller to wear prematurely.
first, i removed two screws at the bottom of front panel. then lifted from the bottom removing it. next, removed drum surround and drum. next , removed right roller and roller shaft. then installed new shaft, slide roller back on shaft. next reinstalled drum, drum surround and front panel. Now so quiet you can hardly hear it run, also my sister says it drys much faster.
Parts Used:
-
kenneth from mineral bluff, GA
-
Difficulty Level:Easy
-
Total Repair Time:15 - 30 mins
-
Tools:Pliers, Screw drivers, Socket set
1 person
found this instruction helpful.
Was this instruction helpful to you?
Thank you for voting!
Loud Sqealing Noise
Remove the door and front cover ,then the top flips up ,remove the front drum support then the drum,remove the snap ring and the pulley
Parts Used:
-
Jeffrey from Adrian, PA
-
Difficulty Level:Easy
-
Total Repair Time:15 - 30 mins
-
Tools:Screw drivers, Socket set
1 person
found this instruction helpful.
Was this instruction helpful to you?
Thank you for voting!
Dryer would not heat.
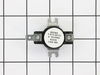
I followed the YouTube video for pulling the heating element to remove and place the thermostat. The actual thermostat removal and replacement was pretty simple. Most of my time was spent removing the front panel, pulling and reinstalling the heating element.
Parts Used:
-
Glen from Clifton, TX
-
Difficulty Level:A Bit Difficult
-
Total Repair Time:30 - 60 mins
-
Tools:Nutdriver, Pliers, Screw drivers
1 person
found this instruction helpful.
Was this instruction helpful to you?
Thank you for voting!
Dyer was making loud banging noise,
I use U Tube watched Video, you have to take apart the dryer, but pretty simple to do. The drum rollers were very easy to install, make sure to have snap ring plyers, installing belt was easy too, make sure to put it back on it the way it came off, mine was ribbed side down on drum. Take a picture if necessary. Getting the belt on the pulley right is the most important part, the rest is just reassembling,
Parts Used:
-
Corinne from SIMI VALLEY, CA
-
Difficulty Level:A Bit Difficult
-
Total Repair Time:30 - 60 mins
-
Tools:Screw drivers, Socket set
1 person
found this instruction helpful.
Was this instruction helpful to you?
Thank you for voting!
Loud squelling noise when dryer was running
Removed front of dryer, removed inner cover, slid roller belt off of drum to remove drum. Only tricky part was the two clip rings. My pliers had .070 tips and the ring holes were smaller so I had to run to HD to buy a pair with various size tips, ended up using the .047 tips. Only one wheel was squeaking when I rotated them by hand, but I had ordered both as recommended here so I replaced them both. Put everything back together feeling the belt to make sure it was not twisted and rolled smoothly when I rotated the drum by hand. Works great now. Lots of thanks to this site and all the posters who share their info!
Parts Used:
-
Michael from LAKE FOREST, CA
-
Difficulty Level:Easy
-
Total Repair Time:30 - 60 mins
-
Tools:Screw drivers, Socket set
1 person
found this instruction helpful.
Was this instruction helpful to you?
Thank you for voting!
Drum roller was squealing loudly every time the dryer was used. Sounded like a car's power steering belt squeal only 10 times louder.
I watched a video on YouTube for the disassembly of the dryer. The parts replacement took less than 20 minutes; the rest of the time was spent on disassembly and reassembly.
Parts Used:
-
Ron from SUMMERVILLE, SC
-
Difficulty Level:Easy
-
Total Repair Time:30 - 60 mins
-
Tools:Nutdriver, Screw drivers, Socket set, Wrench set
1 person
found this instruction helpful.
Was this instruction helpful to you?
Thank you for voting!
Would be very noisy with squeaking when on cycle to dry.
Moved the front door/panel two screws at the bottom of the panel.Then removed the front plate and support for the drum assy. four screws.Then loosen the belt and removed the drum assy. to get access to the drum roller to the back top right,.Used snap ring pliers to remove the clip cleaned the shaft an installed the new roller with the fiber washers and installed per instruction from your video,Also replaced the belt and put all items back in reverse order.It worked like a champ so easy,I would recommend your web site and videos to any one who wants to do it yourself. I have used you in the past and will continue using you for other items for parts and support.
Parts Used:
-
Ronald D. from MIAMI, FL
-
Difficulty Level:Very Easy
-
Total Repair Time:30 - 60 mins
-
Tools:Pliers, Screw drivers
1 person
found this instruction helpful.
Was this instruction helpful to you?
Thank you for voting!
Squeaky, squeaky, squeaky.
Followed the video. Hardest part was getting the belt around the ideler pulley and motor pulley without seeing. But I got it! Thanks to this site you rock!
Parts Used:
-
Jonathan from LUMBERTON, NJ
-
Difficulty Level:Really Easy
-
Total Repair Time:30 - 60 mins
1 person
found this instruction helpful.
Was this instruction helpful to you?
Thank you for voting!
Noisy dryer drum
I made the mistake of repairing my old maytag neptune dryer with cheap eBay rollers and they crumbled apart and made a ton of noise within a month. I replaced them with quality OEM parts from partselect.com and my dryer is running like new. It's easy to do with common household tools and there are even easy to follow instructions available online.
Parts Used:
-
Chris from CLINTON, CT
-
Difficulty Level:Easy
-
Total Repair Time:30 - 60 mins
-
Tools:Screw drivers, Wrench set
1 person
found this instruction helpful.
Was this instruction helpful to you?
Thank you for voting!
Broken prong
I began by removing the two screws at the lower part of the front panel. After removing the panel I was able to access and remove the broken switch which was located on the front panel. I popped out the old switch and replaced it with the new one, reattached the wires and put the front panel on and the jod was done.
Parts Used:
-
Larry from Amarillo, TX
-
Difficulty Level:Really Easy
-
Total Repair Time:Less than 15 mins
-
Tools:Screw drivers
1 person
found this instruction helpful.
Was this instruction helpful to you?
Thank you for voting!
One of the drum support rollers was worn out resulting in a loud screeching noise when the dryer was in use.
Read the instructions included with the parts, removed the 2 screws on the front of the dryer. Removed a couple of wire connections and 4 screws that held the drum in place. Moved the drum enough to have access to the roller supports. I removed the nut from the back of the supports with a 1/2" wrench. Placed the new supports on the old support pins and reinstalled them. Put it all back together. Probably the most difficult task was getting the drive belt back on the drum correctly. I was done in just over 1 hour.
Parts Used:
-
Casey from Fredonia, KS
-
Difficulty Level:Easy
-
Total Repair Time:1- 2 hours
-
Tools:Pliers, Screw drivers, Wrench (Adjustable), Wrench set
1 person
found this instruction helpful.
Was this instruction helpful to you?
Thank you for voting!
Door switch broke
Just follow the video. The hardest part is getting the top to disengage from the clips.
Parts Used:
-
Howard from NEW ROCHELLE, NY
-
Difficulty Level:Easy
-
Total Repair Time:15 - 30 mins
1 person
found this instruction helpful.
Was this instruction helpful to you?
Thank you for voting!
The dryer door would not cut the machine off when it was opened.
-
JEAN from KINSTON, NC
-
Difficulty Level:Very Easy
-
Total Repair Time:Less than 15 mins
-
Tools:Screw drivers
1 person
found this instruction helpful.
Was this instruction helpful to you?
Thank you for voting!
dryer door would not stay closed.
I unscrewed the door catch and pried out with some resistance the strike part. Screwed in the catch and pushed in the strike. Closed door. Voila!! Back in business with assurance.
Parts Used:

-
maria from ROCHESTER, NY
-
Difficulty Level:Really Easy
-
Total Repair Time:Less than 15 mins
-
Tools:Pliers, Screw drivers
1 person
found this instruction helpful.
Was this instruction helpful to you?
Thank you for voting!