




















MDE14PSADW Maytag Dryer - Instructions
Keep searches simple. Use keywords, e.g. "leaking", "pump", "broken" or "fit".
The dryer was make a loud screeching sound
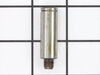
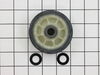
Remove the door and the plastic brackets on the other side of the door opening. Remove the front cover by gentally pulling from the top first. Support the dryer basket (I used an old towel and a block of wood. With a 1/2 inch wrench remove the Roller Shaft with the Drum Support still attached. Replace new shaft and drum support. (always replace both at the same time or you will find that the problem will come back much sooner.) Careful when installing. Make sure that the new non metalic washers (suppied) are propery seated when you are tightening down the nut.
Parts Used:
-
Jonathan from Spokane, WA
-
Difficulty Level:Really Easy
-
Total Repair Time:15 - 30 mins
-
Tools:Screw drivers, Wrench set
2 of 3 people
found this instruction helpful.
Was this instruction helpful to you?
Thank you for voting!
dryer door would not close
discovered it was a broken latch. Ordered the latch, only took 2 days to arrive and all I had to do was remove the broken latch and snap in the new one. I saved myself a service call. I'm very happy!!!!!!
Parts Used:

-
Priscilla from Portland, ME
-
Difficulty Level:Really Easy
-
Total Repair Time:Less than 15 mins
2 of 3 people
found this instruction helpful.
Was this instruction helpful to you?
Thank you for voting!
The female catch in door was bro9ken
I took out the old worn out part and replaced with the one I order.
Parts Used:
-
JOSEPH from ANSONIA, CT
-
Difficulty Level:Really Easy
-
Total Repair Time:Less than 15 mins
2 of 3 people
found this instruction helpful.
Was this instruction helpful to you?
Thank you for voting!
Dryer was leaving black marks on the clothes, and was very noisy.
The video was excellent and made for an easy repair. Would highly recommend.
Parts Used:
-
Fred from GREENCASTLE, PA
-
Difficulty Level:Easy
-
Total Repair Time:30 - 60 mins
-
Tools:Nutdriver, Screw drivers
2 of 3 people
found this instruction helpful.
Was this instruction helpful to you?
Thank you for voting!
Loss of two baffles
Others have described how to remove 4 screws and remove the front panel of the dryer. The problem I saw is that some screws broke off and fell inside while others remained on the separated baffle. The old screws that I found were 1 1/4 inch. The parts manual indicates a replacement screw that is 1 inch long and a number 10 width. One set of holes for the baffles has slotted holes. It appears that wear in the paint indicates movement before breaking off. My solution to the slotted holes was to use washers on the screws and to tighten the screws in the position where any force was not going to move the screws to the center position of the slots. The force of the separation caused the slotted holes to expand.
Parts Used:
-
James from Revere, MA
-
Difficulty Level:A Bit Difficult
-
Total Repair Time:30 - 60 mins
-
Tools:Socket set
2 of 3 people
found this instruction helpful.
Was this instruction helpful to you?
Thank you for voting!
replace door closer
Removed power and front panel, removed broken latch, pushed in new latch and replaced the front panel and power. Done
Parts Used:
-
Erwin from Somersworth, NH
-
Difficulty Level:Really Easy
-
Total Repair Time:Less than 15 mins
-
Tools:Screw drivers, Socket set, Wrench set
2 of 3 people
found this instruction helpful.
Was this instruction helpful to you?
Thank you for voting!
Broken belt, drum did not spin.
We could not find directions for the brand that we have. First we took the back off, which we did not need to do.
lift the top of the dryer, remove the front remove drum. Place belt on front of motor, wrap double belt around support on bottom of dryer, open the remaining belt and stretch around drum. Hold drum in place, replace front and top.
Need at least 2 people, not at all intuitive.
lift the top of the dryer, remove the front remove drum. Place belt on front of motor, wrap double belt around support on bottom of dryer, open the remaining belt and stretch around drum. Hold drum in place, replace front and top.
Need at least 2 people, not at all intuitive.
Parts Used:
-
Beth from Feura Bush, NY
-
Difficulty Level:Difficult
-
Total Repair Time:More than 2 hours
-
Tools:Pliers, Screw drivers
3 of 6 people
found this instruction helpful.
Was this instruction helpful to you?
Thank you for voting!
noisy

-
Ray from MUKWONAGO, WI
-
Difficulty Level:A Bit Difficult
-
Total Repair Time:More than 2 hours
-
Tools:Nutdriver, Socket set
2 of 3 people
found this instruction helpful.
Was this instruction helpful to you?
Thank you for voting!
loud screeching
looked at video on your web site my wife and I decided to try it ourselves we are 70 and 71 And I am in a wheelchair just had surgery so we ordered parts. received parts looked at repair video a couple of times and went for it. during process we had some moments of frustration but we went back to video. end result, screech is gone. could not have done it with out video thanks.
Parts Used:
-
Larry from BRENTWOOD, CA
-
Difficulty Level:Really Easy
-
Total Repair Time:More than 2 hours
-
Tools:Nutdriver, Pliers, Screw drivers, Socket set
1 person
found this instruction helpful.
Was this instruction helpful to you?
Thank you for voting!
No heat from electric dryer
The hardest part of this repair was diagnosis. After running continuity tests on the electrical components, removing the heating unit showed a broken filament on the heat coils. The replacement part fit mechanically, but used spade terminals for high voltage instead of the original mounting posts, requiring retermination of the wires. One of the power leads also had to be extended in length. All works after completion.
Parts Used:
-
John M from SAINT LOUIS, MO
-
Difficulty Level:A Bit Difficult
-
Total Repair Time:More than 2 hours
-
Tools:Nutdriver, Pliers, Screw drivers
1 person
found this instruction helpful.
Was this instruction helpful to you?
Thank you for voting!
Loud noise when dryer turned on. Stop at time.
As per video instructions we took off front and removed drum. We only changed one of the roller support wheel as I could not find any information as to how many I need for my type dryer and parts diagram was deceptive. Showed only one drum support roller.
Parts Used:
-
JUNEWHITE from MOUNT VERNON, AL
-
Difficulty Level:A Bit Difficult
-
Total Repair Time:1- 2 hours
-
Tools:Pliers, Screw drivers, Socket set
1 person
found this instruction helpful.
Was this instruction helpful to you?
Thank you for voting!
very loud squeaking/screeching when the dryer runs
repairmen said to buy a new dryer! or replace the motor! DO NOT EVEN THINK ABOUT IT!
It was the spring washer that was rubbing against the metal that was causing the very loud noise. The fiber washer that is used on the shaft on both sides of the roller had worn though and allowed the metal-metal contact. The fiber washer wore out! The fiber washers are very cheap!!!! in comparison to a motor or new dryer!
The drum rollers that support the rotating drum eventually wear out the fiber washer.
UNPLUG THE DRYER, DISCONNECT THE VENT
Remove the two screws on the lower front of the dryer panel, probably after you have tilted the unit backward. Remove the front panel by tilting out the bottom as there are two clips at the top. AFTER DOCUMENTING the CONNECTIONS - Disconnect the wires from the switch which is mounted on the front panel.
Carefully put the dryer on its back - be careful of the dryer vent to avoid damaging your floor or dryer vent!
Carefully pull the dryer drum up out of the dryer - as this is done the belt which moves the drum will fall away from the drum. I suggest before you remove the drum to eyeball the way the belt is tensioned and wrapped around the motor driveshaft, guard and tensioner. This will be the most difficult part of reassembling the machine. Some visual understand, maybe even pictures will help you later to get it installed correctly back into proper position... and it is NOT intuitive!
Once the drum is removed, the rollers are accessible. Rotate each and find the squeaker!
I recommend you replace the fiber washer on both, even though only one may be squeaking at this point (the other will be close to being worn out as well!).
I will not document the replacement of these parts as the assembly seems well documented elsewhere. I suggest you remain using the spring washer if there - as the after factory replacements do not seem to provide spring washers.
I would also suggest replacing the dryer drum belt, it is worn, after this many years, and putting in a new one will keep the dryer running for many more years. KNOWLEDGE IS POWER - USE IT
It was the spring washer that was rubbing against the metal that was causing the very loud noise. The fiber washer that is used on the shaft on both sides of the roller had worn though and allowed the metal-metal contact. The fiber washer wore out! The fiber washers are very cheap!!!! in comparison to a motor or new dryer!
The drum rollers that support the rotating drum eventually wear out the fiber washer.
UNPLUG THE DRYER, DISCONNECT THE VENT
Remove the two screws on the lower front of the dryer panel, probably after you have tilted the unit backward. Remove the front panel by tilting out the bottom as there are two clips at the top. AFTER DOCUMENTING the CONNECTIONS - Disconnect the wires from the switch which is mounted on the front panel.
Carefully put the dryer on its back - be careful of the dryer vent to avoid damaging your floor or dryer vent!
Carefully pull the dryer drum up out of the dryer - as this is done the belt which moves the drum will fall away from the drum. I suggest before you remove the drum to eyeball the way the belt is tensioned and wrapped around the motor driveshaft, guard and tensioner. This will be the most difficult part of reassembling the machine. Some visual understand, maybe even pictures will help you later to get it installed correctly back into proper position... and it is NOT intuitive!
Once the drum is removed, the rollers are accessible. Rotate each and find the squeaker!
I recommend you replace the fiber washer on both, even though only one may be squeaking at this point (the other will be close to being worn out as well!).
I will not document the replacement of these parts as the assembly seems well documented elsewhere. I suggest you remain using the spring washer if there - as the after factory replacements do not seem to provide spring washers.
I would also suggest replacing the dryer drum belt, it is worn, after this many years, and putting in a new one will keep the dryer running for many more years. KNOWLEDGE IS POWER - USE IT
Parts Used:
-
Roger from Indialantic, FL
-
Difficulty Level:Easy
-
Total Repair Time:1- 2 hours
-
Tools:Nutdriver, Screw drivers, Wrench set
2 of 4 people
found this instruction helpful.
Was this instruction helpful to you?
Thank you for voting!
Painfully loud squeaking
After taking apart the machine (applianceaid.com has slideshows for most major appliances - very comforting and reassuring - highly recommended), I used a shop-vac to clean up all lint and dirt. After getting the retainer ring off the drum roller shaft (snap ring pliers highly recommended), I replaced the drum roller along with the glides which were completely worn through (rivet gun required). I reassembled the dryer to find that the drum wouldn't turn, so I placed another order for the other drum roller and replaced the belt too. Back in business.
Parts Used:
-
Marc from West Windsor, NJ
-
Difficulty Level:Easy
-
Total Repair Time:More than 2 hours
-
Tools:Nutdriver, Pliers, Screw drivers
1 person
found this instruction helpful.
Was this instruction helpful to you?
Thank you for voting!
Squeeky roller
-
John from DELAWARE, OH
-
Difficulty Level:Easy
-
Total Repair Time:1- 2 hours
-
Tools:Nutdriver, Screw drivers, Socket set
1 person
found this instruction helpful.
Was this instruction helpful to you?
Thank you for voting!
I dis-assembled the case.
I re-assembled, checked felts, and wear blocks,(good condition). I cleaned lint, removed coins from baffles, corrected several dents(minor), double checked wire condition and routing (good), finished re-installation, checked balance . all was good, and ran two loads of laundry. very quiet! Thanks
Parts Used:
-
Robert from KANE, PA
-
Difficulty Level:A Bit Difficult
-
Total Repair Time:1- 2 hours
-
Tools:Nutdriver, Screw drivers, Wrench (Adjustable)
1 person
found this instruction helpful.
Was this instruction helpful to you?
Thank you for voting!