




















MDE14PSADW Maytag Dryer - Instructions
Keep searches simple. Use keywords, e.g. "leaking", "pump", "broken" or "fit".
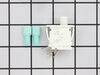
switch clip broke
Unscrewed front panel. Pulled off unbroken wire connecter and popped switch and put new one in. Replaced front panel.
Parts Used:
-
JEROME from NILES, IL
-
Difficulty Level:Very Easy
-
Total Repair Time:Less than 15 mins
-
Tools:Screw drivers
2 of 4 people
found this instruction helpful.
Was this instruction helpful to you?
Thank you for voting!
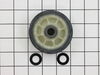
Noisy bearing wheel
I followed the video instructions which were excellent. Dryer repair was a cinch.
Parts Used:
-
Chris from Grandville, MI
-
Difficulty Level:Very Easy
-
Total Repair Time:15 - 30 mins
-
Tools:Screw drivers, Socket set
1 person
found this instruction helpful.
Was this instruction helpful to you?
Thank you for voting!
Super squeaky dryer
The video from this site is perfect. Unplug dryer, remove front panel, unclip wires, remove next panel and pull the drum out. Replace drum support wheels using snap ring pliers (buy the pliers with changeable tips because the holes in the snap ring were pretty small on mine). Put it all back together. The trickiest part is getting the belt back on...just be sure it's not in the groove around the drum and pay attention to how to get it on the motor wheels. Good luck!
Parts Used:
-
Corina from QUEEN CREEK, AZ
-
Difficulty Level:Really Easy
-
Total Repair Time:15 - 30 mins
-
Tools:Nutdriver, Screw drivers
1 person
found this instruction helpful.
Was this instruction helpful to you?
Thank you for voting!
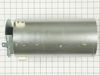
No Heat when Dryer was running/Clothes did not dry
First, unplug the dryer.
Second, remove the front of the dryer by removing the two screws at near bottom on both the left and right. These look like security Torx with the post in the center but you can remove them with a small flat-blade screwdriver.
Third, remove the wires from heating element on the right. There are the two power connections (one each at about 2 and 7 oclock) and two for the sensor at 11 oclock. You probably want to user pliers to remove these just in case...
Fourth, remove the two 1/4" screws holding the heater element in place. One is in the front center, the other is at about 1 oclock at the rear.
Pull straight out and the element comes free.
Fifth, remove the circuit interrupter from the old unit and install it on the new unit. Be sure to move the jumper from the heating element power (about 5 oclock) and the interrupter.
Sixth, install the heating element. The element is a cylinder of metal. I found that I needed to bend in the seam at the back very slightly to get it to fix back in.
Seventh, alight the screw holes and replace the 1/4" screws.
Eighth, reattach the wires, being careful to replace each where it came from.
Ninth, replace the dryer front...and your done.
Second, remove the front of the dryer by removing the two screws at near bottom on both the left and right. These look like security Torx with the post in the center but you can remove them with a small flat-blade screwdriver.
Third, remove the wires from heating element on the right. There are the two power connections (one each at about 2 and 7 oclock) and two for the sensor at 11 oclock. You probably want to user pliers to remove these just in case...
Fourth, remove the two 1/4" screws holding the heater element in place. One is in the front center, the other is at about 1 oclock at the rear.
Pull straight out and the element comes free.
Fifth, remove the circuit interrupter from the old unit and install it on the new unit. Be sure to move the jumper from the heating element power (about 5 oclock) and the interrupter.
Sixth, install the heating element. The element is a cylinder of metal. I found that I needed to bend in the seam at the back very slightly to get it to fix back in.
Seventh, alight the screw holes and replace the 1/4" screws.
Eighth, reattach the wires, being careful to replace each where it came from.
Ninth, replace the dryer front...and your done.
Parts Used:
-
John from SPRINGFIELD, VA
-
Difficulty Level:Really Easy
-
Total Repair Time:15 - 30 mins
-
Tools:Nutdriver, Pliers, Screw drivers
1 of 2 people
found this instruction helpful.
Was this instruction helpful to you?
Thank you for voting!
drum support roller need replacing
Just took it apart and put new one in.
Parts Used:


-
Sharon from Ava, MO
-
Difficulty Level:Easy
-
Total Repair Time:15 - 30 mins
-
Tools:Screw drivers, Wrench set
1 of 2 people
found this instruction helpful.
Was this instruction helpful to you?
Thank you for voting!
Dryer making a grinding noise
Our dryer started making noise and we ignored it until it became a grinding sound, that's when I knew I had to fix it.
The grinding was the front assembly being worn through by the fact that the glides were gone (worn away) and we continued to use the dryer. I, subsequently, had to replace the front assembly (after trying duct tape and metal epoxy, which didn't work). As there were no glides on the replacement front assembly I didn't know to replace them. They had worn away completely and I didn't realize I needed them.
Well, the grinding started again (right away, acually)and I tore it apart again and that's when I realized that I needed the glides (one on each bottom side) so I got those and put them on. They are called "bearing kits" actually.
They come as a cork piece that goes underneath the "vinyl" piece with the tabs going into the slots and the vinyl piece being riveted into the assembly from the underside of the assembly. I think that, so, that when the drum starts rubbing on something it will hit the rivets instead of the assembly and only damage the rivets. That way you know you need them when you hear a grinding sound and I theorize that will get your attention enough to make you want to replce them. The rivets being put in top down looks right though so "whatever" I suppose.
I also had to take them to work to ask an engineer if the cork gets glued to the vinyl as I saw on one post and he agreed as the cork is porous and would be capable of being greased and retaining the grease, He was wrong of course as so many engineers are today. I think that it is rather obvious that you just slip the tabs into the slots as you're common sense brain tells you to do.
The wife's happy and
I'm superman once again.
The grinding was the front assembly being worn through by the fact that the glides were gone (worn away) and we continued to use the dryer. I, subsequently, had to replace the front assembly (after trying duct tape and metal epoxy, which didn't work). As there were no glides on the replacement front assembly I didn't know to replace them. They had worn away completely and I didn't realize I needed them.
Well, the grinding started again (right away, acually)and I tore it apart again and that's when I realized that I needed the glides (one on each bottom side) so I got those and put them on. They are called "bearing kits" actually.
They come as a cork piece that goes underneath the "vinyl" piece with the tabs going into the slots and the vinyl piece being riveted into the assembly from the underside of the assembly. I think that, so, that when the drum starts rubbing on something it will hit the rivets instead of the assembly and only damage the rivets. That way you know you need them when you hear a grinding sound and I theorize that will get your attention enough to make you want to replce them. The rivets being put in top down looks right though so "whatever" I suppose.
I also had to take them to work to ask an engineer if the cork gets glued to the vinyl as I saw on one post and he agreed as the cork is porous and would be capable of being greased and retaining the grease, He was wrong of course as so many engineers are today. I think that it is rather obvious that you just slip the tabs into the slots as you're common sense brain tells you to do.
The wife's happy and
I'm superman once again.
Parts Used:
-
Donald from Northglenn, CO
-
Difficulty Level:Really Easy
-
Total Repair Time:30 - 60 mins
-
Tools:Nutdriver, Screw drivers
1 of 2 people
found this instruction helpful.
Was this instruction helpful to you?
Thank you for voting!
old baffle cracked and new one fit perfect
placed it on post with a little glue. It is for decorative use but could not just leave it with no baffle.
Parts Used:

-
Ernest R from Rocky Point, NY
-
Difficulty Level:Really Easy
-
Total Repair Time:Less than 15 mins
1 of 2 people
found this instruction helpful.
Was this instruction helpful to you?
Thank you for voting!
Drum seal coming apart
Follow instructions on this website and be sure to pull the felt seal fairly tight as you work your way around or you'll be a little short at the end...
Parts Used:
-
Kirt from TWIN FALLS, ID
-
Difficulty Level:Really Easy
-
Total Repair Time:30 - 60 mins
-
Tools:Nutdriver, Screw drivers
1 of 2 people
found this instruction helpful.
Was this instruction helpful to you?
Thank you for voting!
Broken Short Baffle
First, suggest that, if you're mechanically challenged, take pictures or write down the disassembly sequence you use.
Took off the door, removed the front sub panel, then the shroud. When I noticed the wires to the moisture sensors, etc., I remembered to unplug the unit. Once all the screws and clips are removed, used a pry bar to prop up the top of the unit. This makes it much easier to get to the baffle screws from the outside of the drum. Removed old baffles and replaced with the new ones, vacuumed out the inside of the unit, and put it back together in about an hour. It took the parts about three business days to arrive, so it was time to do laundry by then!
Took off the door, removed the front sub panel, then the shroud. When I noticed the wires to the moisture sensors, etc., I remembered to unplug the unit. Once all the screws and clips are removed, used a pry bar to prop up the top of the unit. This makes it much easier to get to the baffle screws from the outside of the drum. Removed old baffles and replaced with the new ones, vacuumed out the inside of the unit, and put it back together in about an hour. It took the parts about three business days to arrive, so it was time to do laundry by then!
Parts Used:
-
Tom from KANSAS CITY, MO
-
Difficulty Level:Easy
-
Total Repair Time:30 - 60 mins
-
Tools:Nutdriver, Screw drivers, Socket set
1 of 2 people
found this instruction helpful.
Was this instruction helpful to you?
Thank you for voting!
Baffle broke off inside tumbler
removed the front panel and lifted the top up. turned the tumbler and screwed down the new baffles from the outside. Used washers because the screw holes were bent from the old baffles.
Parts Used:
-
Larry from Seminole, FL
-
Difficulty Level:A Bit Difficult
-
Total Repair Time:30 - 60 mins
-
Tools:Screw drivers, Socket set
1 of 2 people
found this instruction helpful.
Was this instruction helpful to you?
Thank you for voting!
The drum support roller had disintegrated and fallen off the roller shaft
I simply removed the retaining clip and old bearing and re-installed the new drum roller, washers and retaining clip. Fairly simple really.
Parts Used:
-
John from Orlando, FL
-
Difficulty Level:Easy
-
Total Repair Time:Less than 15 mins
-
Tools:Screw drivers, Wrench set
1 of 2 people
found this instruction helpful.
Was this instruction helpful to you?
Thank you for voting!
My 11 year old daughter broke the door clasp
My 11 year old daughter broke the door clasp to the dryer by repeatedly slamming it trying to get it to close. I told her to go down stairs write down the make model and serial number and come back up and find a place to buy it online. I left with instructions not to use the computer for anything else until the part was found. Less then 15 minutes later I came back because I heard giggling. She was chatting but had found an exploded view of the door and the part. She was very pleased with herself! We bought it and it arrived a few days later. I saw the empty box. She had opened it and taken it down and installed it herself. A good lesson, for her and me
Parts Used:

-
Kent from Ladue, MO
-
Difficulty Level:Really Easy
-
Total Repair Time:Less than 15 mins
1 of 2 people
found this instruction helpful.
Was this instruction helpful to you?
Thank you for voting!
Tension Idler Was Making A High Pitch Noise
I had to remove the door, raise top and remove the front panel. After removing the drum and belt it was easy to replace the tension idler and put it all back together.
Parts Used:
-
robert from swainsboro, GA
-
Difficulty Level:Easy
-
Total Repair Time:1- 2 hours
-
Tools:Nutdriver, Screw drivers, Wrench set
1 of 2 people
found this instruction helpful.
Was this instruction helpful to you?
Thank you for voting!
Loose baffle
The easiest repair I've ever had to do. I checked U-tube and watched a video on how to take off the dryer door and top to get to the baffle, then switched out the old for the new. Put everything back together and it is working great! So easy my 12 year old can do this fix.
Parts Used:
-
Laura from Trabuco Canyon, CA
-
Difficulty Level:Really Easy
-
Total Repair Time:30 - 60 mins
-
Tools:Socket set
1 of 2 people
found this instruction helpful.
Was this instruction helpful to you?
Thank you for voting!
door catch would not latch
Well tried to find this simple part around Columbus and even maytag website no luck.Parts select had it to go and arrived earlier than expected.Fixed it less than 5 minutes works great.taken longer to put the light bulb back in,Really like the accuracy and quick response from parts select.If I had called a service tech probably would have cost $50.00 or more for a part that cost a little over $3.00 and saved this site in case I need to order other parts.Thank you
Parts Used:
-
Sidney from hilliard, OH
-
Difficulty Level:Really Easy
-
Total Repair Time:Less than 15 mins
-
Tools:Screw drivers
1 of 2 people
found this instruction helpful.
Was this instruction helpful to you?
Thank you for voting!