




















MDB7601AWB41 Maytag Dishwasher - Instructions
Keep searches simple. Use keywords, e.g. "leaking", "pump", "broken" or "fit".
Dishwasher leaking.
Remove screws holding the inside of the door. Set lid aside. Pull out the old foam insulation. Clean the area. Replace with new foam insulation. Put door back together.
Parts Used:

-
Chris from SPRINGFIELD, VA
-
Difficulty Level:Very Easy
-
Total Repair Time:Less than 15 mins
2 of 3 people
found this instruction helpful.
Was this instruction helpful to you?
Thank you for voting!
Dishes were not getting clean on the top rack.
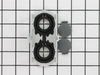
The old docking station seals were getting very soft. To put a band aid on the wound until the new docking station got here I put a sleve on the washer bar feeder tube. This made an improvement. The docking station was removed using a screw driver to unsnap the station. Then all I had to do was snap the new one in. Be care ful not to pull on the piece the docking station is snapped on to. There are metal clips behind there that hold that water delivery tube on to the back of the dishwasher. Those clips are twisted on and can be striped off easily by pulling strait towards you. If that happens you must secure the clips using self tapping screws and a water proof sealent.
Parts Used:
-
David from Billings, MT
-
Difficulty Level:Easy
-
Total Repair Time:Less than 15 mins
-
Tools:Screw drivers
2 of 3 people
found this instruction helpful.
Was this instruction helpful to you?
Thank you for voting!
Cups and glasses on upper rack were not getting clean.
Docking station just pops out, you grab the right side and pop it off. Replace by placing the left side in place and then push the right side until it snaps in place. VERY easy.
The gaskets were worn out and that was allowing a lot of water to escape, not enough pressure to clean the dishes.
The gaskets were worn out and that was allowing a lot of water to escape, not enough pressure to clean the dishes.
Parts Used:
-
Douglas from Pickerington, OH
-
Difficulty Level:Really Easy
-
Total Repair Time:Less than 15 mins
2 of 3 people
found this instruction helpful.
Was this instruction helpful to you?
Thank you for voting!
Latch Asembly Broke, Door wouldn't close properly
The door wouldn't close and it thought it the sensor was constantly open so it would turn on even if the door was wide open. Took the 10 or so torx screws off and removed the cover. Lifted the old assembly out and had to use pliers to get the wires detached from the door sensors. Attached the sensors to the new assembly, replaced the cover and screws and that was it. very easy fix.
Parts Used:

-
Sam from Philadelphia, PA
-
Difficulty Level:Really Easy
-
Total Repair Time:Less than 15 mins
-
Tools:Pliers, Screw drivers
2 of 3 people
found this instruction helpful.
Was this instruction helpful to you?
Thank you for voting!
Top wash arm kept falling off.
I had to remove the the old retainer from the old wash arm ,install it on the new arm by snapping it on then I snapped the arm with the retainer up top of dishwasher.
Parts Used:

-
Francine from Bristol, CT
-
Difficulty Level:Really Easy
-
Total Repair Time:Less than 15 mins
1 person
found this instruction helpful.
Was this instruction helpful to you?
Thank you for voting!
Dishwasher arm keeps falling off.
I bought 2 Maytag appliances, a microwave and a dishwasher - they are both crappy!
The top plastic spray arm kept falling off into the top shelf of the dishwasher, causing all of the glasses on that shelf to come out dirty.
The arm has a small bracket that can snap off and on the main water tube easily without tools.
Changing it was a snap!
The top plastic spray arm kept falling off into the top shelf of the dishwasher, causing all of the glasses on that shelf to come out dirty.
The arm has a small bracket that can snap off and on the main water tube easily without tools.
Changing it was a snap!
Parts Used:
-
Dan from Franklin, WI
-
Difficulty Level:Really Easy
-
Total Repair Time:Less than 15 mins
1 person
found this instruction helpful.
Was this instruction helpful to you?
Thank you for voting!
worn out
simply pulled out old one slowly inserted new one (stretching slightly) Presto done
Parts Used:

-
William from Interlochen, MI
-
Difficulty Level:Really Easy
-
Total Repair Time:Less than 15 mins
1 person
found this instruction helpful.
Was this instruction helpful to you?
Thank you for voting!
Replaced damaged dishwasher tray
-
George from FREDERICK, MD
-
Difficulty Level:Really Easy
-
Total Repair Time:Less than 15 mins
1 person
found this instruction helpful.
Was this instruction helpful to you?
Thank you for voting!
Replaced wheel on rack
-
Lane from ITASCA, IL
-
Difficulty Level:Very Easy
-
Total Repair Time:Less than 15 mins
1 person
found this instruction helpful.
Was this instruction helpful to you?
Thank you for voting!
Broken Latch Assembly
I removed the screws around the top and halfway down the sides of the inside of the door. I found that you dont have to remove all 10 screws to access the assembly. Reach in and pulled out the assembly, there was enough slack to pull it out above the door. Pull the connectors off and slide the new ones on. Set the new assembly back in place, insert the 2 top screws first, and then the rest. That was it...very simple to change.
Parts Used:
-
Shelley from Burlington, IA
-
Difficulty Level:Really Easy
-
Total Repair Time:Less than 15 mins
-
Tools:Screw drivers
1 person
found this instruction helpful.
Was this instruction helpful to you?
Thank you for voting!
Latch handle broke, making it hard to open the door.
Removed ~12 screws holding the inside liner onto the door. Pulled off the two connectors (one with black and one with white wires). Replace the handle and latch mechanism. Redid connections and replaced screws. Viola. (Be sure to buy BOTH the handle and latch mechanism- I don't see how you could easily install the handle on the mechanism myself, and what broken in my case was the black handle).
Parts Used:
-
David from Croton on Hudson, NY
-
Difficulty Level:Really Easy
-
Total Repair Time:Less than 15 mins
1 person
found this instruction helpful.
Was this instruction helpful to you?
Thank you for voting!
Door wouldn't shut
Remove the screws , opened door panel. Removed switch with latch and replaced with new parts. Replaced panel and screws. Install completed.
Parts Used:
-
Ron from RIVERSIDE, CA
-
Difficulty Level:Very Easy
-
Total Repair Time:Less than 15 mins
1 person
found this instruction helpful.
Was this instruction helpful to you?
Thank you for voting!
Door would not shut
Easy! Unscrewed panel, took off old latch, put on new. Took about five minutes.
Parts Used:
-
Laura from Chester, NH
-
Difficulty Level:Really Easy
-
Total Repair Time:Less than 15 mins
-
Tools:Screw drivers
1 person
found this instruction helpful.
Was this instruction helpful to you?
Thank you for voting!
Dishwashwer stopped spraying water
I'm telling this story for my husband who is a pretty handy guy--I watched him do the repair. I had had someone out to look at the dishwasher and they said it would be $284 to fix this one little thing because you couldn't buy the one little part separately, you had to buy a whole new motor. Since the dishwasher is old, it didn't make sense to invest this much in it--might as well buy a new one for that kind of money. My husband did some looking around and found the part on your site and installed it himself. So the cost was under $40. The dishwasher is now working better than it had been for a while.
Parts Used:

-
Wade from Greenville, MS
-
Difficulty Level:Really Easy
-
Total Repair Time:15 - 30 mins
-
Tools:Screw drivers
2 of 4 people
found this instruction helpful.
Was this instruction helpful to you?
Thank you for voting!
old wash arm was cracked and had gunk in it.
The upper arm assembly removes easily by unsnapping a plastic part or two that holds it in place.
Once the arm assembly is removed, you simply remove the screw that holds the arm on, replace the arm, and replace the screw. The key thing here is that you need a "star drive". This is a screw driver or bit that has a star shaped end. I don't know what size it is.
Once the arm assembly is removed, you simply remove the screw that holds the arm on, replace the arm, and replace the screw. The key thing here is that you need a "star drive". This is a screw driver or bit that has a star shaped end. I don't know what size it is.
Parts Used:

-
Lance from Duvall, WA
-
Difficulty Level:Easy
-
Total Repair Time:Less than 15 mins
1 person
found this instruction helpful.
Was this instruction helpful to you?
Thank you for voting!