




















MDB6702AWQ10 Maytag Dishwasher - Instructions
Keep searches simple. Use keywords, e.g. "leaking", "pump", "broken" or "fit".
bottom of basket fell apart & silverware would fall though holes
Replacement basket did not include handle so needed to pry old handle off broken unit to use on the new one. Used screw driver to pop loose clips which attached to basket. Had to stick tooth picks broken in half under them to hold out until all four clips were opened at once - then handle could be pulled off. Easily snapped it back on to the new basket and repair was done. Can't get any easier than this!
Parts Used:

-
Sharon from Fairfield, CA
-
Difficulty Level:Really Easy
-
Total Repair Time:Less than 15 mins
-
Tools:Screw drivers
1 person
found this instruction helpful.
Was this instruction helpful to you?
Thank you for voting!
Replaced silverware basket. No problems!
Lifted out old silverware basket. Set new basket in. Took approximately 20 seconds.
Parts Used:
-
Janet from STURGIS, KY
-
Difficulty Level:Very Easy
-
Total Repair Time:Less than 15 mins
1 person
found this instruction helpful.
Was this instruction helpful to you?
Thank you for voting!
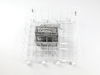
Replaced damaged dishwasher tray
-
George from FREDERICK, MD
-
Difficulty Level:Really Easy
-
Total Repair Time:Less than 15 mins
1 person
found this instruction helpful.
Was this instruction helpful to you?
Thank you for voting!
Door wouldn't shut
Remove the screws , opened door panel. Removed switch with latch and replaced with new parts. Replaced panel and screws. Install completed.
Parts Used:


-
Ron from RIVERSIDE, CA
-
Difficulty Level:Very Easy
-
Total Repair Time:Less than 15 mins
1 person
found this instruction helpful.
Was this instruction helpful to you?
Thank you for voting!
The silverware basket needed replacement since there were cuts in some places on the bottom which caused utensils to fall partway through.
Very simple. Just replaced the old one with the new one. Voila!!!
Parts Used:
-
Barb from TWINSBURG, OH
-
Difficulty Level:Very Easy
-
Total Repair Time:Less than 15 mins
1 person
found this instruction helpful.
Was this instruction helpful to you?
Thank you for voting!
Basket had holes in it from repeated use of holding sharp utensils.
-
Lynne from NEWNAN, GA
-
Difficulty Level:Very Easy
-
Total Repair Time:Less than 15 mins
1 person
found this instruction helpful.
Was this instruction helpful to you?
Thank you for voting!
Worn out basket
-
Denis from JACKSONVILLE, NC
-
Difficulty Level:Really Easy
-
Total Repair Time:Less than 15 mins
1 person
found this instruction helpful.
Was this instruction helpful to you?
Thank you for voting!
Basket broke----bought a new one!
opened door---- took out old basket--threw it away. set new basket in its place!!!!
Parts Used:
-
betty from GEORGETOWN, TX
-
Difficulty Level:Very Easy
-
Total Repair Time:Less than 15 mins
1 person
found this instruction helpful.
Was this instruction helpful to you?
Thank you for voting!
Some of bottom wire in the silverware basket had rusted out allowing silverware to fall through and interfere with rotating arm.
The "repair" was actually a replacement. My wife did it. She took out the old, damaged basket and dropped in the new, replacement basket. She removed the slotted lids because she doesn't think they are necessary and she doesn't like them. I got the old basket for holding small items in my workshop. The lids will be thrown away, unless I can come up with a use for them.
Parts Used:
-
William from MARBLEHEAD, MA
-
Difficulty Level:Very Easy
-
Total Repair Time:Less than 15 mins
1 person
found this instruction helpful.
Was this instruction helpful to you?
Thank you for voting!
Our utensil basket had holes in the bottom and silverware fell through.
-
Steve from Shoreline, WA
-
Difficulty Level:Really Easy
-
Total Repair Time:Less than 15 mins
1 person
found this instruction helpful.
Was this instruction helpful to you?
Thank you for voting!
The bottom of the old basket was breaking and silverware was getting stuck
Open the door and remove old basket. Place the new basket in its plave. Time elapse approximately 20 seconds
Parts Used:
-
Groff from WVisconsi Rapids, WI
-
Difficulty Level:Very Easy
-
Total Repair Time:Less than 15 mins
1 person
found this instruction helpful.
Was this instruction helpful to you?
Thank you for voting!
broken handle
First I removed the screws from the inside of the door exposing the latch assembly. Removed the old part and installed the new assembly. Don't screw it on to the door untill the cover is on again.
First I ordered only the latch without the handle. Found after opening it up the handle was broken on the inside so had to order the assembly. It's a piece of cake to install. If you're having touble opening the door don't think because the handle looks ok from the outside it's not broken.. probably is. Partselect.com is the greatest company to deal with. I'd recommend them to anyone and have.
Sam
First I ordered only the latch without the handle. Found after opening it up the handle was broken on the inside so had to order the assembly. It's a piece of cake to install. If you're having touble opening the door don't think because the handle looks ok from the outside it's not broken.. probably is. Partselect.com is the greatest company to deal with. I'd recommend them to anyone and have.
Sam
Parts Used:
-
karen from escondido, CA
-
Difficulty Level:Really Easy
-
Total Repair Time:15 - 30 mins
-
Tools:Screw drivers
1 person
found this instruction helpful.
Was this instruction helpful to you?
Thank you for voting!
The door didn't seal tight. So when it would go into rinse mode it would leak water on my floor
The repair went easy. Just unscrewed the inside door panel and latch assembly. Then put the new one in. The only bad thing was I purchased the latch assembly with out the handle and found out mine was cracked. I looked back on-line and couldn't find just the handle. Everybody sold it with the latch assembly. I thought I would save the 2 bucks buying the assembly without the handle. But in the end the door seals tight and no water leaks.
Parts Used:
-
robert d from MOORHEAD, MN
-
Difficulty Level:Very Easy
-
Total Repair Time:15 - 30 mins
-
Tools:Screw drivers
1 person
found this instruction helpful.
Was this instruction helpful to you?
Thank you for voting!
door latch broken
first, i removed the inner door panel exposing the latch assembly. i then disconnected the wiring to switches noting their locations. removed and replaced with new latch assembly, connected all wiring back to their corresponding switches, assembled the inner door panel and checked to make sure the latch was working properly.
Parts Used:
-
russell from manchester, TN
-
Difficulty Level:Easy
-
Total Repair Time:15 - 30 mins
1 person
found this instruction helpful.
Was this instruction helpful to you?
Thank you for voting!
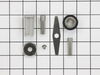
Soap not disolving and leaving residue on everything. Not Cleaning.
Followed the instructions to dismantle all the way down to the motor. Replaced the stripped plastic shaft with the metal one. Clean dishes every time.
Parts Used:
-
Bryan from WHITE PLAINS, NY
-
Difficulty Level:Very Easy
-
Total Repair Time:15 - 30 mins
-
Tools:Screw drivers, Wrench (Adjustable)
1 person
found this instruction helpful.
Was this instruction helpful to you?
Thank you for voting!