




















MB2227PEHB Maytag Refrigerator - Instructions
Keep searches simple. Use keywords, e.g. "leaking", "pump", "broken" or "fit".
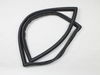
Gasket not sealing good
Opened the bottom freezer door and pulled the gasket out of the groove. Pulled it out around the door and put the new one back around the door and the pressed into the groove. There was one place that a flat spot didn't take shape so I used a blow dryer to heat it up some and now it seals perfectly.
Parts Used:
-
Vince from Miami, FL
-
Difficulty Level:Very Easy
-
Total Repair Time:Less than 15 mins
2 of 2 people
found this instruction helpful.
Was this instruction helpful to you?
Thank you for voting!
Cracked humid drawer

-
Julie from BATH, PA
-
Difficulty Level:Very Easy
-
Total Repair Time:Less than 15 mins
2 of 2 people
found this instruction helpful.
Was this instruction helpful to you?
Thank you for voting!
When the support frame broke we threw the entire system into the trash DUH !
Thanks for the video showing how to replace the Humidity Slide the knowledge that the end with the flair needed to be slightly bent to SNAP into place was a big help.
Parts Used:

-
Bruce from CLARKSVILLE, VA
-
Difficulty Level:Really Easy
-
Total Repair Time:Less than 15 mins
2 of 2 people
found this instruction helpful.
Was this instruction helpful to you?
Thank you for voting!
The center rail was broken
The part just snapped in. super easy.
Parts Used:

-
Joella from THE DALLES, OR
-
Difficulty Level:Very Easy
-
Total Repair Time:Less than 15 mins
2 of 2 people
found this instruction helpful.
Was this instruction helpful to you?
Thank you for voting!
The old shelf shattered when we tried to clean it

-
Michael from COAL VALLEY, IL
-
Difficulty Level:Easy
-
Total Repair Time:30 - 60 mins
2 of 2 people
found this instruction helpful.
Was this instruction helpful to you?
Thank you for voting!
My refrigerator vegetable bins were sagging when I placed veggies in it.
I came across this site and looked at the diagrams. Instead of buying a new crisper bin frame, I noticed that the crisper bin frame was missing the frame brace. I purchased the frame brace and installed it in the crisper frame, which was easy to push into the slot. This solved my problem. No more sag!!
Parts Used:

-
Lee from SAMMAMISH, WA
-
Difficulty Level:Easy
-
Total Repair Time:30 - 60 mins
-
Tools:Screw drivers
2 of 2 people
found this instruction helpful.
Was this instruction helpful to you?
Thank you for voting!
Criper broken by falling bottle
Bought new crisper from Parts select followed directions on how to replace. Replaced in a bought 30 minutes.
Parts Used:
-
Scott from Morgan Hill, CA
-
Difficulty Level:A Bit Difficult
-
Total Repair Time:30 - 60 mins
2 of 3 people
found this instruction helpful.
Was this instruction helpful to you?
Thank you for voting!
Freezer drawer light switch failure.
Disconnect plug from wall. Insert putty knife between light switch.and trim panel , apply pressure to depress plastic spring holding switch in place. Apply a slight twist too putty knife releasing switch from trim piece. This wil expose plug connected to switch. Disconnect plug from switch. Connect new switch to plug. Insert switch into trim. Plug refrigerator into wall socket.
Parts Used:

-
HARRY from FSTRVL TRVOSE, PA
-
Difficulty Level:Really Easy
-
Total Repair Time:Less than 15 mins
2 of 3 people
found this instruction helpful.
Was this instruction helpful to you?
Thank you for voting!
The door switch was broken so the interior light would not come on.
The instructions in the package were not helpful. They wanted me to cut the wiring harness and described where to cut based on the wire colors. My wires were not the same color! I removed the light mechanism using a combination of a screwdriver, putty knife, and plain old muscle with my fingers! The wiring harness unplugged easily and the new one inserted. It was easy to push the whole assembly back into the door. I spent more time looking for something to cut the wiring harness with (and never did find it) than the whole job actually took without needing to cut anything!
Parts Used:
-
Catherine from BROOMALL, PA
-
Difficulty Level:Easy
-
Total Repair Time:Less than 15 mins
-
Tools:Screw drivers
2 of 3 people
found this instruction helpful.
Was this instruction helpful to you?
Thank you for voting!
Broke light switch while cleaning
use kitchen knife to pry out. replaced switch assemble and pressed back into place. Could not have done this with out help from previous customers. Thanks
Parts Used:

-
Gail from Golden, CO
-
Difficulty Level:Really Easy
-
Total Repair Time:Less than 15 mins
2 of 3 people
found this instruction helpful.
Was this instruction helpful to you?
Thank you for voting!
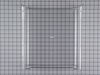
Broken rails and pan
I first looked at the current assembly so that I could see how the new parts were to go (thanks Dad!) Then I removed the drawer and unscrewed the rails. Next, I removed the guide wheels from the old set of rails and installed them into the new rails. After that it was just a matter of screwing in the new rails and sliding the old drawer front plate onto the new drawer. Whala! Back in business.
Parts Used:

-
Veronna from Sonoma, AL
-
Difficulty Level:Really Easy
-
Total Repair Time:Less than 15 mins
-
Tools:Pliers, Screw drivers
2 of 3 people
found this instruction helpful.
Was this instruction helpful to you?
Thank you for voting!
the rail broke from overloading the drawers
got the new part, took the old part out and snapped the new part in! Very easy. Thank you.
Parts Used:
-
Joan from SILVERDALE, WA
-
Difficulty Level:Very Easy
-
Total Repair Time:Less than 15 mins
2 of 3 people
found this instruction helpful.
Was this instruction helpful to you?
Thank you for voting!
Light switch on door broke
Popped out broken switch with blunt flat edged instrument. Disconnected switch from unit . Plugged new piece in and reinserted into side panel of refrigerator. Very easy.
Parts Used:
-
Donna from Oro Valley, AZ
-
Difficulty Level:Really Easy
-
Total Repair Time:Less than 15 mins
3 of 6 people
found this instruction helpful.
Was this instruction helpful to you?
Thank you for voting!
Broken glass crisper -shelving
The glass shelf sits on top of the crisper housing. That was the problem since when I turned the housing over to clean, the glass fell off. I just had to set the new part on to the housing and it was fixed.
I do want to comment on how easy it was to find the part on your website, how reasonable the price and the quick delivery. Thanks!
I do want to comment on how easy it was to find the part on your website, how reasonable the price and the quick delivery. Thanks!
Parts Used:
-
Sonny from Moraga, CA
-
Difficulty Level:Really Easy
-
Total Repair Time:Less than 15 mins
2 of 4 people
found this instruction helpful.
Was this instruction helpful to you?
Thank you for voting!
Light switch broke
Pried out old part with screwdriver. Unplugged. When new part came, just plugged it in and pushed the part into place.
Parts Used:
-
Carolee from Spokane Valley, WA
-
Difficulty Level:Really Easy
-
Total Repair Time:Less than 15 mins
-
Tools:Screw drivers
2 of 4 people
found this instruction helpful.
Was this instruction helpful to you?
Thank you for voting!