




















MB2227PEHB Maytag Refrigerator - Instructions
Keep searches simple. Use keywords, e.g. "leaking", "pump", "broken" or "fit".
A plastic drawer guide broke.
The drawer guide mounts in slots on a bracket hanging below the shelf above. Only had to use a screwdriver to move the plastic tab in the slotted bracket then slide the whole plastic guide out. ordering the new one was easy, cheap, and quick through PartsSelect.com. The new part just popped in without tools. Very easy!
Parts Used:

-
James from Boulder City, NV
-
Difficulty Level:Really Easy
-
Total Repair Time:15 - 30 mins
-
Tools:Screw drivers
3 of 3 people
found this instruction helpful.
Was this instruction helpful to you?
Thank you for voting!
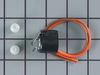
Fridge warm, freeze cold.
Thermostat kit it only had one connector. Fortunately I had a small wire nut that I used on the other wires.
Parts Used:
-
Donald from OMAHA, NE
-
Difficulty Level:A Bit Difficult
-
Total Repair Time:30 - 60 mins
-
Tools:Nutdriver, Screw drivers
3 of 3 people
found this instruction helpful.
Was this instruction helpful to you?
Thank you for voting!
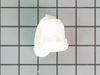
One of the light bulbs went out on my Whirlpool refrigerator.
I changed the bulb but it still didn’t work. I ordered a bulb holder and replaced it and it works properly now. It was an easy repair, remove the bulb, gently pry the bulb holder out with a screwdriver and snap the new one in.
It was useful that under the description of the part in the catalog, it showed that this part was often used to repair this issue. The service was great and the delivery was fast.
It was useful that under the description of the part in the catalog, it showed that this part was often used to repair this issue. The service was great and the delivery was fast.
Parts Used:
-
Brian from LAKE CHARLES, LA
-
Difficulty Level:Very Easy
-
Total Repair Time:Less than 15 mins
-
Tools:Screw drivers
3 of 4 people
found this instruction helpful.
Was this instruction helpful to you?
Thank you for voting!
Center Crisper rail
Take everything off the top self, lift the self install the new part ,put self back in place and then install the drawers again. Took minutes.
Parts Used:

-
Richard from PASADENA, CA
-
Difficulty Level:Really Easy
-
Total Repair Time:Less than 15 mins
3 of 4 people
found this instruction helpful.
Was this instruction helpful to you?
Thank you for voting!
changed the light bulb still would not work so I figured it was the switch sure enough.
I took a chance and ordered a switch that is next to the top of the door. looked for how to remove it easily done in ten minutes works fine last long time.
Parts Used:

-
anthony from HAVELOCK, NC
-
Difficulty Level:Really Easy
-
Total Repair Time:15 - 30 mins
3 of 4 people
found this instruction helpful.
Was this instruction helpful to you?
Thank you for voting!
shut off arm was broke and so was bracket
i just took the prts apart and replaced with new part really easy and saved $185.00 easy as pie
Parts Used:


-
brandon from Cedar Rapids, IA
-
Difficulty Level:Easy
-
Total Repair Time:Less than 15 mins
-
Tools:Nutdriver, Screw drivers
12 of 31 people
found this instruction helpful.
Was this instruction helpful to you?
Thank you for voting!
defective light switch
inserted a knife between the switch and the plastic interior in order to pop the switch out.
then took off the 2 wires on the old switch put them on the new switch and reinserted the switch into the plastic interior.
then took off the 2 wires on the old switch put them on the new switch and reinserted the switch into the plastic interior.
Parts Used:
-
THOMAS from WILLARD, OH
-
Difficulty Level:Really Easy
-
Total Repair Time:Less than 15 mins
3 of 4 people
found this instruction helpful.
Was this instruction helpful to you?
Thank you for voting!
Adjusti-temp meat/cheese drawer right glide rail fell off
When the new glide rail didn't look any different that the one I thought was broken, I thought I'd assessed the wrong broken part as everytime I tried to put it in the slots it would still fall off, just like the old one.. But I went back and reread the other repair stories to get a picture in my mind what they were talking about. I realized I needed to get the glass shelf off but it wouldn't budge. I found the original information booklet and realized the two blue clips in the shelf tracks were nothing more than packing clips (we've had the fridge 8 year.) when I got those off (these took the most time and a flat head screwdriver) the shelf came right off. Then I put the glide rail brackets in the appropriate slots, pushed the rail toward the front of the shelf and when it got to the place of resistance, I just applied steady, gentle pressure to get the brackets to lock in place in the slots. Repair done, placed shelf back in fridge, put drawer back on, and it was done. Oh, forgot, I first had to take the little wheel thingy off the old raid and screw it onto the new rail before attaching the new rail to the shelf. By the Way, this was really easy to do. I'm a 66 year old grandmother and this was my first refrigerator repair. Always read the previous repair stories--they really do tell you what you need to do.
Parts Used:
-
Pamela from San Antonio, TX
-
Difficulty Level:Easy
-
Total Repair Time:Less than 15 mins
-
Tools:Screw drivers
3 of 4 people
found this instruction helpful.
Was this instruction helpful to you?
Thank you for voting!
Light switch wasn't working.. As I would close the door I would notice our frig light wasn't going off...
I simply removed the old switch by gently pulling down on the old switch with a screwdriver. When it was about half way out I just gently pulled down on the old switch and it popped out... I removed the two connectors attached to the old switch by pulling on the connectors with a pliers...I tried using my fingers but wasn't able to pull the connectors off so I used pliers. It worked perfectly.. When pulling off the old connectors, make sure you attach the new switch to the same tabs on the new switch... It was very easy to do and took under 5 mins.....The light switch works perfect....P.S. You should unplug the frig while making the connection just in case....Safety first....!!!
Parts Used:
-
David from Hemet, CA
-
Difficulty Level:Really Easy
-
Total Repair Time:Less than 15 mins
-
Tools:Pliers, Screw drivers
3 of 4 people
found this instruction helpful.
Was this instruction helpful to you?
Thank you for voting!
Door light switch disintegrated
Very simple fix, remove 3 screws, two connectors to the old switch
Parts Used:
-
Thomas from Roseville, CA
-
Difficulty Level:Really Easy
-
Total Repair Time:Less than 15 mins
-
Tools:Screw drivers
2 of 2 people
found this instruction helpful.
Was this instruction helpful to you?
Thank you for voting!
fridge door switch did not work
I removed the switch housing (4 screws), replacing the switch in the housing was a snap. It took 5 minutes, cost $8 and light works like new!
Why didn't I order this part and do the repair earlier? Very simple.
Why didn't I order this part and do the repair earlier? Very simple.
Parts Used:
-
stu from richmond, VA
-
Difficulty Level:Easy
-
Total Repair Time:Less than 15 mins
-
Tools:Socket set
2 of 2 people
found this instruction helpful.
Was this instruction helpful to you?
Thank you for voting!
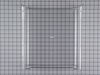
Meat Pan Cracked
-
Mitchell from Lilburn, GA
-
Difficulty Level:Really Easy
-
Total Repair Time:Less than 15 mins
3 of 5 people
found this instruction helpful.
Was this instruction helpful to you?
Thank you for voting!
Rear mount tab broken on Center Crisper Rail
It took longer to empty the glass shelf above the Crisper Bins than to replace the rail. Since the part simply snaps in place, no tools were required
Parts Used:
-
Joseph from Live Oak, FL
-
Difficulty Level:Really Easy
-
Total Repair Time:Less than 15 mins
2 of 2 people
found this instruction helpful.
Was this instruction helpful to you?
Thank you for voting!
Light didnt go on
The light rocker switch wasnt working. I found the part on the web site. It was so easy. I used a screw driver to pop out the old one and pop the new one in. It took 5 min. Thanks!!!
Parts Used:
-
dorotea from staten island, NY
-
Difficulty Level:Really Easy
-
Total Repair Time:Less than 15 mins
-
Tools:Screw drivers
3 of 5 people
found this instruction helpful.
Was this instruction helpful to you?
Thank you for voting!
Had to be careful not to break other parts.
Popped rail off and replaced with new one. Video showed how to do it. A bit tight to remove and just needed a little strength and patience.
Parts Used:
-
Colleen from NEW HARTFORD, NY
-
Difficulty Level:Easy
-
Total Repair Time:15 - 30 mins
2 of 2 people
found this instruction helpful.
Was this instruction helpful to you?
Thank you for voting!