




















MAV8600AWQ Maytag Washer - Instructions
Keep searches simple. Use keywords, e.g. "leaking", "pump", "broken" or "fit".
shakes, noisey
Removed the waterlines. Set the ends in a small pan or bucket to catch the water.Do the same with the drain line.
Keep an old towell handy as water will drain out of the drain pump when you remove the drain hose. Removed the back panel. Use a flat bladed screw driver to pop the top off the two clips in front holding the top down. Lift the top and pull the two screws which holds the front in place. Remove the front and set aside. Underneath, use gloves and the screw driver to remove the six springs by placing the screwdriver through the top hook end about an inch and with both hands lift the spring off. Carefull not to let the blade slip off and bust your knuckles on something,hence the gloves. Lean the machine over and walk the belt off the pulley. Disconnect the small tube in the back left corner from the drum and lift the unit out from the top. Set the drum on it's top and loosen the six screws under the big pulley just enough to pull the snubber out. Replace new snubber, tighten screws. Set drum back in place and reattach springs. Lean unit over and replace belt. Reconnect the small tube, back left corner. Replace the front panel and top. Connect the drain line and replace the rear panel. Connect waterlines and check for leaks. I went ahead and replaced all springs. I recommend replacing the belt while your at it. I'm wishing I would have. It runs like new, gets more water out on the spin cycle and the dryer dosn't take as long to dry the clothes.
Keep an old towell handy as water will drain out of the drain pump when you remove the drain hose. Removed the back panel. Use a flat bladed screw driver to pop the top off the two clips in front holding the top down. Lift the top and pull the two screws which holds the front in place. Remove the front and set aside. Underneath, use gloves and the screw driver to remove the six springs by placing the screwdriver through the top hook end about an inch and with both hands lift the spring off. Carefull not to let the blade slip off and bust your knuckles on something,hence the gloves. Lean the machine over and walk the belt off the pulley. Disconnect the small tube in the back left corner from the drum and lift the unit out from the top. Set the drum on it's top and loosen the six screws under the big pulley just enough to pull the snubber out. Replace new snubber, tighten screws. Set drum back in place and reattach springs. Lean unit over and replace belt. Reconnect the small tube, back left corner. Replace the front panel and top. Connect the drain line and replace the rear panel. Connect waterlines and check for leaks. I went ahead and replaced all springs. I recommend replacing the belt while your at it. I'm wishing I would have. It runs like new, gets more water out on the spin cycle and the dryer dosn't take as long to dry the clothes.
Parts Used:


-
Dan from Lafayette, CO
-
Difficulty Level:Easy
-
Total Repair Time:30 - 60 mins
-
Tools:Screw drivers, Socket set
9 of 11 people
found this instruction helpful.
Was this instruction helpful to you?
Thank you for voting!
Loud squeal when spin cycle finished, white powder under washer
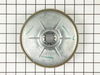
Read DIY review from William, Middleton, OH on 01-15-08. Tip on how to relieve spring pressure on brake assembly worked like a dream (3ea 10-24X2 bolts/machine screws). Replaced brake and machine works like new and was an inexpensive fix. Once the shell/housing is off the machine, tub can be turned upside down and the base doesn't need to be removed. White powder under machine was a plastic wear ring that tells you when your brake rotor needs to be changed. Brake rotor still had lining but was much thinner than replacement part. Note* Use putty knife to push in clips on front to release the top lid section.
Parts Used:
-
Kevin from Pooler, GA
-
Difficulty Level:A Bit Difficult
-
Total Repair Time:1- 2 hours
-
Tools:Nutdriver, Pliers, Wrench set
8 of 8 people
found this instruction helpful.
Was this instruction helpful to you?
Thank you for voting!
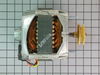
One of the two bolts that holds the motor in place broke off and since the bolts are actually embedded in the motor I had to buy the whole motor rather then just a 25 cent bolt.
-
Elmer from Fort Campbell, KY
-
Difficulty Level:Difficult
-
Total Repair Time:1- 2 hours
-
Tools:Pliers, Screw drivers, Socket set
18 of 38 people
found this instruction helpful.
Was this instruction helpful to you?
Thank you for voting!
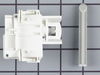
slammed lid and broke lid switch
it took a little longer to fix the lid switch becasue the you have to figure out how to install the switch after you takethe old one out. The old one popped out but the new one needs some twisting and pressure. It also is an ackward position to work in on the back of the washer front the front. I think the instructions could have been much better by warning the installer to pay attention when you take the old one out. But it worked and we fixed the problem for $22 and four days of waiting for the part.
Parts Used:
-
Patrick from Little Rock, AR
-
Difficulty Level:A Bit Difficult
-
Total Repair Time:30 - 60 mins
-
Tools:Nutdriver, Screw drivers
8 of 10 people
found this instruction helpful.
Was this instruction helpful to you?
Thank you for voting!
No Cold Water On Any Setting
1. ) Pulled washer away from wall 2. ) Disconnected power and removed supply hoses from valve 3. ) Removed valve mounting bracket from washer. With 8mm socket 4. ) Disconnected wiring harnesses from valve and removed valve from bracket with phillips screwdriver. 5. ) Installed new valve and completed repair in reverse order.
Parts Used:

-
Bryan from Houston, TX
-
Difficulty Level:Really Easy
-
Total Repair Time:Less than 15 mins
-
Tools:Nutdriver, Pliers, Screw drivers
9 of 13 people
found this instruction helpful.
Was this instruction helpful to you?
Thank you for voting!
Auger was broken
Needed a medium extension and a rachet a screw driver and a 13mm socket. I used a short screw driver and inserted in it the softer container and lifted it strait up to get the softner container out of the way. I used the medium extension to reach in the auger and loosen the small bolt holding the auger on the machine. Pulled it up and out. Reversed the above procedure and it was set to go. Total time about 8 to 10 minutes. Thank for all the help Kudos to all including Susan W.
Parts Used:

-
Charles F from Brooklyn, OH
-
Difficulty Level:Really Easy
-
Total Repair Time:Less than 15 mins
-
Tools:Screw drivers, Socket set
7 of 7 people
found this instruction helpful.
Was this instruction helpful to you?
Thank you for voting!
Old agitator broke
Removed old agitator, and installed new one. Very easy.
Parts Used:
-
Johan from Kingsford, MI
-
Difficulty Level:Really Easy
-
Total Repair Time:Less than 15 mins
-
Tools:Wrench set
9 of 13 people
found this instruction helpful.
Was this instruction helpful to you?
Thank you for voting!
No water fill ,close the lid machine does not work
just unplug the power , disconnect the wire from lid switch ,slide the lid switch assembly out off the switch housing . Then reverse the action I just did above and the machine work again.
Parts Used:
-
Tuong from Sacramento, CA
-
Difficulty Level:Really Easy
-
Total Repair Time:Less than 15 mins
-
Tools:Nutdriver, Screw drivers
8 of 10 people
found this instruction helpful.
Was this instruction helpful to you?
Thank you for voting!
The washer did not start. The only thing that would work was the fascet switch would add water.
I opened up the control panel on the back by removing the 4 screws and then used the print that was inside to check where the power went from the power cord. I checked the power at diferent places and determined that I did not have power coming from the lid switch with the door up or down. You could here the switch click when you opened and closed the door but aperantly it was not working. After going on your web site and looking at the other posts I realixed that there was a fuse link in the switch that was probably blown. I ordered the switch and it was a simple matter to replace when it arrived. The washer works great once more.
Parts Used:
-
Jim from Owosso, MI
-
Difficulty Level:Easy
-
Total Repair Time:Less than 15 mins
-
Tools:Nutdriver, Screw drivers
7 of 8 people
found this instruction helpful.
Was this instruction helpful to you?
Thank you for voting!
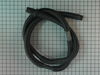
Hose had a split in it
took off front of washer , took off hose clamp removed old hose . replaced with new hose clamped back on put on front cover ran washer check for any leakes. done and done
Parts Used:
-
Chris from Hoffman Estates, IL
-
Difficulty Level:Really Easy
-
Total Repair Time:15 - 30 mins
-
Tools:Nutdriver, Screw drivers
8 of 11 people
found this instruction helpful.
Was this instruction helpful to you?
Thank you for voting!
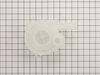
Machine making a grinding noise during spin cycle
On this particular model #MAV7550AWW Maytag washer, you do not remove a back panel since it is a three sided case. I first disconnected power and hoses from wall. Removed the belt from under the machine (you need to tilt the machine). To access the water pump you need to remove the front panel by first sliding a putty knife between the top of the machine and the panel slide it in about 2 inches from the edge to release the latch, repeat the procedure on the other side. On the inside or the panel about 2 inches there is a nut on either side once you remove both the front panel unlatches easily, from the bottom two latches. The water pump is located on the right front of the bottom plate. it is held in by three nut screws, (have plenty of towels to catch the water that is released once you disconnect the two hoses that are on the pump. The replacement part (made in the USA) is all plastic but fits perfectly. We Replaced the pump and reconnected everything. There is a video here on this site the explains in detail the removal and placement of the drive belt. The job is very simple to do. I am a woman under 5ft and I did this repair with the help of my son (17yr old). The machine is good as new. Second repair I have done on the machine and with a lot of savings!.
Parts Used:

-
Ines from West Babylon, NY
-
Difficulty Level:Easy
-
Total Repair Time:30 - 60 mins
-
Tools:Screw drivers, Socket set
7 of 8 people
found this instruction helpful.
Was this instruction helpful to you?
Thank you for voting!
Oil leak from lower lip seal
I didn’t have special tool for brake but punch and hammer worked. Seal was easy to replace. Several videos online to show you how. It wasn’t worth it to tear apart the transmission and buy more parts/seals (if they were even available). But I didn’t know how much oil was in it. I drilled a hole in the side to somewhat check level and added 80-90 gear oil. It was almost empty and added almost a quart. Used a self taping screw/bolt with gasket sealer to plug the hole. I got 34 yrs out of this washer. If it fails, oh well. Just hate to buy a new one that only last 10yrs if im lucky.
Parts Used:

-
Anthony from CHESANING, MI
-
Difficulty Level:Easy
-
Total Repair Time:1- 2 hours
-
Tools:Nutdriver, Screw drivers, Socket set, Wrench set
6 of 6 people
found this instruction helpful.
Was this instruction helpful to you?
Thank you for voting!
would no longer spin with a load of clothes, but would still drain the water.
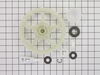
Replaced the transmission pulley and bearing. Also I put on a new drive belt. I did the repairs exactly the way Steve does in the repair videos.
Replace the Transmission Pulley and Bearing Kit - 5:44
Replaced the Drive Belt 52 inches - 1:10
Also I replaced the drain pump even though it still worked, because the machine is 19 years old.
Replace the Drain Pump video - 6:22 min.
After doing the repairs, the Maytag Atlantis washer now works fine.
Replace the Transmission Pulley and Bearing Kit - 5:44
Replaced the Drive Belt 52 inches - 1:10
Also I replaced the drain pump even though it still worked, because the machine is 19 years old.
Replace the Drain Pump video - 6:22 min.
After doing the repairs, the Maytag Atlantis washer now works fine.
Parts Used:
-
Scott from CINCINNATI, OH
-
Difficulty Level:Easy
-
Total Repair Time:30 - 60 mins
-
Tools:Nutdriver, Pliers
6 of 6 people
found this instruction helpful.
Was this instruction helpful to you?
Thank you for voting!
Washer shut down while filling w/ lid up
I did a continuity check on the lid switch assembly since it was a) the easist to get to, and b) my wife's descreiption of how rthe washer stopped made me think it had something to do with the lid switch.
I found that all of the contacts were open regardless of the position of the switch, and I also discovered that there was a fuse inside the swithch. I decided to order a replacement part based on the presence of the fuse.
Upon repacling the fuse (a snap in affair), the washer was working again... my wife was impressed and I was happy!
I found that all of the contacts were open regardless of the position of the switch, and I also discovered that there was a fuse inside the swithch. I decided to order a replacement part based on the presence of the fuse.
Upon repacling the fuse (a snap in affair), the washer was working again... my wife was impressed and I was happy!
Parts Used:
-
Peter from Gilbert, AZ
-
Difficulty Level:Really Easy
-
Total Repair Time:15 - 30 mins
-
Tools:Screw drivers
7 of 9 people
found this instruction helpful.
Was this instruction helpful to you?
Thank you for voting!
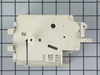
Water would not drain after rinse cycle.
Three screws removed that hold dial panel to top of washer. Remove timer cap and lock pin, then knob. Remove circuit board and connectors. Remove two screws holding timer to panel. swap out old timer for new one, reverse order to put back together.
Parts Used:
-
Mark T. from Richardson, TX
-
Difficulty Level:Really Easy
-
Total Repair Time:15 - 30 mins
-
Tools:Screw drivers, Socket set
7 of 9 people
found this instruction helpful.
Was this instruction helpful to you?
Thank you for voting!