




















MAV8600AWQ Maytag Washer - Instructions
Keep searches simple. Use keywords, e.g. "leaking", "pump", "broken" or "fit".
Screaming under the washer
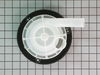
Placed the washer on 2 brick under the front. Removed the belt, used a straight blade screw driver for the lifting of the top off. reoved 2 bolts off the face and removed the screws of the water pump. Water pump was messy with smelly water but a bowel and a towel helps. Placed the pump on, reversed the tear apart...placed the belt on the bottom. Removed the brick under the front. Hooked up the water supply...plugged in and did a load..it worked perfectly....Thanks!!!!
Parts Used:

-
Anthony from DeKalb, IL
-
Difficulty Level:Easy
-
Total Repair Time:15 - 30 mins
-
Tools:Nutdriver, Screw drivers, Socket set
14 of 16 people
found this instruction helpful.
Was this instruction helpful to you?
Thank you for voting!
Machine jumped around room when spinning
The washing machine would shake very loudly when spinning.
Found red oil under machine. Asked experts, they said "buy new machine, not worth repairing transmission".
replaced small oil seal and drilled small hole and added some transmission oil(auto) then sealed hole. replaced belt just because the other one was oil soaked.
Works great, Like new, cheap fix under $20..
Found red oil under machine. Asked experts, they said "buy new machine, not worth repairing transmission".
replaced small oil seal and drilled small hole and added some transmission oil(auto) then sealed hole. replaced belt just because the other one was oil soaked.
Works great, Like new, cheap fix under $20..
Parts Used:
-
Randy from Colgate, ND
-
Difficulty Level:A Bit Difficult
-
Total Repair Time:1- 2 hours
-
Tools:Nutdriver, Pliers, Screw drivers, Socket set
15 of 19 people
found this instruction helpful.
Was this instruction helpful to you?
Thank you for voting!
loud hi pitched squeeling noise all the time.
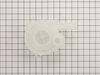
Remove front panel and back service panel below water conn. lines. Put a 4" plastic box between the tub and inside of cabinet "directly opposite the spring to be removed to lower the tub to base for less opposing travel to unlatch spring from tub hook. Also took an old slotted screw driver w/ a blade about 1/4 " and grinded 1/8 from middle about an1/8" deep and used it to latch the spring when pushing it up and off the tub. Replaced all 6. Also did motor pivot spring. Tested and the it worked for one cycle, then the tub again just falls to the right as if the spring at 9 o'clock was broke and strains the belt drive but the spin cycle still works o.k. and the washer does not bang and walk away till you stop the machine. Thought the 6 tub springs would take care of both problems. Told that the snubber ring needs to be replaced. Never but another maytag again. JUst did the belt,a week later the water pump went then the springs.....
Parts Used:
-
Patrick from Accord, NY
-
Difficulty Level:Easy
-
Total Repair Time:30 - 60 mins
-
Tools:Nutdriver, Pliers
15 of 20 people
found this instruction helpful.
Was this instruction helpful to you?
Thank you for voting!
Pump was leaking
I felt extremely confident when purchasing the part because I say three diagrams which clearly showed I was ordering the correct part. 0. Drain all of the water out of the machine. 1. Remove the rear panel from the washer. 2. Use the pliers to disconnect the hoses from the pump. 3. Remove the three screwa from the old pump. 4. Support the washer with the block then take the belt off pulley. 5. Remove old pump. 6. put new pump in place then reconnect the pulley, you can remove the block.. 7. Install the three screws for the pump after you tighten it up by placing the pump over ther correct screw holes.. 8. Reconnect the two hoses using the clamps you removed. 9. Secure the rear panel and screw in place. 10. Wash clothes. EASY FIX!!!
Parts Used:
-
Christopher from Westwego, LA
-
Difficulty Level:Really Easy
-
Total Repair Time:15 - 30 mins
-
Tools:Nutdriver, Pliers
14 of 17 people
found this instruction helpful.
Was this instruction helpful to you?
Thank you for voting!
Washer would not agitate
Remover agitator/Auger assembly. Install new agitator/auger assembly. Washer still would not agitate. Called repairman and found the transmission was bad. Fortunately transmission was still under warranty. 10 year warranty on transmission.
Parts Used:
-
Gerald from Spring, TX
-
Difficulty Level:Really Easy
-
Total Repair Time:Less than 15 mins
-
Tools:Nutdriver, Socket set
14 of 18 people
found this instruction helpful.
Was this instruction helpful to you?
Thank you for voting!
The timer would quit in mid cycle. Spin did not drain the water in Permanent Press or Delicate cycles.
I opened the front of the machine. The clips had rusted. One broke and the others were very difficult to work with. I pried the panel open with a large screwdriver. I took the back panel off to access the water pump. I removed the back panel on the electricals to access the timer. To replace the timer I pried off the decorative cover. To get the knob off you have to squeeze in on the timer split shaft while pulling out on the know. This was the second hardest part. (The front panel access was the most difficult). After that the timer clip is easy to loosen and it slides a littel then pops out. Electrical connection was obvious. The motor sping was the next most difficlt part. The spring fits on the rear part of the motor which is most easily accessed through the rear panel used for replacing the water pump. The water pump has three screws holding it and two hose clamps that come off easily with a pair of pliers. Before removing the water pump, I had to tip up the machine and take the belt off. This was also pretty easy. Put it back together and works great again on all cycles.
Parts Used:
-
Dale from Benton, LA
-
Difficulty Level:A Bit Difficult
-
Total Repair Time:1- 2 hours
-
Tools:Nutdriver, Pliers, Screw drivers, Socket set
14 of 18 people
found this instruction helpful.
Was this instruction helpful to you?
Thank you for voting!
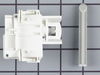
Lid switch had went out.
I removed the rear panel of the washer, and removed the lid switch assembly. Then, replaced the old one with the new lid switch and plunger. Put the rear panel back on the washer, and started washing clothes again!!!!!! I think a monkey could have done it....
Parts Used:
-
Kyle from Skiatook, OK
-
Difficulty Level:Really Easy
-
Total Repair Time:Less than 15 mins
-
Tools:Screw drivers, Wrench (Adjustable)
12 of 15 people
found this instruction helpful.
Was this instruction helpful to you?
Thank you for voting!
original Factory Water Pump Bearing seized up
Vey Easy to Fix. 1)Turn Water off at the wall. 2)Remove access panel on back of washer. 3) Remove Water pump. It is bolted down to the bottom of the washer by three nut head bolts. when loose the pump can be manipulated and tilted so the belt will have slack and most likely fall right off. Have a bucket ready. Remove water hose from top of pump by sgueaing clam with pliars and sliding clamp up hose. allow to drain in bucket. Lift drain hose out from wall and allow to drain through the pump into bucket. remove hose from pump that goet to drain. Replace pump and reverse steps listed above.
Parts Used:
-
Bill from Mount Pleasant, MI
-
Difficulty Level:Really Easy
-
Total Repair Time:Less than 15 mins
-
Tools:Nutdriver, Pliers
10 of 11 people
found this instruction helpful.
Was this instruction helpful to you?
Thank you for voting!
water pump was noisy
Removed the front panel, Removed the belt from pump in the back of machine. Removed the pump from the back of machine, Put the pump in reconnected the belt, Replaced all the screws. My husband did the repair work in a matter of 45 minutes. Machine works fine now. The part came when I was told it would. I am very pleased with your service.
Parts Used:
-
Patsy from Brookfield,, MO
-
Difficulty Level:Easy
-
Total Repair Time:30 - 60 mins
-
Tools:Screw drivers, Socket set
10 of 11 people
found this instruction helpful.
Was this instruction helpful to you?
Thank you for voting!
washer making pounding and rocking sound
Took a screwdriver and pried up the top of washer, then reached in and unscrewed the front two screws that allowed the front to be lifted off.
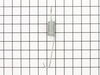
Removed two screws on lower right side that allowed us to pry open right side of washer. There are six springs along the bottom of washer that keep the tub stable and keep it from bouncing against sides while in spin mode. One of the springs broke and needed to be replaced. Off course it was the one that was in the far back and the hardest to get too. But by prying open the right side it was reachable. The wife pushed against the tub to make the spring stretch a little less but still was too difficult. We took the advice of another home repair guy and put quarters in the spring (about $1.75 worth) to make it stretch out, then it was simple to connect the two ends, remove the quarters and voila....it was done. Screwed theright side back on, but the minimum order on the springs was six and the others seemed fine, we just put the other five inside the washer cabinet, replaced the front panel, reset the clamps on top of the front panel, slammed the top down and we were back in business. The parts including shipping was a little over $10.00. So I am sure we saved at least $140 repair job.
Removed two screws on lower right side that allowed us to pry open right side of washer. There are six springs along the bottom of washer that keep the tub stable and keep it from bouncing against sides while in spin mode. One of the springs broke and needed to be replaced. Off course it was the one that was in the far back and the hardest to get too. But by prying open the right side it was reachable. The wife pushed against the tub to make the spring stretch a little less but still was too difficult. We took the advice of another home repair guy and put quarters in the spring (about $1.75 worth) to make it stretch out, then it was simple to connect the two ends, remove the quarters and voila....it was done. Screwed theright side back on, but the minimum order on the springs was six and the others seemed fine, we just put the other five inside the washer cabinet, replaced the front panel, reset the clamps on top of the front panel, slammed the top down and we were back in business. The parts including shipping was a little over $10.00. So I am sure we saved at least $140 repair job.
Parts Used:
-
serenade from charleston, SC
-
Difficulty Level:Easy
-
Total Repair Time:1- 2 hours
-
Tools:Nutdriver, Screw drivers, Socket set
10 of 11 people
found this instruction helpful.
Was this instruction helpful to you?
Thank you for voting!
washer would not spin.
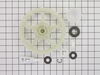
tip washer up on wooden blocks.remove drive belt.remove "E" clip from tub drive pulley and remove all the parts.Install new parts in kit as per instructions.machine works great!
Parts Used:
-
Robert from South Gibson, PA
-
Difficulty Level:Really Easy
-
Total Repair Time:30 - 60 mins
-
Tools:Pliers, Screw drivers
10 of 13 people
found this instruction helpful.
Was this instruction helpful to you?
Thank you for voting!
terrible grinding noise
For safety I Unplugged the machine
Tipped machine back and removed the belt. Rotated the motor by hand and all is well there. Rotated the water pump by hand and a grinding sound appeared. I Let the machine down . Using a hard object , 1/16th of an inch thick, I slide it between the front edge of the lid and the front panel unlocking the clips ( one on the right side and one on the left side ) holding the lid down. I then tipped the lid up and removed the 2 screws holding the front panel on. Lifted the front panel off of the clips on the bottom end of panel. Using a nut driver I removed the 3 bolts holding the pump to the frame. Then with a pliers I removed the clips holding the 2 hoses. With a pan to catch the water I removed the hoses and drained them into the pan.
I then took my machine model number and went to the internet in search of a new water pump. After checking several sites with no success, I come upon the site for PartSelect.Com. With the excellent search method on the site I was able to quickly find the part I needed. I placed my order (10pm) on a Tuesday night and a short time later I received an email letting me know they had my order. On Wednesday I received an email letting me know they had shipped my order. On Friday the order had arrived.
I removed the new pump from the box and inspected it . Every thing looks great. I placed the pump into its mount on machine and bolted it down. Attached the 2 hoses, put the front panel back on and tipped the top down into place. Pushed machine into place, plugged it in and fired it up. I now have a quiet running machine again. Thank You to PartSelect.com for the quick response to my
Tipped machine back and removed the belt. Rotated the motor by hand and all is well there. Rotated the water pump by hand and a grinding sound appeared. I Let the machine down . Using a hard object , 1/16th of an inch thick, I slide it between the front edge of the lid and the front panel unlocking the clips ( one on the right side and one on the left side ) holding the lid down. I then tipped the lid up and removed the 2 screws holding the front panel on. Lifted the front panel off of the clips on the bottom end of panel. Using a nut driver I removed the 3 bolts holding the pump to the frame. Then with a pliers I removed the clips holding the 2 hoses. With a pan to catch the water I removed the hoses and drained them into the pan.
I then took my machine model number and went to the internet in search of a new water pump. After checking several sites with no success, I come upon the site for PartSelect.Com. With the excellent search method on the site I was able to quickly find the part I needed. I placed my order (10pm) on a Tuesday night and a short time later I received an email letting me know they had my order. On Wednesday I received an email letting me know they had shipped my order. On Friday the order had arrived.
I removed the new pump from the box and inspected it . Every thing looks great. I placed the pump into its mount on machine and bolted it down. Attached the 2 hoses, put the front panel back on and tipped the top down into place. Pushed machine into place, plugged it in and fired it up. I now have a quiet running machine again. Thank You to PartSelect.com for the quick response to my
Parts Used:
-
ALVA K from chippewa falls, WI
-
Difficulty Level:Really Easy
-
Total Repair Time:15 - 30 mins
-
Tools:Nutdriver, Pliers, Screw drivers
9 of 10 people
found this instruction helpful.
Was this instruction helpful to you?
Thank you for voting!
Water Pump was making loud noises
After pulling the machine away from the wall and turning off the water and unpluging. I simply removed the panel in the back and reached underneath and removed the belt. Took off the hose clamps and removed the three screws holding the pump on. Put the new pump back in place and hooked up the hoses. Then put the belt on for a test run.......all OK put the back on and was done. Whole job about twenty minutes. Saved over two hundred dollars doing this myself. Very simple repair.
Parts Used:
-
Thomas from Bel Air, MD
-
Difficulty Level:Really Easy
-
Total Repair Time:15 - 30 mins
-
Tools:Nutdriver, Pliers, Socket set
9 of 10 people
found this instruction helpful.
Was this instruction helpful to you?
Thank you for voting!
would not drain/slow spin
i did the repair by the instructions that you had on the web site,and i thank you for all the help you gave me.
Parts Used:
-
Carlos from Georgetown, TN
-
Difficulty Level:Really Easy
-
Total Repair Time:15 - 30 mins
-
Tools:Nutdriver, Pliers, Socket set
11 of 16 people
found this instruction helpful.
Was this instruction helpful to you?
Thank you for voting!
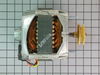
would'nt wash w/out getting hot
just took the front off and then took the old motor off and switched over about 2 parts from the old to the new and then put the new part on and then placed the front back on and it was ready to go
Parts Used:
-
Emery from Talladega, AL
-
Difficulty Level:Really Easy
-
Total Repair Time:15 - 30 mins
-
Tools:Screw drivers, Wrench set
10 of 14 people
found this instruction helpful.
Was this instruction helpful to you?
Thank you for voting!