




















JVM1533WD - Instructions
Keep searches simple. Use keywords, e.g. "leaking", "pump", "broken" or "fit".
Micro Wave no heat all else fine. Also at times door would not shut properly.
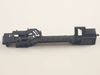
Replace (after testing w/ohm meter) diode and locker holder. My door often would not close properly. Microwave let know by saying not shut properly. When disassembled found the top screw mount was hollowed out resulting in it moving on occasion when you close door. First remove casing (special safety torx head) needed for rear screws. Onc e removed all parts available to view or work on. Diode is on the capacitor so caution is needed when removing. Serious shock hazard if touched. Use insulated pliers to remove from capacitor and a phillips on the ground. Test with ohm meter Should have resistance on way and non the opposite. Replaced mine bad. Next the holder 2 phillips screws and its yours. Unplug each switch and remove. Take note to what wires go to what switch and what switch mounts where. Mine had 3 switches. Removed from old holder and put in new. Screwed holder back in place and left scrws loose till re wired. Once wired set the holder by lightly tighting the screws. Try the door till it seats properly ensuring that all 3 switches are working properly. If so thighten screws. If all seems to work as advertised, safely plug in and test unit if heats up un plug and put cover back on micro. Your all set. Happy heating.
Parts Used:
-
Roy from MILLINGTON, TN
-
Difficulty Level:Really Easy
-
Total Repair Time:1- 2 hours
-
Tools:Pliers, Screw drivers
2 of 2 people
found this instruction helpful.
Was this instruction helpful to you?
Thank you for voting!
Door switch malfunction
Take cover off microwave. Check door switches to determine which one was faulty.Remove and replace faulty switch.
Parts Used:
-
Sherry from PINELAND, SC
-
Difficulty Level:Very Easy
-
Total Repair Time:Less than 15 mins
-
Tools:Nutdriver, Screw drivers
2 of 3 people
found this instruction helpful.
Was this instruction helpful to you?
Thank you for voting!
Bad door switch and divide
Remove upper grill, then control panel, then 2 screws hold door switch mounting bracket, that will let you roll the switches out to work on them. Remove each switch by carefully pushing back retainer clips. Diode a long pair of needlenose pliers is helpful. The control board in front of capacitor comes out with a flat screwdriver and pry up. Removing grnd wires helps
Parts Used:

-
Robert from COLORADO SPGS, CO
-
Difficulty Level:Easy
-
Total Repair Time:30 - 60 mins
-
Tools:Screw drivers
3 of 6 people
found this instruction helpful.
Was this instruction helpful to you?
Thank you for voting!
Replacing top vent filter
Followed owners manual instructions to the letter: removed two top screws, opened the unit door so I could slide out the old filter. We don’t cook much at all in the unit, mostly just heating coffee and reheating leftovers. BUT! The top grill was pretty greasy and needed hot soapy water to clean, including in the depths of the top area. The whole process, especially the company website for part ID and purchase, was slick!
Parts Used:

-
Paul from CHARLOTTESVLE, VA
-
Difficulty Level:Very Easy
-
Total Repair Time:15 - 30 mins
-
Tools:Screw drivers
2 of 3 people
found this instruction helpful.
Was this instruction helpful to you?
Thank you for voting!
purchased a home that the microwave needed a grease filter
Used Google to locate parts dealers for GE.
Ordered from Partselect.
Part arrived a few days later and I easily put it in.
I thought the cost of this part was out of line but all others sold it for about the same.
Ordered from Partselect.
Part arrived a few days later and I easily put it in.
I thought the cost of this part was out of line but all others sold it for about the same.
Parts Used:
-
Martin from Discovery Bay, CA
-
Difficulty Level:Really Easy
-
Total Repair Time:Less than 15 mins
4 of 9 people
found this instruction helpful.
Was this instruction helpful to you?
Thank you for voting!
broke door latch
Pryed off frame from around latch,with screwdriver,took off old latch keeping eye on spring and how it comes off.Going on was a no brainer had to pry side a little with screwdriver the new latch fell into place don't forget the spring,the frame slipped right in all fixed oh yes i did take the door off prying top pin with screwdriver be carefull it is all plastic.
Parts Used:
-
walter from palm bay, FL
-
Difficulty Level:A Bit Difficult
-
Total Repair Time:Less than 15 mins
-
Tools:Screw drivers
5 of 12 people
found this instruction helpful.
Was this instruction helpful to you?
Thank you for voting!
Broken Glass Cooking Tray
-
Gloria from ROSSFORD, OH
-
Difficulty Level:Very Easy
-
Total Repair Time:Less than 15 mins
2 of 3 people
found this instruction helpful.
Was this instruction helpful to you?
Thank you for voting!
Change the Charcoal Filter and Microwave Grease Filter (Normal Maintenance)
Both were easy to replace. I followed the instructions in the users manual which came with the microwave. On the grease filter, I removed the 2 Phillips head screws which hold the grill plate in place. I had to open the microwave all the way to remove the grill plate. The grease filter was easy to remove and replace with a new one. I then put the grill back in and secured it with the 2 screws. Easy Peasy!
Parts Used:

-
Lynwood from GONZALES, LA
-
Difficulty Level:Very Easy
-
Total Repair Time:Less than 15 mins
-
Tools:Screw drivers
1 person
found this instruction helpful.
Was this instruction helpful to you?
Thank you for voting!
Air Filter Replacement
Originally called it "grease filter" until I found very small print "air filter" on damaged original. Part #PS3527528
Slipped into place with ease -- right bottom of microwave
Slipped into place with ease -- right bottom of microwave
Parts Used:
-
Claude from PARK CITY, UT
-
Difficulty Level:Very Easy
-
Total Repair Time:Less than 15 mins
1 person
found this instruction helpful.
Was this instruction helpful to you?
Thank you for voting!
suddenly stopped working while in use
i unplugged the unit,unscrewed the outer shell so that all the wiring and internal components were visible.starting at the first of three micro switches i removed the slip on terminals installed the alligator clips too the wires so the switch would now be bypassed.i made sure the wires and clips were not touching anything plugged unit in and it worked.i then installed the new switch and closed up the outer shell
Parts Used:
-
Kevin from Colonia, NJ
-
Difficulty Level:Easy
-
Total Repair Time:Less than 15 mins
-
Tools:Pliers, Screw drivers
2 of 4 people
found this instruction helpful.
Was this instruction helpful to you?
Thank you for voting!
I burned something in the micro and couldn't get rid of the smell. I thought replacing the charcoal filter would eleviate the problem
I used a screw driver to take out 4 screws on top of the micro, took out the old filter and put the new filter in. It couldn't have been any easier.
Parts Used:

-
Barbara from DELRAY BEACH, FL
-
Difficulty Level:Very Easy
-
Total Repair Time:Less than 15 mins
-
Tools:Screw drivers
1 person
found this instruction helpful.
Was this instruction helpful to you?
Thank you for voting!
Cracked plastic where the spring attaches
A 2 yr old could do this snap out. Snap in less then. 30 seconds . What a shame and rip off on appliance repair shops - I called to do this rediculsley 40 second job and the wantvv$125.00!9t more. Omg. I’m a senior/ no wonder God punished the world wit Covid 19! Too many nasty infair. Buii I needed and rip offs.
Parts Used:
-
Samuel from LAS VEGAS, NV
-
Difficulty Level:Very Easy
-
Total Repair Time:Less than 15 mins
2 of 4 people
found this instruction helpful.
Was this instruction helpful to you?
Thank you for voting!
Try to heat food and fuse would blow.

-
bart from new sarpy, LA
-
Difficulty Level:A Bit Difficult
-
Total Repair Time:1- 2 hours
-
Tools:Screw drivers
8 of 22 people
found this instruction helpful.
Was this instruction helpful to you?
Thank you for voting!
no power in microwave in turn table wouldn't turn light would work act like door was open
remov cover to check voltage and found problem at the interlock switch ohm the switch and found it was open replace both switches it work fine now
Parts Used:
-
johnny from port orange, FL
-
Difficulty Level:Easy
-
Total Repair Time:1- 2 hours
-
Tools:Screw drivers
5 of 13 people
found this instruction helpful.
Was this instruction helpful to you?
Thank you for voting!
Turntable Stopped Working/Display Timer Would Countdown But Not Heat
With this model, you must remove the outer covering. Don't try to access the display unit from the front like I've seen in some other GE microwave videos. After removing the outer covering, the switches are easy to replace. They are very visible and easy to get to without taking any other parts off. You will see the door switches just behind the display board. Remove the switch and then remove the connecting wires to ensure you don't inadvertently brake a wire. You will need a tamper resistant star bit to remove 3 or 4 screws from the back panel. All other screws are philips head. I went ahead and replaced both switches (yes...there are two of them) and works like a charm. I saved an $800 microwave for less than $60 and know what to do if it happens again. Appears to be a common problem on this model. Thanks for others making a post...It saved me time and money reading others remarks. Good luck!
Parts Used:
-
Steve from Wesley Chapel, FL
-
Difficulty Level:Really Easy
-
Total Repair Time:30 - 60 mins
-
Tools:Screw drivers
1 person
found this instruction helpful.
Was this instruction helpful to you?
Thank you for voting!