




















JVM1533WD - Instructions
Keep searches simple. Use keywords, e.g. "leaking", "pump", "broken" or "fit".
everything worked except it wouldnt cook
tested all 3 of the door switche for continuity, the top switch was faulty, replaced it,for approx $4.00 and saved a $350 dollar microwave.
Parts Used:

-
Joseph from N VERSAILLES, PA
-
Difficulty Level:Very Easy
-
Total Repair Time:30 - 60 mins
-
Tools:Screw drivers
11 of 21 people
found this instruction helpful.
Was this instruction helpful to you?
Thank you for voting!
Microwave would not heat anything and turntable no longer turned.
I decided the door switch was the problem because 2 problems happened at the same time. I removed the 4 screws for the top outside cover and the 1 screw that held the control board. After removing the control board screw, I lifted it up and removed it. This gave me access to the 3 door switches. I then removed the 2 screws that held the plastic piece that holds the switches. This made it easier then to replace the switches.
Parts Used:

-
Jon from DANA, IN
-
Difficulty Level:A Bit Difficult
-
Total Repair Time:30 - 60 mins
-
Tools:Pliers, Screw drivers
7 of 9 people
found this instruction helpful.
Was this instruction helpful to you?
Thank you for voting!
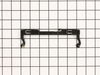
Door latch broke where it hooks to spring.
Just pulled off the cover, removed the old latch, re-connected the spring...put it all back togeather. Everything just snapps back in. The entire repair took about two minutes. Very easy.
Parts Used:
-
Robert from Colorado Springs, CO
-
Difficulty Level:Really Easy
-
Total Repair Time:Less than 15 mins
-
Tools:Screw drivers
9 of 16 people
found this instruction helpful.
Was this instruction helpful to you?
Thank you for voting!
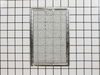
Filters were missing from microwave.
The repair went well. It was really easy to replace the filters. We bought this house recently only to find out the previous owners threw all the filters for the microwave out including the two reusable grease filters. The grease filters were easy, just slipped them in. The charcoal filter required taking the top plastic vent off by removing two screws and slipping the filter in.
Parts Used:

-
Barbara from Nashville, NC
-
Difficulty Level:Really Easy
-
Total Repair Time:Less than 15 mins
-
Tools:Screw drivers
11 of 22 people
found this instruction helpful.
Was this instruction helpful to you?
Thank you for voting!
Magnitron failed
Over the stove microwave installed in top cabinet row.
1. Unplug device.
2. Two people to remove from wall/cabinet (remove two, large, top mounting screws and rotate entire microwave down and off the wall mount). Should be some wood spacers between top of device and bottom of cabinet.
3. Remove screws from sheet metal cover.
4. Remove one screw holding blowers in place and rotate out of the way, in order to gain access to 2 of 5 screws that hold the magnetron in place.
5. Unplug magnetron and remove the 5 screws.
6. Drop in new magnetron and re-assemble microwave in reverse order (steps 5-3).
7. Two people restore micro to wall/cabinet. Replace wood spacers, re-install two, large mounting screws (finger-tight). Test device. Secure the two large screws.
1. Unplug device.
2. Two people to remove from wall/cabinet (remove two, large, top mounting screws and rotate entire microwave down and off the wall mount). Should be some wood spacers between top of device and bottom of cabinet.
3. Remove screws from sheet metal cover.
4. Remove one screw holding blowers in place and rotate out of the way, in order to gain access to 2 of 5 screws that hold the magnetron in place.
5. Unplug magnetron and remove the 5 screws.
6. Drop in new magnetron and re-assemble microwave in reverse order (steps 5-3).
7. Two people restore micro to wall/cabinet. Replace wood spacers, re-install two, large mounting screws (finger-tight). Test device. Secure the two large screws.
Parts Used:
-
Joseph from WILTON, NH
-
Difficulty Level:A Bit Difficult
-
Total Repair Time:1- 2 hours
-
Tools:Screw drivers
8 of 13 people
found this instruction helpful.
Was this instruction helpful to you?
Thank you for voting!
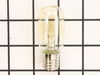
Interior lamp burned out
Unscrewed the vent at top of microwave exposing small access to bulb. The access to this was very limited so that was the major issue in changing the bulb. You needed small hands to do the job.
Parts Used:
-
Patricia from Tarpon Springs, FL
-
Difficulty Level:A Bit Difficult
-
Total Repair Time:Less than 15 mins
-
Tools:Screw drivers
11 of 23 people
found this instruction helpful.
Was this instruction helpful to you?
Thank you for voting!
When door was opened, the microwave would turn on.
Looked on line and found a you tube that said to check the door micro switches (there are three of them. Found one of the switches had an actuator that was stuck down. I got the actuator working but problem was still present. Another you tube showed how to repair the contacts in the switch and that solved the problem. however the plastic piece that holds the switches was broken and would not hold the switches securely. Ordered that piece and a new switch. Remove the vent plate on top (one phillips) and the control panel (one phillips). The switch holder is held in place with 2 phillips and is a little tricky to get it out and undo the wires. Once out, it's just a matter of putting the switches into the new holder and reinstalling it. Google the model number and the problem and there's virtually a you tube to repair ANYTHING.
Parts Used:

-
David from HILTON HEAD, SC
-
Difficulty Level:A Bit Difficult
-
Total Repair Time:30 - 60 mins
-
Tools:Screw drivers
5 of 5 people
found this instruction helpful.
Was this instruction helpful to you?
Thank you for voting!
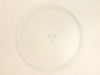
the glass circular tray inside had cracked in half.It was of no use. I reordered another
The tray came within 5 days and I simply took it out of its well-packaged box and slipped it into my microwave. It is working just like new. I can't thank you all for being so punctual and reliable. better than having to buy a brand new microwave.
Parts Used:
-
patty from SEATTLE, WA
-
Difficulty Level:Very Easy
-
Total Repair Time:Less than 15 mins
5 of 6 people
found this instruction helpful.
Was this instruction helpful to you?
Thank you for voting!
Bulbs were burnt out tried to remove them and the bulb broke from the socket
Moved the stove from underneath the microwave. Took the microwave down and turned it over. this need not be done. took the screws out to remove the bottom panel. there is a quick disconnect that need to be opened up. used pliers to remove the bad sockets and installed new one, used pliers to seat them. put bottom panel on, hooked up the quick connect. put the screws in and tightened them. installed bulbs and hooked up the electric and turned the lights on, they worked. installed the microwave, slid the stove back in place.
Parts Used:
-
William from Vero Beach, FL
-
Difficulty Level:Easy
-
Total Repair Time:30 - 60 mins
-
Tools:Pliers, Screw drivers
7 of 12 people
found this instruction helpful.
Was this instruction helpful to you?
Thank you for voting!
Microwave went totaly blank - No power
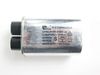
Disassembled the front cover, found slow blow fuses, then replaced with microwave fuses 250V-20Amp. Utilized a few fuses to pin point the problem, Microwave functions all worked except the express feature, made an assumption after using a tester that it was the high voltage capacitor and the diode that attaches. Replaced both, plugged in and tested. Worked! reinstalled the unit. Sucessfull for the past month.
Parts Used:
-
Mark from Bushwood, MD
-
Difficulty Level:A Bit Difficult
-
Total Repair Time:1- 2 hours
-
Tools:Pliers, Screw drivers, Wrench set
8 of 15 people
found this instruction helpful.
Was this instruction helpful to you?
Thank you for voting!
Door locker snapped off
Unplugged the microwave. I opened the door. I used a butter knife to pop the bezel off the inside of the door. I pushed the locker up and to the left and used the butter knife to pry it loose. Disconnected the locker from the spring, and reversed for the installation.
Parts Used:

-
Dave from FOREST, VA
-
Difficulty Level:Easy
-
Total Repair Time:15 - 30 mins
4 of 4 people
found this instruction helpful.
Was this instruction helpful to you?
Thank you for voting!
Latch was broken you put spring on
Took off plastic around inside the door , took broken latch off and put spring on new latch on plactic on and it works . ????
Parts Used:
-
Lenoma from NORTHGLENN, CO
-
Difficulty Level:Really Easy
-
Total Repair Time:15 - 30 mins
4 of 4 people
found this instruction helpful.
Was this instruction helpful to you?
Thank you for voting!
Opened door to get food put more food in closed door it wouldnt work
Everything worked on the display light inside worked but when you closed the door and set time it would start counting down but not heating nor would the turntable turn. Started reading troubleshooting chart and first thing I did was removed the cover and checked door switches and found primary door switch wasn't working so I ordered a new one installed it and it worked. Anyone doing this has to be very careful because of the stored energy in the capacitor is strong enough to kill.
My micro is only 2 years old so I was hoping it wasn't anything major.
My micro is only 2 years old so I was hoping it wasn't anything major.
Parts Used:
-
Henry Totten from GROVES, TX
-
Difficulty Level:Really Easy
-
Total Repair Time:30 - 60 mins
-
Tools:Screw drivers
4 of 4 people
found this instruction helpful.
Was this instruction helpful to you?
Thank you for voting!
No Power
Check with Digital meter all connections.Find a Thermostat open loop.This thermostat is near the Megatron .
Parts Used:

-
Florentino from West Palm Beach, FL
-
Difficulty Level:A Bit Difficult
-
Total Repair Time:15 - 30 mins
-
Tools:Screw drivers
7 of 14 people
found this instruction helpful.
Was this instruction helpful to you?
Thank you for voting!
mICROWAVE WOULD NOT HEAT
I REMOVED THE TOP PANEL OF THE MICR0WAVE AND THEN REMOVED ONE SCREW TO REMOVE THE CONTROL PANEL. rEMOVED OLD SWITCH. SNAPPED IN NEW SWITCH AND CONNECTED WIRE. REPLACED CONTROL PANEL AND UPPER PANEL.
Parts Used:
-
Peter from Bessemer, MI
-
Difficulty Level:Really Easy
-
Total Repair Time:15 - 30 mins
-
Tools:Screw drivers
5 of 8 people
found this instruction helpful.
Was this instruction helpful to you?
Thank you for voting!