




















JVM1490WD - Instructions
Keep searches simple. Use keywords, e.g. "leaking", "pump", "broken" or "fit".
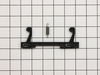
broken door latch
I held the door open while the repair man took the black facing off and replaced the latch and reinstalled the facing I was worn out
Parts Used:
-
Mark from Meridian, TX
-
Difficulty Level:Really Easy
-
Total Repair Time:Less than 15 mins
Was this instruction helpful to you?
Thank you for voting!
Oven would not operate after we noticed that the catch inside the door was broken
Removed the door, removed the old choke cover (breaking all the stap catches), removed the slide door latch assembly from the spring (the most difficult task) then reassembly of the latch to spring, sliding into the grooves along the inside of the door, the installing the new choke cover (very easy with the new one) taking care not the break any of the staps. Easy enough! Another difficult task was to re-install the door to the frame. It appears that the lower "hinge" is slightly bent down to allow easy install but the door now makes a slight sweeking sound when opening and closing.
Parts Used:

-
Peter from Madison, AL
-
Difficulty Level:Really Easy
-
Total Repair Time:Less than 15 mins
-
Tools:Screw drivers
Was this instruction helpful to you?
Thank you for voting!
replace plate

-
ed from virginia beach, VA
-
Difficulty Level:Really Easy
-
Total Repair Time:Less than 15 mins
-
Tools:Screw drivers
Was this instruction helpful to you?
Thank you for voting!
Just recently fixed and my son broke it a week later...
My son said order it. It came a day later. Very cool. He took the door off and up to his room. No idea what tools except most likely a screwdriver. I asked him how did it go. He said it's good. Nice...
Parts Used:
-
Amy from Hillburn, NY
-
Difficulty Level:Really Easy
-
Total Repair Time:15 - 30 mins
-
Tools:Screw drivers
Was this instruction helpful to you?
Thank you for voting!
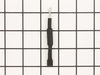
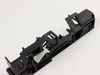
Microwave portion did not work, Halogen lights and fans did.
The primary door latch switch contacts were not closing properly. I broke the latch bracket while removing the switch. It is only a plastic clip that holds the switch in place. I replaced the switch and bracket. The Advantium now works in all modes.
Parts Used:
-
Gary from Mahopac, NY
-
Difficulty Level:Really Easy
-
Total Repair Time:15 - 30 mins
-
Tools:Pliers, Screw drivers
Was this instruction helpful to you?
Thank you for voting!
broken door latch assembly (I broke it!)
I had left the door to the microwave open and turned around and hit the door latch assembly with my arm, sanpping off the bottom latch hook. In an effort to take apart the latch assembly it was necessary to take off the door choke cover and in doing so I sanpped a few of the plastic tabs that hold it in place. Undismayed, I then went online, found PartSelect, ordered the replacement parts, received them in three days and in fifteen minutes fixed both of them. The diagrams on the site made it easy to find what I needed and ordering the parts was easy. Thanks PartSelect-my wife is happy again!!!
Parts Used:
-
David from Little Falls, NJ
-
Difficulty Level:Really Easy
-
Total Repair Time:15 - 30 mins
-
Tools:Pliers, Screw drivers
Was this instruction helpful to you?
Thank you for voting!
Broken plsastic

-
Brian from Lakewood, WA
-
Difficulty Level:Easy
-
Total Repair Time:Less than 15 mins
-
Tools:Screw drivers
Was this instruction helpful to you?
Thank you for voting!
All power to the microwave went out.
PartSelect had helpful repair instructions on-line which made the repair easier and faster. Unfortunately, there were other problems with the oven that immediately blew the new fuse I had just installed. It was then determined that additional repair would most likely cost almost as much as a new microwave.
Parts Used:

-
Michael from East China Township, MI
-
Difficulty Level:Easy
-
Total Repair Time:Less than 15 mins
-
Tools:Screw drivers
Was this instruction helpful to you?
Thank you for voting!
Glass tray broke in microwave

-
Ralph from Puyallup, WA
-
Difficulty Level:Really Easy
-
Total Repair Time:Less than 15 mins
Was this instruction helpful to you?
Thank you for voting!
Rack holder had broken off
Ordered part and looked at the install video and with in 2 minutes the new one was installed
Parts Used:

-
Bradley V from Plainfield, IN
-
Difficulty Level:Really Easy
-
Total Repair Time:Less than 15 mins
-
Tools:Pliers
Was this instruction helpful to you?
Thank you for voting!
broken micro tray
-
william from San Marcos, CA
-
Difficulty Level:Really Easy
-
Total Repair Time:Less than 15 mins
Was this instruction helpful to you?
Thank you for voting!
Powered Off completely
After reading reviews that there was no power what so ever and a fuse replacement will solve the problem, I tried it. Replacing the fuse is very easy (and I am not handy at all). All you have to do is remove the microwave cover from the top by removing two screws, slide the cover to the left and pulling the cover off. Then remove the grill in front of you, by removing one or two screws. The fuse is in front of you, use pliers and be firm but gentle. Replacing the fuse is easy but it did not solve my problem.
Parts Used:
-
Mohammad from Piscataway, NJ
-
Difficulty Level:Easy
-
Total Repair Time:Less than 15 mins
-
Tools:Screw drivers
Was this instruction helpful to you?
Thank you for voting!
Glass rotating tray cracked and broke when cooking
This is the tray the glass cooking tray rest on and rotates the glass during cooking. The metal tray was installed upside down. The rotating glass tray was not properly installed. The oven was at a very high temp. and the weight of the utensil on the glass was not supported correctly. Result, big " pop " and broken glass tray. Note this is the second glass repaced. The first one dropped while removing it from the oven. It stuck to the bottom of the cooking dish and then fell to the floor. Pop, big breakage. Maybe you can learn from my mistakes.
Parts Used:
-
paul g. from westlake village, CA
-
Difficulty Level:Really Easy
-
Total Repair Time:Less than 15 mins
Was this instruction helpful to you?
Thank you for voting!
Quit working
-
William from Socorro, NM
-
Difficulty Level:Really Easy
-
Total Repair Time:Less than 15 mins
-
Tools:Pliers, Screw drivers
Was this instruction helpful to you?
Thank you for voting!
one of the rack holders melted and was not functional
I was so happy to find this part. I had been using an upside down glass bowl to level the rack! once I found part and it arrived it was in in less than 5 seconds!!
Parts Used:
-
Nancy from La Grange, IL
-
Difficulty Level:Really Easy
-
Total Repair Time:Less than 15 mins
Was this instruction helpful to you?
Thank you for voting!