




















JSP39BK2BB General Electric Range - Instructions
Keep searches simple. Use keywords, e.g. "leaking", "pump", "broken" or "fit".
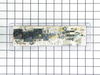
My electronic control board went out so I could not use my oven. My oven light blew as well.
I started with changing the bulb. I removed the small bracket that holds the glass cover over the bulb unscrewed the bulb and reversed to replace the bulb. To replace the control board I removed the top plate on the back of my stove took the small screw's out of the control panel and unplugged the wire's. Plugged the wire's into the right spots on the new control board and put it back together.
Parts Used:

-
Stella from PADUCAH, KY
-
Difficulty Level:Really Easy
-
Total Repair Time:Less than 15 mins
-
Tools:Pliers, Socket set
2 of 3 people
found this instruction helpful.
Was this instruction helpful to you?
Thank you for voting!
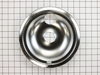
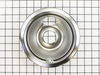
Old Burner Chrome Ruined
-
RALPH from TROY, NY
-
Difficulty Level:Really Easy
-
Total Repair Time:Less than 15 mins
3 of 6 people
found this instruction helpful.
Was this instruction helpful to you?
Thank you for voting!
Broken rear drawer support
Installed the new brackets at the back of the drawer with the 2 screws provided. The new rear mount design is much better than than the old side mount.
Parts Used:

-
Jesse from Knob Noster, MO
-
Difficulty Level:Really Easy
-
Total Repair Time:Less than 15 mins
-
Tools:Nutdriver
2 of 3 people
found this instruction helpful.
Was this instruction helpful to you?
Thank you for voting!
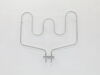
Element actually burn through and had a hole in it!
Really simple. shut off breakers. checked the breakers were off. then checked again (this is 220V power to the element).
Undid the 2 nuts holding the old element in place. Pulled out the element into the oven space an inch or two.
Used pliers to pull the contacts out from the old element (not by the wires folks). reversed the process and I was done!
Undid the 2 nuts holding the old element in place. Pulled out the element into the oven space an inch or two.
Used pliers to pull the contacts out from the old element (not by the wires folks). reversed the process and I was done!
Parts Used:
-
andrew from toano, VA
-
Difficulty Level:Really Easy
-
Total Repair Time:Less than 15 mins
-
Tools:Nutdriver, Pliers
2 of 3 people
found this instruction helpful.
Was this instruction helpful to you?
Thank you for voting!
Burner spontaneously cycled without knob activation
First I cut the circuit at the breaker, and then pulled the range from wall to access the access panel. This top panel was held with 4 screws and removable with a standard phillips head screwdriver.
I then removed the 5 wire-crimped fasteners from the defective surface burner switch. (I first labeled these wires to ensure correct placement to the new switch). There were an additional two screws behind the corresponding knob that needed to be removed in order to completely remove the old switch.
The new switch was installed in reverse order to the steps indicated above (two screws behind knob, 5 wire-crimped fasteners, 4 screws to panel). Range was pushed back into position and breaker turned on.
I then removed the 5 wire-crimped fasteners from the defective surface burner switch. (I first labeled these wires to ensure correct placement to the new switch). There were an additional two screws behind the corresponding knob that needed to be removed in order to completely remove the old switch.
The new switch was installed in reverse order to the steps indicated above (two screws behind knob, 5 wire-crimped fasteners, 4 screws to panel). Range was pushed back into position and breaker turned on.
Parts Used:
-
Anil from Milpitas, CA
-
Difficulty Level:Easy
-
Total Repair Time:Less than 15 mins
-
Tools:Screw drivers
2 of 3 people
found this instruction helpful.
Was this instruction helpful to you?
Thank you for voting!
Oven was taking much longer than normal to cook foods. Found the bake element was broken (literally broken through in a spot).
Loosen the screws to the bake element. Carefully pull out old element until wires are exposed. Pop off the clips from wires to heating element (leaving clips on the wires). Attach clips to new heating element. Screw back into place. Piece of cake!
Parts Used:
-
David from Stevensville, MD
-
Difficulty Level:Really Easy
-
Total Repair Time:Less than 15 mins
-
Tools:Nutdriver
2 of 3 people
found this instruction helpful.
Was this instruction helpful to you?
Thank you for voting!
Bake element burned out.
After I removed the 2 screws holding the element to the rear wall, I was afraid to pull too hard on the wiring for fear of breaking something. However as I pulled on the connectors, I could see there was some wire that I could pull out through the insulation (maybe 1"). I put a clamp on each wire for fear it might slip back inside. I then disconnected the clips and reconnected to the replacement element, pushed the wiring & clips back, and replaced the 2 screws. I am a DIY guy, but 76 years old, and convinced anyone could do this.
Parts Used:
-
John from LA MARQUE, TX
-
Difficulty Level:Easy
-
Total Repair Time:30 - 60 mins
-
Tools:Pliers, Socket set, Wrench set
2 of 3 people
found this instruction helpful.
Was this instruction helpful to you?
Thank you for voting!
Oven bake element burnt out
We had previously removed the bad element, which was initially confusing because the element plugs were so small and narrow compared to previous experience. After our local parts store couldn't seem to get the correct part in for us, we ordered the exact element here. It plugged in fairly easily, we screwed a few cover plates on, and slid the stove back into place. (and of course switched the appropriate electrical breaker off before replacing the element)
Parts Used:
-
Allan from Clinton, WA
-
Difficulty Level:Easy
-
Total Repair Time:15 - 30 mins
-
Tools:Screw drivers
4 of 9 people
found this instruction helpful.
Was this instruction helpful to you?
Thank you for voting!
on off switch smoked and smelled hot
-
john from MILROY, PA
-
Difficulty Level:Really Easy
-
Total Repair Time:15 - 30 mins
-
Tools:Pliers, Screw drivers
1 person
found this instruction helpful.
Was this instruction helpful to you?
Thank you for voting!
Plastic guide Broken
-
NICK from Vernon, CA
-
Difficulty Level:Easy
-
Total Repair Time:15 - 30 mins
-
Tools:Pliers, Screw drivers
9 of 25 people
found this instruction helpful.
Was this instruction helpful to you?
Thank you for voting!
Replaced the outlet the one of the top burners on top of my stove, it went very well.
I followed the instructions on the video, the only thing they left out is where the wires go through to the back of the stove being that there are sharp edges. A role of glass tape would have been handy to replace the old tape. Thanks for asking, I hope this helps someone else.
Parts Used:
-
Charles from MECHANIC FLS, ME
-
Difficulty Level:Easy
-
Total Repair Time:30 - 60 mins
-
Tools:Screw drivers
1 person
found this instruction helpful.
Was this instruction helpful to you?
Thank you for voting!
Bake button stopped registering
This was simple enough to repair for me, a relative novice. Just remember you need a nut driver to take the back panel off, take a photo of the existing board so you remember which wires go where, and you definitely need a hair dryer to heat up the sticker on the old board so you can remove it and put it on the new board.
Parts Used:
-
Ryan from COHOES, NY
-
Difficulty Level:Easy
-
Total Repair Time:30 - 60 mins
-
Tools:Nutdriver, Pliers
1 person
found this instruction helpful.
Was this instruction helpful to you?
Thank you for voting!
burner terminal block was worn out
I unhooked the main power cord, unhooked the worn out block terminal cut the tape that was holding all the wires together. Removed the back panel and followed the wires unhooked the 2 wires and installed the new block terminal. Tied all the wires back, attached the back panel and plugged the power cord back into the outlet. i tested the burner to see if it was working. The burner is working great, instructions were easy to follow and my wife is happy. Thank you
Parts Used:
-
Mario from RENO, NV
-
Difficulty Level:Really Easy
-
Total Repair Time:30 - 60 mins
-
Tools:Nutdriver, Pliers
1 person
found this instruction helpful.
Was this instruction helpful to you?
Thank you for voting!
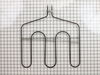
Remove and replace Broil (upper) heating element.
Turn off the power to the oven. (There should be a circuit breaker in the main power panel dedicated to just the oven) (the oven should be cool to the touch).
Open and remove the door by pulling it up and off the hinges (this is best accomplished with a helper).
Remove the racks (wire shelves).
Remove the two 1/4" mounting screws that secure the heating element to the back and the two screws that secure the element to the top of the oven..
Gently pull the wires out and disconnect them from the heating element.
Now reverse the process.
Connect the wires to the new heating element in the same fashion as they came off.
Push the wires and heating element back in place and secure with the four screws.
Replace the wire racks (shelves).
Replace the door (again, this is best accomplished with a helper).
Turn the power back on.
Run a test of the broiler to make sure the repair was completed properly.
voila!
Open and remove the door by pulling it up and off the hinges (this is best accomplished with a helper).
Remove the racks (wire shelves).
Remove the two 1/4" mounting screws that secure the heating element to the back and the two screws that secure the element to the top of the oven..
Gently pull the wires out and disconnect them from the heating element.
Now reverse the process.
Connect the wires to the new heating element in the same fashion as they came off.
Push the wires and heating element back in place and secure with the four screws.
Replace the wire racks (shelves).
Replace the door (again, this is best accomplished with a helper).
Turn the power back on.
Run a test of the broiler to make sure the repair was completed properly.
voila!
Parts Used:
-
Russell from ARROYO GRANDE, CA
-
Difficulty Level:Really Easy
-
Total Repair Time:30 - 60 mins
-
Tools:Nutdriver
1 person
found this instruction helpful.
Was this instruction helpful to you?
Thank you for voting!
Heating element was completely broken.
Removed old element with a socket wrench. Replaced new element with socket wrench. Pretty easy!
Parts Used:
-
George from FREDERICKSBRG, VA
-
Difficulty Level:Really Easy
-
Total Repair Time:30 - 60 mins
-
Tools:Socket set
1 person
found this instruction helpful.
Was this instruction helpful to you?
Thank you for voting!