




















JSP39BK2BB General Electric Range - Instructions
Keep searches simple. Use keywords, e.g. "leaking", "pump", "broken" or "fit".
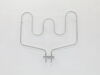
Element brunt into
make sure to throw breaker and power is off of range, the elements still have power on them when range is off. Took door off, pulled racks out, pulled the two screws holding the element in place. Pull elements straight out and unplug the wires connecting to thr element and reverse the prosses.
Parts Used:
-
Robert from BREWTON, AL
-
Difficulty Level:Really Easy
-
Total Repair Time:30 - 60 mins
-
Tools:Nutdriver, Pliers
2 of 2 people
found this instruction helpful.
Was this instruction helpful to you?
Thank you for voting!
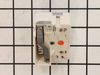
Was burned out
-
BRINDIA from DOVER, TN
-
Difficulty Level:Really Easy
-
Total Repair Time:30 - 60 mins
-
Tools:Screw drivers, Socket set
2 of 2 people
found this instruction helpful.
Was this instruction helpful to you?
Thank you for voting!
Oven drawer open and close incorrectly
First I removed the oven drawer. Verified that the support clips would rest correctly on rail, then review installation document with supports to locate alternate location for replacement supports. I did have to personally locate 2 fastners not provided with the supports ot complete installation. After installation, oven drawer opens and closes smoothly.
Parts Used:

-
James from Goldsboro, NC
-
Difficulty Level:Easy
-
Total Repair Time:Less than 15 mins
-
Tools:Screw drivers
2 of 2 people
found this instruction helpful.
Was this instruction helpful to you?
Thank you for voting!
lights blown out

-
Gerald from WINTERVILLE, GA
-
Difficulty Level:Very Easy
-
Total Repair Time:Less than 15 mins
6 of 14 people
found this instruction helpful.
Was this instruction helpful to you?
Thank you for voting!
Top left electric burner on the stove top did not heat up
Simple to repair. Take off the cowling around the burner element on the stove top and pull out the old element. Slide in the new heating element with the cowling paying attention to the three spoke support areas on the stove burner frame. Very simple. A 5 minute repair. No tools required.
Parts Used:

-
Jeff from SAN RAFAEL, CA
-
Difficulty Level:Really Easy
-
Total Repair Time:Less than 15 mins
2 of 2 people
found this instruction helpful.
Was this instruction helpful to you?
Thank you for voting!
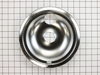
Needed new drip pans
-
Patricia from GORDONVILLE, TX
-
Difficulty Level:Really Easy
-
Total Repair Time:Less than 15 mins
2 of 2 people
found this instruction helpful.
Was this instruction helpful to you?
Thank you for voting!
It was burned out
I just follow Steve's Installation Vidio. My range works.
Thanks Steve
Thanks Steve
Parts Used:
-
lan from SANTA CLARA, CA
-
Difficulty Level:Really Easy
-
Total Repair Time:Less than 15 mins
-
Tools:Socket set
2 of 2 people
found this instruction helpful.
Was this instruction helpful to you?
Thank you for voting!
oven racks very old and writing on knobs worn ff
-
Patricia from SAN JOSE, CA
-
Difficulty Level:Very Easy
-
Total Repair Time:Less than 15 mins
2 of 2 people
found this instruction helpful.
Was this instruction helpful to you?
Thank you for voting!
broken light cover
-
Francis from LAKE ELSINORE, CA
-
Difficulty Level:Very Easy
-
Total Repair Time:Less than 15 mins
2 of 2 people
found this instruction helpful.
Was this instruction helpful to you?
Thank you for voting!
I had to replace the surface heating element on my Selectra stove top.
I just inserted the replacement where the old one had been connected. It took less than 5 minutes. It was so simple & easy that 'repair' is too generous a word -- & I am NOT handy, in any sense of the word. It took me longer to figure out where to find the model number!
Parts Used:
-
Elaine from SAINT JAMES, NY
-
Difficulty Level:Very Easy
-
Total Repair Time:Less than 15 mins
2 of 2 people
found this instruction helpful.
Was this instruction helpful to you?
Thank you for voting!
burner was damaged so it didn't work
Easy repair, just had to take the damaged burner out and slide the new burner in....
Parts Used:
-
Joan from ORLANDO, FL
-
Difficulty Level:Really Easy
-
Total Repair Time:Less than 15 mins
2 of 2 people
found this instruction helpful.
Was this instruction helpful to you?
Thank you for voting!
Defective switch
Replaced element control switches
Parts Used:
-
Mary from EDENTON, NC
-
Difficulty Level:Easy
-
Total Repair Time:15 - 30 mins
-
Tools:Screw drivers, Socket set
2 of 2 people
found this instruction helpful.
Was this instruction helpful to you?
Thank you for voting!
Replaced Oven Thermostat Sensor in oven
1) Shut off power to oven
2) Removed oven door using snap down hinges on door
3) Removed 4-phillips head screws holding the oven frame to cabinets
4) Pulled oven out of cabinet and set it on stool in front of opening
5) Remove 2-hex screws holding metal shield covering the electrical wiring on back of oven
6) Unplugged bad thermostat connector
7) Removed the single hex screw holding thermostat inside the oven
8) Pulled the thermostat and lead wire from oven
9) Fed the new thermostat wire into inside back of oven
10) Reverse steps 1-7
2) Removed oven door using snap down hinges on door
3) Removed 4-phillips head screws holding the oven frame to cabinets
4) Pulled oven out of cabinet and set it on stool in front of opening
5) Remove 2-hex screws holding metal shield covering the electrical wiring on back of oven
6) Unplugged bad thermostat connector
7) Removed the single hex screw holding thermostat inside the oven
8) Pulled the thermostat and lead wire from oven
9) Fed the new thermostat wire into inside back of oven
10) Reverse steps 1-7
Parts Used:
-
C Thomas from SAN MARCOS, CA
-
Difficulty Level:Very Easy
-
Total Repair Time:15 - 30 mins
-
Tools:Screw drivers, Socket set
2 of 2 people
found this instruction helpful.
Was this instruction helpful to you?
Thank you for voting!
Oven temp wouldn't regulate.
-
Ronald from Crumpler, NC
-
Difficulty Level:Very Easy
-
Total Repair Time:15 - 30 mins
-
Tools:Nutdriver, Pliers, Screw drivers
2 of 2 people
found this instruction helpful.
Was this instruction helpful to you?
Thank you for voting!
Erratic oven temp
RE: 2 yr. old GE double wall oven with convection option in upper oven, non-convection in lower oven: baked goods were not browning, were undercooked or burned. Tested both ovens on regular bake setting using 2 oven thermometers. Set ovens for 350. Although after 10 min both ovens beeped "ready", the oven thermometers actually read 200 - then would swing up as high as 500 and as low as 200 during the 20 min test period. Decided to first replace top oven sensor only, just in case it really was a more expensive control panel problem. It was a bit awkward to reach back there with the oven door in the way, but I have long arms! Aimed my flashlight, removed nuts with a socket wrench, pulled out the sensor, popped the clip and the old sensor easily separated from its connection. Snapped on the new sensor, pushed it back in and reset the nuts. Easy. Set the oven for 350 and tested again with 2 oven thermometers for 45 min. Voila! The oven thermometers read exactly 350 when the oven beeped "ready" and it stayed at 350 throughout the entire 45 min retest period with only a 3 degree variation both up and down. What a great improvement! Immediately went online to Parts Select and ordered another sensor for the bottom oven which was having the same problem. Fixed both ovens all for under $30 - and just in time for Christmas cookies! Don't want to know what the repair guy would have charged.......Merry Christmas!
Parts Used:
-
Gail from Glen Allen, VA
-
Difficulty Level:Easy
-
Total Repair Time:15 - 30 mins
-
Tools:Nutdriver, Socket set
2 of 3 people
found this instruction helpful.
Was this instruction helpful to you?
Thank you for voting!