




















JS2428GEHB-PJS2428GHB0 Jenn-Air Refrigerator - Instructions
Keep searches simple. Use keywords, e.g. "leaking", "pump", "broken" or "fit".
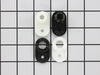
The door made a loud noise on opening and closing.
Emptied the door.
Removed the door, top bolts first.
Lifted out the door.
Installed new cam at the bottom.
Set the door back in place.
Bolted the top hinge back on.
Smooth!
The part came quickly and was the right one. You can't imagine how many outfits lose it here. Well done and thanks.
Removed the door, top bolts first.
Lifted out the door.
Installed new cam at the bottom.
Set the door back in place.
Bolted the top hinge back on.
Smooth!
The part came quickly and was the right one. You can't imagine how many outfits lose it here. Well done and thanks.
Parts Used:
-
Dennis from Kerrville, TX
-
Difficulty Level:Really Easy
-
Total Repair Time:30 - 60 mins
-
Tools:Nutdriver, Screw drivers
3 of 4 people
found this instruction helpful.
Was this instruction helpful to you?
Thank you for voting!
Door would not close properly
Removed the door by taking 3 screws out of the top and lifting straight up, then replaced with the new parts and very easily replaced the door, worked ike a charm, if i didn't know any better it was like factory new
Parts Used:
-
Sarkis from Havertown, PA
-
Difficulty Level:Really Easy
-
Total Repair Time:15 - 30 mins
-
Tools:Nutdriver
3 of 4 people
found this instruction helpful.
Was this instruction helpful to you?
Thank you for voting!
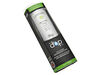
This is almost embarassing but you asked....
Once the part arrived, which was very quickly BTW..all I had to do was remove the old filter and then just screw the new one into place....Now I just happen to be both female and blonde but was able to get the job done in less than 15 minutes (that includes opening the box) and with very little water dripping from the old filter!!! Looks like I could work as the Maytag repair woman soon!!
Parts Used:
-
laurie from gold canyon, AZ
-
Difficulty Level:Really Easy
-
Total Repair Time:Less than 15 mins
3 of 4 people
found this instruction helpful.
Was this instruction helpful to you?
Thank you for voting!
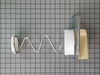
Ice Maker Auger
Wow! less Than 15 mins to install, called partSelect and within two days the Auger arrived and with handy socket it was done!
Parts Used:
-
Marshall from Marrero, LA
-
Difficulty Level:Really Easy
-
Total Repair Time:Less than 15 mins
-
Tools:Socket set
3 of 4 people
found this instruction helpful.
Was this instruction helpful to you?
Thank you for voting!
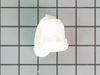
One of the light bulbs went out on my Whirlpool refrigerator.
I changed the bulb but it still didn’t work. I ordered a bulb holder and replaced it and it works properly now. It was an easy repair, remove the bulb, gently pry the bulb holder out with a screwdriver and snap the new one in.
It was useful that under the description of the part in the catalog, it showed that this part was often used to repair this issue. The service was great and the delivery was fast.
It was useful that under the description of the part in the catalog, it showed that this part was often used to repair this issue. The service was great and the delivery was fast.
Parts Used:
-
Brian from LAKE CHARLES, LA
-
Difficulty Level:Very Easy
-
Total Repair Time:Less than 15 mins
-
Tools:Screw drivers
3 of 4 people
found this instruction helpful.
Was this instruction helpful to you?
Thank you for voting!
door closure part broken. door wouldn't remained closed
-
Patricia from JACKSON, WY
-
Difficulty Level:Really Easy
-
Total Repair Time:Less than 15 mins
-
Tools:Socket set
2 of 2 people
found this instruction helpful.
Was this instruction helpful to you?
Thank you for voting!
Repaced the right-side door light switch
Killed the power to the fridge. Then, used a small, thin screwdriver to depress the clip on the bottom of the switch and wriggled the old switch out. The two wires easily came off the contacts with pliers. Connected the wires to the new switch and snapped it into the hole--clip facing down and contacts facing up. Turned the power back on and checked the switch. Worked perfectly! Easy job.
Parts Used:

-
Charles from SEGUIN, TX
-
Difficulty Level:Very Easy
-
Total Repair Time:Less than 15 mins
-
Tools:Pliers, Screw drivers
2 of 2 people
found this instruction helpful.
Was this instruction helpful to you?
Thank you for voting!
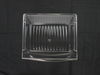
Original drawer slide in component cracked
-
Jon from Saint Marys, GA
-
Difficulty Level:Really Easy
-
Total Repair Time:Less than 15 mins
2 of 2 people
found this instruction helpful.
Was this instruction helpful to you?
Thank you for voting!
slides cracked and broken off in sections
Removed the top glass shelf to make slides easier to reach. Then simply removed the old tray and installed new one. You do have to watch for the small stops in the slides or you could damage new unit.
Parts Used:
-
Donald from Helena, AL
-
Difficulty Level:Easy
-
Total Repair Time:Less than 15 mins
2 of 2 people
found this instruction helpful.
Was this instruction helpful to you?
Thank you for voting!
Bottom Cam broke on Fridge Door
Removed top hinge cover and socketed out hinge nuts. Lifted door off bottom hinge. Socketed out broken bottom cam and replaced with new. Reset door with someone lifting and the other guiding. Reattached top hinge and cover. Voila.
Parts Used:
-
Jon from Butler, PA
-
Difficulty Level:Really Easy
-
Total Repair Time:Less than 15 mins
-
Tools:Nutdriver, Screw drivers, Socket set
2 of 2 people
found this instruction helpful.
Was this instruction helpful to you?
Thank you for voting!
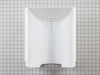
original ice bucket plastic slides onto rack broke and wouldn't support full ice load
On several occasions the ice bucket had fallen inches onto other frozen foods and the auger wouldn't work. After dealing with this several times over a period of several years, I decided to see if I could locate a replacement which I did through your company; We took the old one out, unsnapped parts and then snapped the new bucket to the gate and shazzam, we were able to slide the new bucket into place and it works like new. Hopefully a repair won't be necessary again!
Parts Used:
-
Albert from LEWISBURG, PA
-
Difficulty Level:Really Easy
-
Total Repair Time:30 - 60 mins
2 of 2 people
found this instruction helpful.
Was this instruction helpful to you?
Thank you for voting!
crank on Ice feed bent and can lose from back .
-
Eva from YUCAIPA, CA
-
Difficulty Level:Really Easy
-
Total Repair Time:30 - 60 mins
-
Tools:Screw drivers, Socket set
2 of 3 people
found this instruction helpful.
Was this instruction helpful to you?
Thank you for voting!
needed to replace water filter
-
Barbara from ST CLR SHORES, MI
-
Difficulty Level:Really Easy
-
Total Repair Time:30 - 60 mins
4 of 9 people
found this instruction helpful.
Was this instruction helpful to you?
Thank you for voting!
Ice from icemaker taste metallic; new ice maker directly from box
I did not do the repair yet, there is no schematic on how to route the hose; also no description of how to do the routing/connections.
Parts Used:

-
Samuel from ALEXANDRIA, VA
-
Difficulty Level:Difficult
-
Total Repair Time:More than 2 hours
2 of 3 people
found this instruction helpful.
Was this instruction helpful to you?
Thank you for voting!
Would not feed ice out of bucket
I removed the bucket and then took the feed screw out and replaced the end cap and reinstalled the feeder in the new bucket and put it back in place and it worked fine. This is not a hard job, you just have to pay attention to the dismantle so you can get every thing back together properly.
the breakdown and parts list was a big help.
the breakdown and parts list was a big help.
Parts Used:

-
David from Boise, ID
-
Difficulty Level:Really Easy
-
Total Repair Time:15 - 30 mins
-
Tools:Nutdriver
2 of 3 people
found this instruction helpful.
Was this instruction helpful to you?
Thank you for voting!