




















JD900WKW General Electric Range - Instructions
Keep searches simple. Use keywords, e.g. "leaking", "pump", "broken" or "fit".
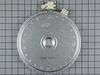
Repair was slow, due to replacement part was incorrect. Original part had two spring loaded spacers, & holes for them to sit in. The replacement part did not have holes. I was able to drill two holes to make it work.
Turned off power. Opened range door, removed 2 screws that held top in place. Took a photo of the existing wiring for reference. Removed old burner. Be careful with spacers & springs. If dropped, they will be hard to locate in the insulation. Replaced wiring connectors & verified proper location with photo. Closed cover, replaced 2 screws & turned on circuit breaker.
Parts Used:
-
Victor from FAYETTEVILLE, GA
-
Difficulty Level:A Bit Difficult
-
Total Repair Time:30 - 60 mins
-
Tools:Pliers, Screw drivers, Socket set
1 person
found this instruction helpful.
Was this instruction helpful to you?
Thank you for voting!
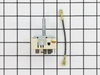
Dual burner only had hidden setting.
Removed old switch, put metal jumper from old switch to new one and connected wires to the new one . Reinstalled. Works great.
Parts Used:
-
Steve from HENDERSON, TX
-
Difficulty Level:Really Easy
-
Total Repair Time:30 - 60 mins
-
Tools:Nutdriver, Pliers
1 person
found this instruction helpful.
Was this instruction helpful to you?
Thank you for voting!
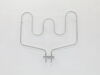
Oven not heating
-
David from HIGHLAND, UT
-
Difficulty Level:Really Easy
-
Total Repair Time:30 - 60 mins
-
Tools:Nutdriver
1 person
found this instruction helpful.
Was this instruction helpful to you?
Thank you for voting!
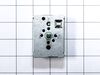
The control knob on the burner stopped allowing you to adjust temperature and would on turn the burner off when turning counter clockwise
I turned off the breaker, removed the control knobs from all of the burners there are plastic knots on each control knob that needs to be removed (once loosened they can easily be turned by hand). You can then just lift the out piece off. You need to remove 4 knots to release the control panel so you can access the control know. I removed the 2 screws in the old control know, there are 4 wires that need to be pulled to disconnect. I wrote down the order in which the colored wires were connected . I then removed the old part and reversed the process
Parts Used:
-
Karen from BELLE ISLE, FL
-
Difficulty Level:Really Easy
-
Total Repair Time:30 - 60 mins
-
Tools:Nutdriver, Wrench (Adjustable)
1 person
found this instruction helpful.
Was this instruction helpful to you?
Thank you for voting!
Change bulb

-
Louis from LEAGUE CITY, TX
-
Difficulty Level:Really Easy
-
Total Repair Time:30 - 60 mins
-
Tools:Nutdriver
3 of 8 people
found this instruction helpful.
Was this instruction helpful to you?
Thank you for voting!
small (inner) burner was not 'burning'
turn off the power at the breaker first
remove the 2 screws under the 'lip' of the stove top (open the oven door to get to them)
prop up the stove top on the cardboard box the part came in
pull off the wires one by one and attach to the new burner OR record where each wire goes first
remove the old burner (2 screws) and attach the new burner
screw down the stove top
try the burner - when it does not work flip the power breaker back on and then try again
bask in the joy, admiration and wonder directed your way by various family members
remove the 2 screws under the 'lip' of the stove top (open the oven door to get to them)
prop up the stove top on the cardboard box the part came in
pull off the wires one by one and attach to the new burner OR record where each wire goes first
remove the old burner (2 screws) and attach the new burner
screw down the stove top
try the burner - when it does not work flip the power breaker back on and then try again
bask in the joy, admiration and wonder directed your way by various family members
Parts Used:
-
Jerry from Tierra Verde, FL
-
Difficulty Level:Easy
-
Total Repair Time:Less than 15 mins
-
Tools:Pliers, Screw drivers
1 of 2 people
found this instruction helpful.
Was this instruction helpful to you?
Thank you for voting!
lower bake element went out
basically unscrew two screws, unplug, plug new one in and screw the screws back in.
Parts Used:
-
Rachel from Maryland Heights, MO
-
Difficulty Level:Easy
-
Total Repair Time:Less than 15 mins
-
Tools:Socket set
2 of 5 people
found this instruction helpful.
Was this instruction helpful to you?
Thank you for voting!
only the inner/smaller part of the dual burner is working
I ordered a new burner assuming As is turns out: nothing wrong with the burner.
Parts Used:
-
Albert from South Boston, VA
-
Difficulty Level:Really Easy
-
Total Repair Time:Less than 15 mins
2 of 5 people
found this instruction helpful.
Was this instruction helpful to you?
Thank you for voting!
While on self clean, the bake element began to burn
First I removed the two screws that hold the element in place. I then pulled the element out about 3 inches and disconnected the two wires. I plugged in the new element and proceeded to clean the oven which is what I was doing when the problem occured.
Parts Used:
-
Scott from Troy, MO
-
Difficulty Level:Really Easy
-
Total Repair Time:Less than 15 mins
-
Tools:Nutdriver
2 of 6 people
found this instruction helpful.
Was this instruction helpful to you?
Thank you for voting!
cooktop inner ring did not work
Dear PartSelect:
I am very impressed by your service and company. My order arrived in less than 24 hours. It was a perfect match and is currently in service. I am very satisfied with the entire experience and will use your company again.
I simply opened up the cooktop with a screwdriver and disconnected the wires to the affected burner. After the part arrived, I reconnected them. I had to swap over two brackets from the old burner, so don't throw it away until the new one arrives. It went back together very easily and worked immediately.
Matt Brennan
I am very impressed by your service and company. My order arrived in less than 24 hours. It was a perfect match and is currently in service. I am very satisfied with the entire experience and will use your company again.
I simply opened up the cooktop with a screwdriver and disconnected the wires to the affected burner. After the part arrived, I reconnected them. I had to swap over two brackets from the old burner, so don't throw it away until the new one arrives. It went back together very easily and worked immediately.
Matt Brennan
Parts Used:
-
Matthew from Lexington Park, MD
-
Difficulty Level:Really Easy
-
Total Repair Time:15 - 30 mins
-
Tools:Screw drivers
1 of 3 people
found this instruction helpful.
Was this instruction helpful to you?
Thank you for voting!
Two stage burner was not working on the outer part of burner.
Locate breaker box and turn off breaker to stove. Removed the two screw in front that hold the top in place. Raised the top and supported it with the box the new burner came in. Removed two screws that held the burner in place and the 5 wires one at a time an installed them on the new burner. Put new burner in place and installed two mounting screws. Reinstalled the two screws in the front to hold the top in place then turned the breaker back on and tested burner. Worked great. Received part in 2 days.
Parts Used:
-
Gregory from Pleasant Valley, MO
-
Difficulty Level:Really Easy
-
Total Repair Time:15 - 30 mins
-
Tools:Nutdriver, Pliers, Screw drivers
0 of 1 people
found this instruction helpful.
Was this instruction helpful to you?
Thank you for voting!
Light burnt out.
Turned the wire protector to the side. Turned out the old bulb and replaced it with the new. Turned the wire protector back in place and I'm like new.
Parts Used:
-
Roscoe G from ROCHESTER, NY
-
Difficulty Level:Very Easy
-
Total Repair Time:Less than 15 mins
2 of 8 people
found this instruction helpful.
Was this instruction helpful to you?
Thank you for voting!
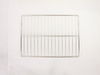
Old dishwasher rack and silverware rack
The whole process was very easy! I just got the model number and bought a new rack and silverware holder on,one. There was no assembly needed so I just popped them in and replaced the old ones! Very easy to do!
Parts Used:
-
Anne Marie from Andover, MA
-
Difficulty Level:Really Easy
-
Total Repair Time:Less than 15 mins
Was this instruction helpful to you?
Thank you for voting!
Small burner not working, outside was fine
Followed directions that I found on the internet and it was easy to remove the old burner and replace it with the one I ordered from you. There was no problems at all.
Parts Used:
-
Lynda from Burdock, SD
-
Difficulty Level:Really Easy
-
Total Repair Time:15 - 30 mins
-
Tools:Screw drivers
Was this instruction helpful to you?
Thank you for voting!
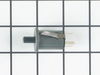
broken switch
This was a wall mounted oven. Turned off breaker. Pulled panel off by removing 6 screws. Pulled connectors off old switch. Removed old switch. Just a friction fit. I used my jack knife to get it moving. Pushed in the new switch and connected wires. (just push on tabs) Put panel back together and turned on breaker. Done, easy.
Parts Used:
-
Bob from Marcy, NY
-
Difficulty Level:Easy
-
Total Repair Time:15 - 30 mins
-
Tools:Screw drivers
Was this instruction helpful to you?
Thank you for voting!