




















JD900WKW General Electric Range - Instructions
Keep searches simple. Use keywords, e.g. "leaking", "pump", "broken" or "fit".
Dual burner only had hidden setting.
Removed old switch, put metal jumper from old switch to new one and connected wires to the new one . Reinstalled. Works great.
Parts Used:
-
Steve from HENDERSON, TX
-
Difficulty Level:Really Easy
-
Total Repair Time:30 - 60 mins
-
Tools:Nutdriver, Pliers
1 person
found this instruction helpful.
Was this instruction helpful to you?
Thank you for voting!
Lower Oven Broiler Stopped Working
Turned power off to oven
Unscrewed broiler nuts (total of 4)
Pulled Broiler out from back of stove
Disconnected wires
Reconnected wire
Remounted broiler and replaced bolts
Turned power back on
Unscrewed broiler nuts (total of 4)
Pulled Broiler out from back of stove
Disconnected wires
Reconnected wire
Remounted broiler and replaced bolts
Turned power back on
Parts Used:
-
Frank from PARKER, CO
-
Difficulty Level:Really Easy
-
Total Repair Time:30 - 60 mins
-
Tools:Nutdriver, Pliers
1 person
found this instruction helpful.
Was this instruction helpful to you?
Thank you for voting!
Remove and replace Broil (upper) heating element.
Turn off the power to the oven. (There should be a circuit breaker in the main power panel dedicated to just the oven) (the oven should be cool to the touch).
Open and remove the door by pulling it up and off the hinges (this is best accomplished with a helper).
Remove the racks (wire shelves).
Remove the two 1/4" mounting screws that secure the heating element to the back and the two screws that secure the element to the top of the oven..
Gently pull the wires out and disconnect them from the heating element.
Now reverse the process.
Connect the wires to the new heating element in the same fashion as they came off.
Push the wires and heating element back in place and secure with the four screws.
Replace the wire racks (shelves).
Replace the door (again, this is best accomplished with a helper).
Turn the power back on.
Run a test of the broiler to make sure the repair was completed properly.
voila!
Open and remove the door by pulling it up and off the hinges (this is best accomplished with a helper).
Remove the racks (wire shelves).
Remove the two 1/4" mounting screws that secure the heating element to the back and the two screws that secure the element to the top of the oven..
Gently pull the wires out and disconnect them from the heating element.
Now reverse the process.
Connect the wires to the new heating element in the same fashion as they came off.
Push the wires and heating element back in place and secure with the four screws.
Replace the wire racks (shelves).
Replace the door (again, this is best accomplished with a helper).
Turn the power back on.
Run a test of the broiler to make sure the repair was completed properly.
voila!
Parts Used:
-
Russell from ARROYO GRANDE, CA
-
Difficulty Level:Really Easy
-
Total Repair Time:30 - 60 mins
-
Tools:Nutdriver
1 person
found this instruction helpful.
Was this instruction helpful to you?
Thank you for voting!
Repair was slow, due to replacement part was incorrect. Original part had two spring loaded spacers, & holes for them to sit in. The replacement part did not have holes. I was able to drill two holes to make it work.
Turned off power. Opened range door, removed 2 screws that held top in place. Took a photo of the existing wiring for reference. Removed old burner. Be careful with spacers & springs. If dropped, they will be hard to locate in the insulation. Replaced wiring connectors & verified proper location with photo. Closed cover, replaced 2 screws & turned on circuit breaker.
Parts Used:
-
Victor from FAYETTEVILLE, GA
-
Difficulty Level:A Bit Difficult
-
Total Repair Time:30 - 60 mins
-
Tools:Pliers, Screw drivers, Socket set
1 person
found this instruction helpful.
Was this instruction helpful to you?
Thank you for voting!
The control knob on the burner stopped allowing you to adjust temperature and would on turn the burner off when turning counter clockwise
I turned off the breaker, removed the control knobs from all of the burners there are plastic knots on each control knob that needs to be removed (once loosened they can easily be turned by hand). You can then just lift the out piece off. You need to remove 4 knots to release the control panel so you can access the control know. I removed the 2 screws in the old control know, there are 4 wires that need to be pulled to disconnect. I wrote down the order in which the colored wires were connected . I then removed the old part and reversed the process
Parts Used:
-
Karen from BELLE ISLE, FL
-
Difficulty Level:Really Easy
-
Total Repair Time:30 - 60 mins
-
Tools:Nutdriver, Wrench (Adjustable)
1 person
found this instruction helpful.
Was this instruction helpful to you?
Thank you for voting!
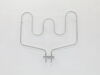
Oven not heating
-
David from HIGHLAND, UT
-
Difficulty Level:Really Easy
-
Total Repair Time:30 - 60 mins
-
Tools:Nutdriver
1 person
found this instruction helpful.
Was this instruction helpful to you?
Thank you for voting!
Followed a GE Video on installation
-
Sarah from MONTGOMERY, TX
-
Difficulty Level:Very Easy
-
Total Repair Time:15 - 30 mins
-
Tools:Screw drivers
1 person
found this instruction helpful.
Was this instruction helpful to you?
Thank you for voting!
The heating element failed for the oven. Broiler element continued to function.
This is a pretty easy job. Took 20 min. because I was especially careful. Once the new element arrived, I simple shot off the power (DO THAT, BE SURE TO DO THAT ). Two 5/16 screws hold the element in place at the rear of the oven. Once removed the element can move forward. A surprise was that wires attached to the element come with it. There are simple push on connections on the element. There were a little difficult to remove (heat I am sure ), but a couple of needle nose plyers and the two wires removed with ease. Plug in the new element connectors and push the wires and the connection back into place. Once in place, reinstall the screws and test.
Parts Used:
-
Steve from ANAHEIM, CA
-
Difficulty Level:Really Easy
-
Total Repair Time:15 - 30 mins
-
Tools:Nutdriver, Pliers
1 person
found this instruction helpful.
Was this instruction helpful to you?
Thank you for voting!
Oven quit heating
Disconnected power, removed two screws from bracket. Unplugged old element, installed new element and replaced screws in bracket. Restored power and back in business!
Parts Used:
-
LARRY from MOSELLE, MS
-
Difficulty Level:Really Easy
-
Total Repair Time:15 - 30 mins
-
Tools:Socket set
1 person
found this instruction helpful.
Was this instruction helpful to you?
Thank you for voting!
Small burner of Dual Burner no longer would work.
Pull out Range and unplug from wall receptacle. Open Range door and remove 2 hex head screws with pliers. Screws located at top inside of range door opening. They hold the burner top in place. Slowly lift front of top burner section up and at same time slightly lifting back of burner section since it rests on 2 pivots. Prop front of burner section open, tilted back, with a piece of 2X4 maybe 2 1/2 ft. long. Make sure the 2X4 is located at the front/middle of range [resting on insulation] and at front middle of burner top to keep it opened firmly and balanced. You have about 5 or 6 wire clips to remove from elec. posts. Use pliers to gently remove clips. Tag the wires with tape to remember which wires go onto the new burner. Or take a close up picture with your phone to remember which wires go where. There are 2 philips head screws holding clips that hold the burner in place. The clips are slipped into a slot to help hold them in place. Mark the 2 slots so that when you remove the clips you will remember which slots to put them back into. You will need to hold the burner with one hand while you are removing the last clip as it could just fall out. Remove old burner and install new burner at same angle as was the old burner. You will have to make sure that the 2 clips are in the slotted openings first as you can not put them in place after the burner is installed in the opening. Reinstall the 2 screws into the 2 clips. Hold the electrical pole fittings with one hand while you gently reattach the electrical clips with a set of pliers. You may need to wiggle the clips back and forth to get them on securely. Remove the 2X4 and gently lower the burner top. The hardest part is now you have to slightly lift the back of the burner top while the front is lifted up and maneuver the back to drop down over the 2 pivots. Then the burner top will drop down in place so that the 2 screws in the range door opening can be reinstalled. I don't know of an easy way of making the top of the burner section fall down over the pivots except trial and error. Maybe use a flashlight to look back where the pivots are located while the top is propped open. That may help you visually to see what you are trying to do.
Parts Used:
-
Jerry L from Palmetto, FL
-
Difficulty Level:Easy
-
Total Repair Time:15 - 30 mins
-
Tools:Pliers, Screw drivers, Wrench (Adjustable)
1 person
found this instruction helpful.
Was this instruction helpful to you?
Thank you for voting!
door gasket was soiled
-
Joseph from Murrells Inlet, SC
-
Difficulty Level:Really Easy
-
Total Repair Time:Less than 15 mins
1 person
found this instruction helpful.
Was this instruction helpful to you?
Thank you for voting!
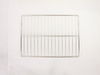
oven racks old and ugly
1. Open oven door
2. insert oven racks (perfect fit)
3. close oven door. Done and finished - man am I tired
2. insert oven racks (perfect fit)
3. close oven door. Done and finished - man am I tired
Parts Used:
-
Claudene from ORCUTT, CA
-
Difficulty Level:Very Easy
-
Total Repair Time:Less than 15 mins
1 person
found this instruction helpful.
Was this instruction helpful to you?
Thank you for voting!
Top oven not keeping baking temperature
Used a nut driver to remove element the insulation was tight and pulled the wires off before they came out of the oven. I made a small hook out of a coat hanger and pulled the wires through the opening.
Parts Used:
-
Donald from BUFORD, GA
-
Difficulty Level:Easy
-
Total Repair Time:Less than 15 mins
-
Tools:Nutdriver
1 person
found this instruction helpful.
Was this instruction helpful to you?
Thank you for voting!
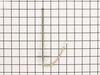
Bake and convection cycles quit working after a10 minutes
Unbolted temperature sensor from back of oven. Disconnect cable connector. Replaced and reconnected new sensor and bolted back in place. Haven’t had to replace bake element yet, but it’s a major job being this GE Profile oven has the bake element hidden. That’s a new one on me.
Parts Used:
-
Stephen from Zachary, LA
-
Difficulty Level:Very Easy
-
Total Repair Time:Less than 15 mins
-
Tools:Nutdriver
1 person
found this instruction helpful.
Was this instruction helpful to you?
Thank you for voting!
inner element not working
opened oven door and removed two 1/4 " screws from range top. lifted range top and propped open like a car hood with a 1" diam dowel rod. marked on new element the wire color locations from old element and removed wires. removed the two small screws and clips that hold the element to the range top and removed element. Matched where the mounting screws locate to the new element. Installed new element in reverse order.
Parts Used:
-
Michael from BAY CITY, MI
-
Difficulty Level:Really Easy
-
Total Repair Time:Less than 15 mins
-
Tools:Nutdriver, Pliers, Screw drivers
1 person
found this instruction helpful.
Was this instruction helpful to you?
Thank you for voting!