




















JD900WKW General Electric Range - Instructions
Keep searches simple. Use keywords, e.g. "leaking", "pump", "broken" or "fit".
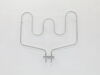
Element was fried, no pun.
Exactly as you descibe and after disconnecting the two wires from the contacts on the element and taping the two wires to the oven wall so they do not fall back into the hole from where they came was extremly helpful. Also was an opportune time to clean the oven properly prior to installing the new element.
Thanks
Thanks
Parts Used:
-
Donald from Rome, GA
-
Difficulty Level:Easy
-
Total Repair Time:30 - 60 mins
-
Tools:Socket set
5 of 5 people
found this instruction helpful.
Was this instruction helpful to you?
Thank you for voting!
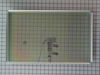
Wife broke the interior window by splashing water on it while heated to 450.
Well I did it all wrong from the get go. I did finally do a search on how to replace it and then it was quite easy. Learn from me, watch video and save yourself tons of hassle.
Parts Used:
-
Dennis from GRETNA, NE
-
Difficulty Level:Difficult
-
Total Repair Time:30 - 60 mins
-
Tools:Nutdriver, Screw drivers, Socket set
6 of 8 people
found this instruction helpful.
Was this instruction helpful to you?
Thank you for voting!
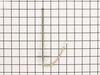
the temp was not accurate
had to remove the oven from the wall. once i realized that i had to take the side wall brackets off before removing the oven it was quite easy. then just had to remove oven door and slide the unit onto a chair while replacing the sensor. put it all back in and the wife was so happy to have her oven back she made me a batch of brownies. yum.
Parts Used:
-
scott from new harmony, UT
-
Difficulty Level:A Bit Difficult
-
Total Repair Time:15 - 30 mins
-
Tools:Socket set
7 of 12 people
found this instruction helpful.
Was this instruction helpful to you?
Thank you for voting!
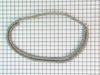
replaced gasket on oven door
-
mary from MODESTO, CA
-
Difficulty Level:Easy
-
Total Repair Time:15 - 30 mins
5 of 6 people
found this instruction helpful.
Was this instruction helpful to you?
Thank you for voting!
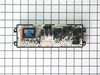
Oven would intermittently loose all power when hot
First found and threw appropriate breakers. Then removed knobs and faceplate retainer nuts and pulled off faceplate. Next removed four control panel retaining screws and lifted out and partially spun/inverted control panel. Couldn't fully remove due to wiring. Next removed four oven control screws and pulled back control module. Then just removed all wiring connections to old control module. Worked in reverse with new control module, turned breaker back on, and just had to set the clock. Back in business!
Parts Used:
-
Eric from Hemphill, TX
-
Difficulty Level:Easy
-
Total Repair Time:15 - 30 mins
-
Tools:Socket set
5 of 6 people
found this instruction helpful.
Was this instruction helpful to you?
Thank you for voting!
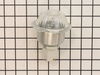
Light not working tried to Remove light assembly not knowing glass could screw out. Without thinking grounded exposed hot wire to burner bracket melting light socket connector. Had to replace socket.
First and most important trun off curcit breaker. Use 1/4 inch but driver to remove socket (2) screws. Remove ground and hot wire clips from old socket, replace on new socket. Screw back into oven ceiling and turn on power. Reset clock and your are done. Very simple.
Parts Used:
-
Richard from CUMMING, GA
-
Difficulty Level:Really Easy
-
Total Repair Time:15 - 30 mins
-
Tools:Socket set
4 of 4 people
found this instruction helpful.
Was this instruction helpful to you?
Thank you for voting!
wire connection to socket was bad
Disconnected the old socket ( 2 srews ) removed the two wires from the old socket, reconnected them to the new socket and reinstalled the lamp.
Parts Used:
-
David from Gansevoort, NY
-
Difficulty Level:A Bit Difficult
-
Total Repair Time:15 - 30 mins
-
Tools:Pliers, Screw drivers
6 of 10 people
found this instruction helpful.
Was this instruction helpful to you?
Thank you for voting!
oven not as hot as temp display said it was
pull out stove, unbolt old temp sensor inside stove with 1/4 nutdriver, go to back of stove and take off cover and unhook sensor and hook up new one, put all back together and slide stove back in place.
Parts Used:
-
John from HOT SPRINGS, AR
-
Difficulty Level:Really Easy
-
Total Repair Time:30 - 60 mins
-
Tools:Nutdriver
4 of 4 people
found this instruction helpful.
Was this instruction helpful to you?
Thank you for voting!
Broken inner window
-
randy from LORETTO, TN
-
Difficulty Level:Very Easy
-
Total Repair Time:15 - 30 mins
-
Tools:Nutdriver, Screw drivers
5 of 7 people
found this instruction helpful.
Was this instruction helpful to you?
Thank you for voting!
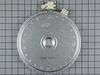
outside element burned out
. First I removed the two screws that hold the element in place. I then pulled the element out about 3 inches and disconnected the two plugs.
plugged in the new element and screwed it in place
plugged in the new element and screwed it in place
Parts Used:
-
peter from westfield, MA
-
Difficulty Level:Really Easy
-
Total Repair Time:Less than 15 mins
-
Tools:Screw drivers
4 of 4 people
found this instruction helpful.
Was this instruction helpful to you?
Thank you for voting!
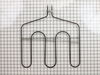
Burnt Broiler Element
Just like everyone else it was a simple r&r. However, when removing or installing wire clips I make it a habit to hold the ends with needle nose to prevent any: "snap!" ooops! However to prevent burning the element in the first place, it is strongly suggested to push that broil button twice so that it is set to low temp. It is too easy to use the high setting which will shorten the elements life by 40 - 60 %. Also, keep the oven door partially open when using the broiler. Like the manual tells you!!!
Parts Used:
-
ROBERT P. from Santa Fe,, NM
-
Difficulty Level:Really Easy
-
Total Repair Time:Less than 15 mins
-
Tools:Pliers, Screw drivers, Socket set
5 of 7 people
found this instruction helpful.
Was this instruction helpful to you?
Thank you for voting!
Heating element broke
e.g. First I removed the two screws that hold the element in place. I then pulled the element out about 3 inches and disconnected the two wires...) Then I simply re-connected the replacement element and viola!
Parts Used:
-
ian from brevard, NC
-
Difficulty Level:Really Easy
-
Total Repair Time:Less than 15 mins
-
Tools:Nutdriver
5 of 7 people
found this instruction helpful.
Was this instruction helpful to you?
Thank you for voting!
Oven slow to heat.
First I removed the 4 screws that hold the element in place. I then pulled the element out about 3 inches. I removed the sensor and disconnected the connector.
Parts Used:
-
Scott from Burleson, TX
-
Difficulty Level:Really Easy
-
Total Repair Time:Less than 15 mins
-
Tools:Nutdriver, Pliers, Screw drivers
6 of 10 people
found this instruction helpful.
Was this instruction helpful to you?
Thank you for voting!
old blackened oven racks
-
Roger from Falls Church, VA
-
Difficulty Level:Really Easy
-
Total Repair Time:Less than 15 mins
8 of 17 people
found this instruction helpful.
Was this instruction helpful to you?
Thank you for voting!
Burner element was burnt
It was very easy. First turn off the power. Remove two screws to pick up the hood then remove two screws holding the element. Tag the wires with number. Unplug the old burner attach the wires to new burner. Attach two screws with spring to hold the burner, put the hood down and put the screws holding the top hood.
Parts Used:
-
Chandra from Naugaeuck, CT
-
Difficulty Level:Really Easy
-
Total Repair Time:Less than 15 mins
-
Tools:Screw drivers, Socket set
4 of 5 people
found this instruction helpful.
Was this instruction helpful to you?
Thank you for voting!