




















JD900WKW General Electric Range - Instructions
Keep searches simple. Use keywords, e.g. "leaking", "pump", "broken" or "fit".
Interior light needed replaced
Unplugged the appliance for safety. Removed two 1/4" screws that held the assembly in place. Carefully removed the wire guard that retains the glass shield. Unscrewed old light bulb and replaced with new part. Reversed the steps after cleaning glass cover.
Parts Used:

-
Leo from TWIN FALLS, ID
-
Difficulty Level:Really Easy
-
Total Repair Time:Less than 15 mins
-
Tools:Nutdriver
22 of 45 people
found this instruction helpful.
Was this instruction helpful to you?
Thank you for voting!
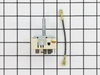
Dual burners stay on hi all the time. No regulation.
The hardest part was getting the correct part. I trusted the on line number and the first part I received was incorrect. I should have taken the part number off the old switch. When I did, I found out that the part number changed when I tried to order it. When the part came, the wiring instructions were not even close. I just took one wire at a time off the old switch and put it on the same terminal of the new switch. The repair was/is very simple made complex and too much time because of a wrong part and incorrect wiring instructions. As far as getting the incorrect and correct parts through the mail it was very fast. Received both parts in less than 3 days. A bonus is that I sent the old switch back for a rebate. Thanks for that.
Parts Used:
-
Peter from whitesboro, NY
-
Difficulty Level:Easy
-
Total Repair Time:15 - 30 mins
-
Tools:Nutdriver, Pliers, Screw drivers
11 of 13 people
found this instruction helpful.
Was this instruction helpful to you?
Thank you for voting!
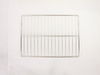
Needed extra oven space
Thanksgiving was coming and I needed extra oven space. So I ordered an additional rack. Installation ... just put it in the oven. My part came the day after I ordered it.
Parts Used:
-
noreen from flushing, NY
-
Difficulty Level:Really Easy
-
Total Repair Time:Less than 15 mins
11 of 15 people
found this instruction helpful.
Was this instruction helpful to you?
Thank you for voting!
f2 and f3 codes oven would shut off
lift door off and remove racks take out old sensor. one word of advise when pulling old sensor out tie a string around connector coming out of oven if it slips out of yor hand it could fall through hole iif you dont have a string attached you pull the whole oven out of wall to acess it
Parts Used:
-
garry from manhattan, IL
-
Difficulty Level:Very Easy
-
Total Repair Time:Less than 15 mins
-
Tools:Nutdriver
9 of 9 people
found this instruction helpful.
Was this instruction helpful to you?
Thank you for voting!
Twice I ordered the oven light bulb & each time the light bulb was defected
I had to call for a appointment for repair with GE Appliance because I thought then it . .was something electrical. The technician came out & checked everything out, turned out it was not electrical, The technician went out to his truck got a light bulb from his truck, put it in & it worked. It cost me $121.00 for trip charge from GE appliance for a light bulb that worked, your light bulbs were defective twice. Very disappointed with your products, cost me alot of money for a good light bulb thru GE appliance
Parts Used:
-
Barbara from BELLEVUE, WA
-
Difficulty Level:Very Difficult
-
Total Repair Time:Less than 15 mins
17 of 36 people
found this instruction helpful.
Was this instruction helpful to you?
Thank you for voting!
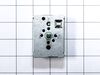
Eye on stove would intermittently heat on high even when low was selected.
Disconnected breaker. Removed knobs, plastic retaining nuts mounted to each switch shaft. Removed four 1/4 inch hex head screws on front panel and two screws securing defective switch. Removed bad switch, and replaced with new part. Took photo of wiring before removing old part. Referred to photo to ensure correct wiring of new part. Reassembled front panel in reverse order of disassembly. Turned breaker to on, and tested new switch. All worked well.
Parts Used:
-
Nellie from ATHENS, AL
-
Difficulty Level:Very Easy
-
Total Repair Time:Less than 15 mins
-
Tools:Nutdriver, Screw drivers, Wrench (Adjustable)
7 of 7 people
found this instruction helpful.
Was this instruction helpful to you?
Thank you for voting!
Oven not getting to temperature
Very simple. Remove one screw and carefully pull the sensor until you see the connection point. Remove the old one and snap the new one in and guide the wire back and reassemble the screw. Be sure to remove the oven door for easy access.
Parts Used:
-
Kyle from MIDDLETON, WI
-
Difficulty Level:Very Easy
-
Total Repair Time:Less than 15 mins
-
Tools:Nutdriver
7 of 7 people
found this instruction helpful.
Was this instruction helpful to you?
Thank you for voting!
The burner light was on - burner control spun freely
Looked up the part, ordered it, and it was there in 3 days. It was slightly different than the old control, but a very well-written set of instuctions detailed which wires to move to which terminal. The entire repair took about 30 minutes, including moving the range out, replacing the control, and push the range back in place. Works perfectly.
Parts Used:
-
Richard from Indianapolis, IN
-
Difficulty Level:Easy
-
Total Repair Time:15 - 30 mins
-
Tools:Nutdriver, Pliers, Screw drivers, Wrench (Adjustable)
11 of 19 people
found this instruction helpful.
Was this instruction helpful to you?
Thank you for voting!
Rotary switch for the dual control burner failed
Removed range from cabinets then approximately 6 sheet metal screws from the front of the range and two 1/4" sheet metal screws from the side to remove the front and top of the range. Lifted the cook top removed the two screws from the rotary switch and followed the directions included with switch to connect the wires. In reverse order reassembeled the range.
Quick & Easy
Quick & Easy
Parts Used:
-
Robert from Belvidere, NJ
-
Difficulty Level:Really Easy
-
Total Repair Time:15 - 30 mins
-
Tools:Screw drivers, Socket set
8 of 11 people
found this instruction helpful.
Was this instruction helpful to you?
Thank you for voting!
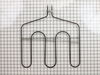
Broken Bake Element
I unfastened the three 1/4" rear screws, then the two support screws on top. I pulled the old element out,( plenty of slack wire luckily). disconnected it from the bayonet-type connections, then attached the new element. I secured the new element using the 1/4" screws. Bingo!
Parts Used:
-
Joseph from Beaumont, CA
-
Difficulty Level:Really Easy
-
Total Repair Time:15 - 30 mins
-
Tools:Nutdriver
7 of 8 people
found this instruction helpful.
Was this instruction helpful to you?
Thank you for voting!
left front burner would not turn on
Removed panel to gain access, removed wires from switch from burner that was not operating and attached them to switch for burner that was working. Burner worked, problem identified. Replaced bad switch with new switch. Problem solved.
Parts Used:
-
manuel from key west, FL
-
Difficulty Level:Easy
-
Total Repair Time:Less than 15 mins
-
Tools:Wrench (Adjustable)
7 of 8 people
found this instruction helpful.
Was this instruction helpful to you?
Thank you for voting!
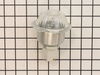
Oven light did not work
Turned off power to the oven, Removed the oven light housing, installed new housing, turned power on and walla.
Parts Used:
-
Howard from Rio Vista, CA
-
Difficulty Level:Really Easy
-
Total Repair Time:Less than 15 mins
-
Tools:Nutdriver
9 of 16 people
found this instruction helpful.
Was this instruction helpful to you?
Thank you for voting!
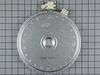
Outer ring of burner did not work
1- opened oven door
2- unscrewed 2 screws underneath top with a socket wrench
3- unscrewed clips that held burner
4-used needle nose pliers to pull off wire clips off old burner
5- placed wires onto new burner
6- opened clips to make it easier to reinsert burner
7-reattached burner
8-Replaced top
The hardest part was unscrewing the 2 screws that held the top in place due to the position of the screws
2- unscrewed 2 screws underneath top with a socket wrench
3- unscrewed clips that held burner
4-used needle nose pliers to pull off wire clips off old burner
5- placed wires onto new burner
6- opened clips to make it easier to reinsert burner
7-reattached burner
8-Replaced top
The hardest part was unscrewing the 2 screws that held the top in place due to the position of the screws
Parts Used:
-
Barry from Bradenton, FL
-
Difficulty Level:Really Easy
-
Total Repair Time:Less than 15 mins
-
Tools:Pliers, Screw drivers, Socket set
5 of 5 people
found this instruction helpful.
Was this instruction helpful to you?
Thank you for voting!
Broiler Element Failed
Disconnect the power to the oven at the main breaker panel. Open the oven door to the first stop (not all the way open) and pull straight up to remove the oven door from the hinge. Using a 1/4" drive ratchet with 1/2" extension with 1/4" socket, remove the 1/4" sheetmetal screw holding the temperature probe at the center of the broiler mounting plate. Remove the two 1/4" screws holding the broiler mounting plate. Remove the two 1/4" screws holding the broiler element at the ceiling of the oven. Pull the broiler element out from the back of the oven and there should be two electrical connectors at the back of the broiler element. Pull the electrical connectors off of element. Replace the element and re-install in reverse order.
Parts Used:
-
Ron from Irvine, CA
-
Difficulty Level:Really Easy
-
Total Repair Time:15 - 30 mins
-
Tools:Socket set
6 of 8 people
found this instruction helpful.
Was this instruction helpful to you?
Thank you for voting!
Right front burner had no heat control. (High heat when on "Low")
Pull range out of the "hole", and spin so that back of range is accessible. Remove cover over top "control area" on back of range. (Four screws that happen to be the same size as the magnetic socket that holds the interchangeable tip on a cordless screw gun. Simply remove this tip, and use the tip holder as a magnetic nut driver!). Remove the knob by pulling gently straight off. Remove black plastic retaining nut under where knob was. Inside are two small screws that hold the switch in place. Remove these screws with a magnetic screwdriver (If you drop these screws and lose them, you'll have a hard time finding them. Very small!!). Carefully follow enclosed instructions to move the wires from the old switch to the new switch. Put back together in reverse order.
Parts Used:
-
John from Ocoee, FL
-
Difficulty Level:Easy
-
Total Repair Time:15 - 30 mins
-
Tools:Nutdriver, Screw drivers
7 of 11 people
found this instruction helpful.
Was this instruction helpful to you?
Thank you for voting!